Any Kitchen Will Do

Give me a kitchen and I will cook.

Archive for the category “parsley”

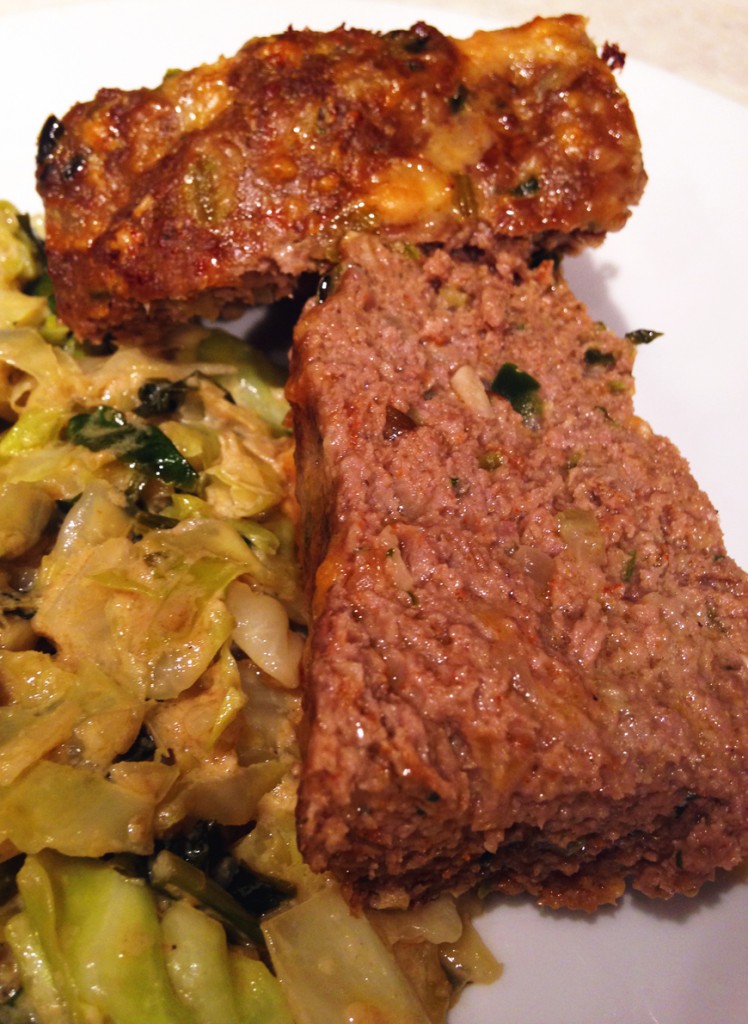
Spicy Poblano Meatloaf

spicy poblano meatloaf

I know it is only August, but temperatures up here in Alaska continue to be cool during summer and my thoughts already turn to warm, fall dinners. Some of you are walking around in swimsuits trying to survive three digit temperatures and staying in the swimming pool as long as possible. We never put away our jackets and fleece, still needing them regularly, and daylight is down to a paltry 17 hours each day. We actually get to see sunset colors before bedtime! You are allowed to laugh, but regardless of the inspiration, I came up with this meatloaf. I remember when I was a kid I would make fun of the meatloaf my mom would make. Not because it did not taste good, it was awesome. It was just a thing. I was not alone in this form of entertainment – my dad and brother joined in too. They liked the loaf just like me and always had seconds. I am still not sure why we decided to make fun of it, but one day mom had a little too much of the kidding and declared she would not make meatloaf again. She was serious. I don’t remember ever having it again after that night.  Regardless of the edge over which we pushed mom, I still consider meatloaf a childhood comfort food. An important thing to not forget is the smushing of ingredients with hands. There is no way to properly combine ingredients without using hands. Don’t even consider excluding the step. I will probably make a summer salad tomorrow when the temperature gets up to a sweltering sunny 70 degrees, but today I cuddle under a warm blanket with my plate of loafy food watching the fog and rain.

Spicy Poblano Meatloaf

1 1/2 pounds ground beef
2 Tbsp avocado oil
1 poblano pepper, seeded and chopped
1/2 medium onion, finely chopped
3 stalks celery, finely chopped
4 cloves garlic, finely chopped
1 Tbsp chili powder (adjust amount to preferred spiciness)
2 tsp ground cumin
2 tsp cumin seeds
1/2 cup fresh cilantro, roughly chopped
1/4 cup fresh parsley, roughly chopped
2 cups grated cheese (suggest cheddar or colby/monterrey jack mixture)
Sea salt to taste

Preheat oven to 375 degrees. Add avocado oil to medium frying pan over medium high heat. When oil is hot add pepper, onion, celery, cumin seeds and garlic. Sprinkle generously with salt. Stir and cook until soft and browning begins. Add the chili powder, cumin, cilantro and parsley and stir. Continue cooking until liquid is reduced and some browning begins. Set aside mixture and let cool slightly. In large bowl add ground beef, eggs and cheese. With your hands mix together the three ingredients until well combined. Add cooked mixture and combine well. Load the meat into and press firmly in a 9 x 9 square baking dish. Place in oven and bake for one hour, until loaf separates from edges of pan and cheese bubbles up and begins to brown. Remove pan from oven and let cool for about ten minutes, letting the liquid settle. Serve with a vegetable side, like a creamy cabbage collard mix.
Herbilicious Chicken

herbilicious chicken

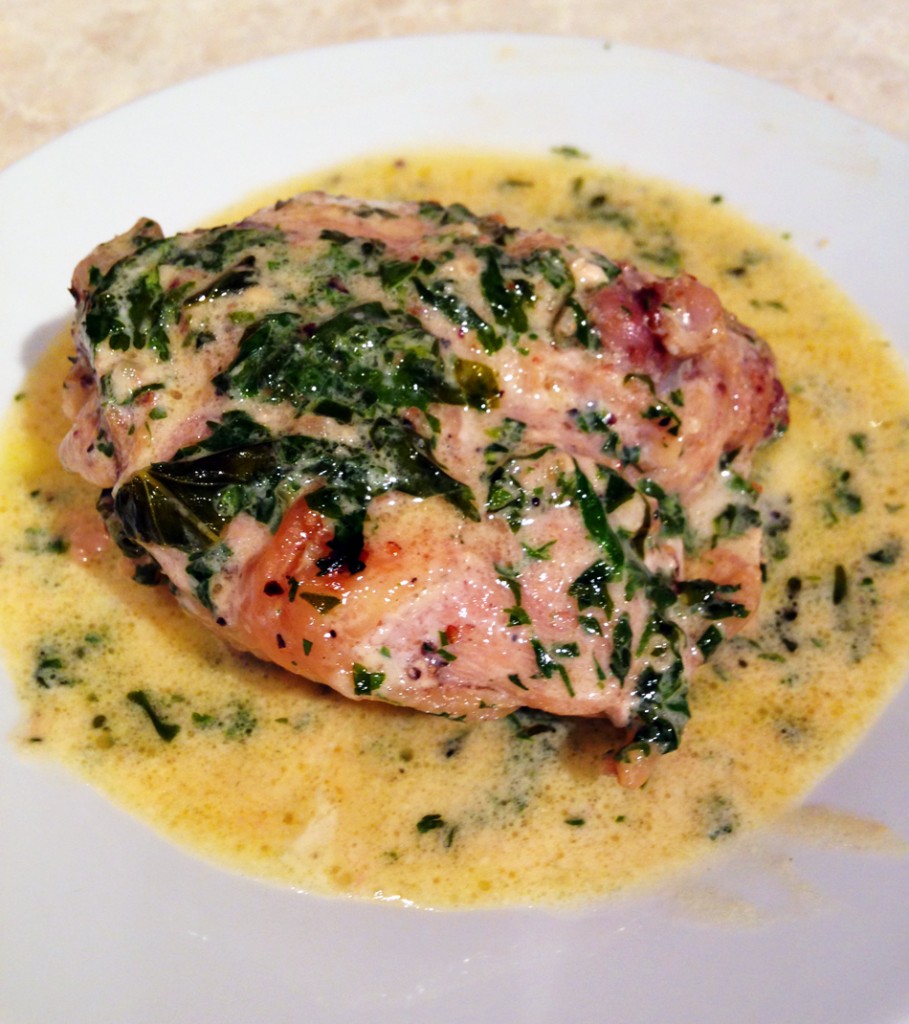
It is so herby and so delicious it must be herbilicious! And chicken to boot! We even made it twice in one week, which is very rare in our house – not only making the recipe, but making chicken. We are a protein kind of house, and most often rely on beef and pork to keep up our intake. Chicken is okay, but not our first choice. A dish has to be really good to get a double-make in a week. Our little balcony garden is growing like gangbusters and the nibbling birds cannot keep up, so we actually get to eat some of our harvest! Our oregano and sage look a little sad, but the cilantro, basil and parsley are very happy with the circumstances, and they do what they can to try and keep up with the towering collard greens. After not doing much gardening in recent years I am now reminded by our little plot just how much better food tastes when I grow it myself. It is amazing how much the sense of taste is influenced by the feeling of such an accomplishment. I can only imagine this dish would also be herbilicious with other herb combinations, so walk out in your garden and grab some handfuls. Let me know how it goes!

Herbilicious Chicken

6 – 8 chicken thighs, skin on
1/4 cup butter
3/4 – 1 cup heavy whipping cream
1 cup fresh parsley
1 cup fresh cilantro
1/2 cup fresh basil
3 cloves garlic, chopped
Salt and pepper, to taste

Season chicken thighs with salt and pepper. In large frying pan over medium high heat place all thighs in the dry plan, skin side down. Cook until skin begins to brown, about eight minutes. Turn thighs and cook for five more minutes. While chicken cooks roll the parsley, cilantro and basil together and slice them up, then finish with a rough chop. Add butter to pan and flip thighs so they are all coated with butter. Add herbs and garlic, again turning the thighs so they are coated. Cover pan and cook for ten more minutes, until juices from chicken run clear. Add cream and stir thighs until cream mixes with juices and herbs. Lower heat and let simmer until cream is heated and chicken is cooked completely, about five more minutes. Serve immediately.

Ranch Dressing

ranch dressing

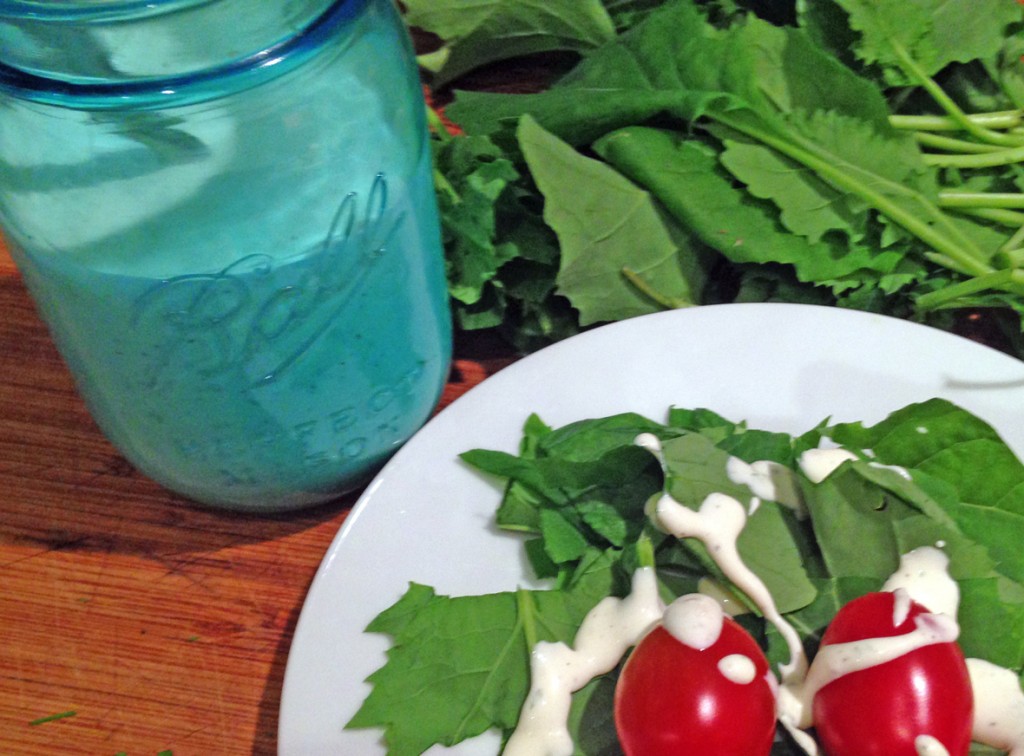
Summer means salad, especially a salad with nice, tender, young collard green leaves that you see above. They have a nice peppery taste that is less bitter than older collard greens. These particular greens came straight from our little container garden on our balcony, which made them taste even better! It also means raw veggies straight from the fridge as side dishes. Most vegetables better for you raw, and they also contribute to reducing the heat in the kitchen on a warm June day, even in Alaska. Since making our own stellar homemade mayonnaise we are confidently surging forward in using it for sauce bases, which includes this lovely dressing. I have always preferred homemade ranch dressing over the bottled stuff, and have usually relied on dressing mixes. When I started reading labels more closely I discovered some mixes have untoward ingredients, like monosodium glutamate. That stuff puffs me up like a balloon. Others have ‘modified food starch’. If you look up such an ingredient you may find it can sometimes include wheat. Not fun, especially for Big D. There goes the mix permanently off the grocery list. Geez…. Of course, if other people can make homemade versions, then why can’t I? We certainly have a spice cabinet stocked sufficiently to do so. I feel silly not having tried it before. Now I feel happy having it continuously available in my fridge, whether it is summer or not. You will see it here often!

Ranch Dressing 

1 cup mayonnaise
1/2 cup heavy cream
2 Tbsp lemon juice
1 1/2 tsp apple cider vinegar
1 Tbsp dried onion flakes
2 Tbsp fresh parsley, finely chopped
1 tsp dried basil leaves, crushed
1/2 tsp black pepper, ground
1/2 tsp garlic powder
2-4 Tbsp water (optional)
1/4 – 1/2 tsp sea salt, to taste

In a medium bowl combine all ingredients except salt, whisk together until well combined. Add some water if dressing is too thick. Add salt to taste. Chill overnight to allow flavors to blend. Store in the refrigerator.

Almond Pizza Crust

no flaxseed pizza crust

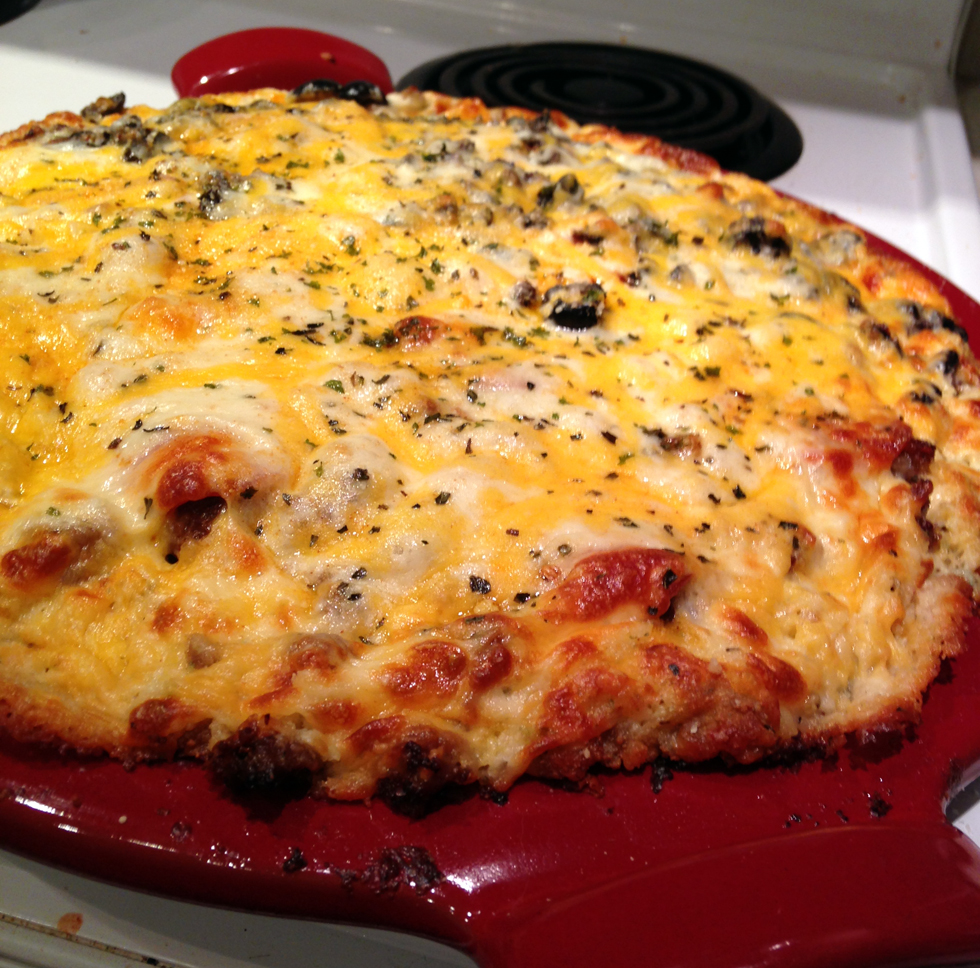
A long time ago Big D and I started a tradition of pizzabeer. No, that is not a typo. We would go to a spot – whether it was in Alaska, Virginia, Nevada, Texas…wherever we were, we would sit and eat pizza, drink beer and have long, winding talks about where we were going together. Sometimes they were about short term goals, other times they were longer term. Regardless, they were talks over food and beverage. Without some effort it is difficult to have wheat free pizzabeer. When making pizza these days we do it at home and we regularly use a wheat free crust figured out a couple of years ago. It is delicious, but includes flaxseed meal and coconut flour, which gives it a nuttier taste than what we like for some pizzas. This version of a wheat free crust is made by relying on almond meal and cheese. It makes for a crust that can hold the excess of toppings we are wont to use, while not adding a ton of strong flavor. Just think about it – when you eat pizza are you tasting the crust, or is it the toppings? I realized when I was pondering pizza that what I missed most was the toppings, not the crust taste, and the ability to pick up a piece of pizza and take a big bite. There was a simple concept I realized a few years ago when trying to eat healthier – if I am craving a food it was important to figure out what I craved – was it taste, texture, occasion or appearance? The craving focus varies by dish, but it was easy to identify for pizza. Other examples include the creamy of ice cream, the crunch of chips, the heaviness and nuttiness of a piece of bread. Now, back to the crust. We stumbled upon this more subtle tasting version one night when we wanted pizza and were woefully short of coconut flour and flaxseed meal. Necessity is the mother of invention, right? Oh, and look at my new pretty! Big D got me a new pizza stone! It is all fancy with an enamel finish that does not stick and gets crazy hot. Works as well as the more porous versions I have had in the past, but much more versatile.

Almond Pizza Crust

4 cups shredded mozzarella cheese
6 Tbsp almond flour
1 tsp baking soda
2 tsp dried parsley flakes
1 tsp dried basil
1 tsp garlic powder
1/2 tsp onion powder
1 tsp sea salt
2 eggs, beaten

Toppings (Used in the picture)

1/2 cup pizza sauce or tomato paste
1 cup mozzarella cheese and cheddar cheese, grated and mixed
20-24 pepperoni slices
1/2 cup black olives, chopped
Sprinkling of finely chopped basil and oregano

Preheat oven to 450 degrees (if using a pizza stone prepare as directed). Combine together in a medium bowl all ingredients except the eggs. When well combined add the eggs and stir with a fork until a moist dough forms. Spread enough dough onto the pizza stone or baking dish to have a layer about 1/4 inch deep. The pizza stone in the picture needs about 1/2 the dough, and since it is preheated the dough begins to soften as soon as it touches the surface. A stone without an enamel finish may not work with this crust. Bake the crust for no more than five minutes, allowing it to set and just begin to brown. Lower oven temperature to 425 degrees. Remove crust from oven and add sauce, toppings and cheese. Return to oven and bake for 10 – 15 minutes, until top is browning. Let cool for about ten minutes, allowing crust to set and toppings to cool. Slice and serve.

Cauliflower Mac Bake

cauli mac bake

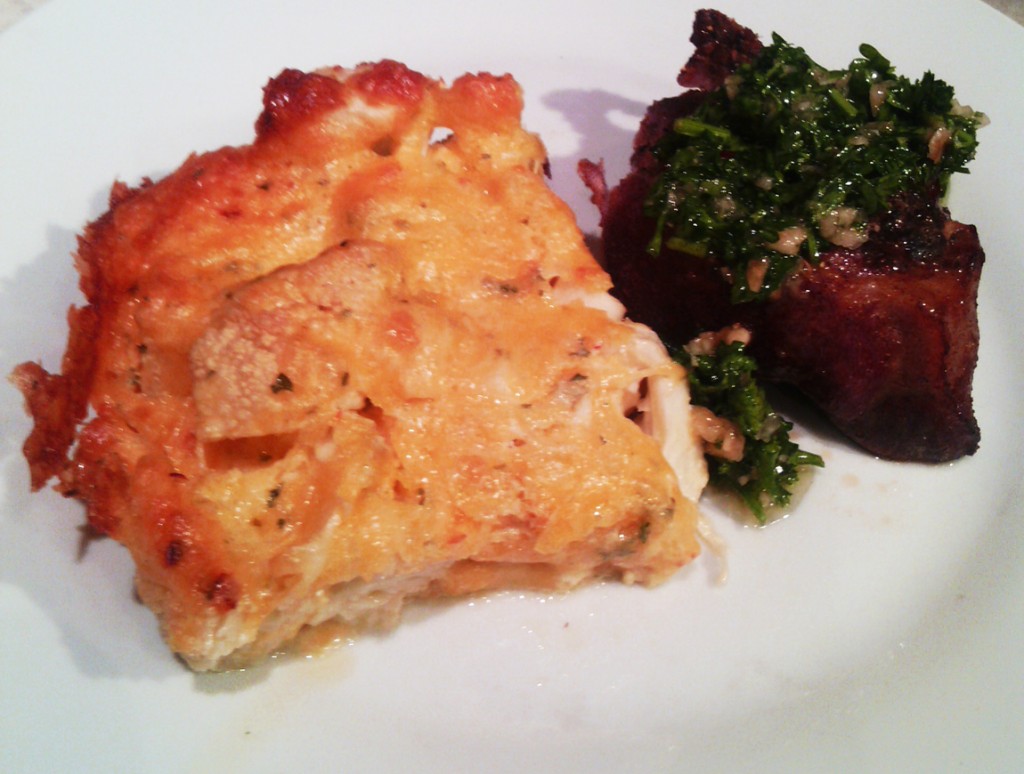
Our foster son Tall P makes really good cheesy scrambled eggs. Somehow he cooks the eggs just right and puts in just enough cheese right at the end to make it taste like baked macaroni and cheese. I won’t try to duplicate it, for it is something he does for us, so why try? He is the master! I had a hankering for them the other day when he was busy at school, so I decided to try a baked cauliflower version of mac n cheese. I think I found a great way to do a veggie version, although I bet he would not agree. I have to reveal here that Tall P is not a vegetable lover. He likes corn on the cob and vegetables in soup, and only if they are an unrecognizable puree added as a thickener and he does not know they were added. Yes, Paul, you now know the veggie soup secret! This dish was inspired by the cheesy eggs, created with cheesy veggies.  Go figure. It definitely appeased my craving for baked mac and cheese (not so much the Kraft version I grew up eating, but the baked stuff I discovered later in life). The dish was easy to prepare and bake, allowing me to time it perfectly with the smoked pork Big D made. Add some chimichurri to the pork and what a meal!

Cauliflower Mac Bake

1 large head cauliflower
1/2 cup heavy cream
2 eggs
1 Tbsp parsley, finely chopped
1/2 tsp garlic powder
1/2 tsp sea salt
1 tsp ground mustard
1/2 tsp red chile flakes
2 cups cheddar cheese, grated
1/4 pound sharp white cheddar cheese, sliced into thin pieces
3 Tbsp butter

Preheat oven to 350 degrees. Chop cauliflower head into bite-sized pieces, making sure stem pieces are a little smaller. Place white cheddar cheeses slices in the bottom of a 9×9 or 9-11 baking dish. Spread cauliflower evenly over cheese. In a medium bowl combine cream, eggs, garlic, salt, mustard and chile flakes. Whisk until well combined. Add cheese and stir until well coated. Pour cheese mixture over cauliflower, spreading it evenly. Make thin slices over butter and place them on top of cheese mixture. Place in preheated oven for 60 – 75 minutes. The thicker the cauliflower the longer the baking time to make sure the middle is baked soft. Remove from oven and let sit for five minutes before serving. Slice into six or nine pieces for side dishes – it should come out intact, but if it doesn’t, it will still taste awesome.

Mini Pizza Pucks

mini pizza pucks_edited-1

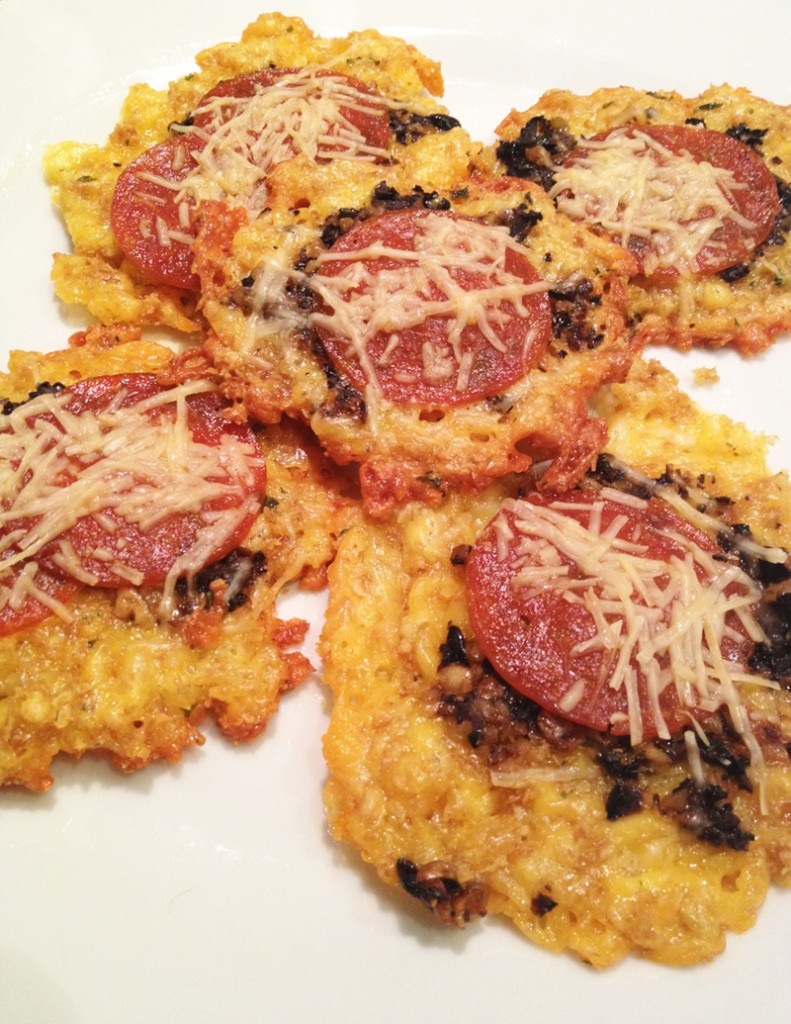
Our whole family loves pizza. Lately I have been trying to find simple dishes for weekday meals, what with Little B getting involved in evening activities and Big D and I with busy work days. In our endeavor to avoid wheat there are few alternatives for quick pizza where we live. The local pizza places just give blank looks when the words ‘wheat free’ or ‘gluten free’ are used, and delivery is a joke when wheat free is concerned. To be fair, there is one place with gluten free pizza, but it is still has nutrition-poor carbohydrates in a rice based crust. Not the end of the world for Little B on the rare occasion, but for me and Big D, who need to avoid the carbs, it is not a solution. These pizza pucks I made are a result of spontaneous experimentation. I tried to combine my cheese crisps and low carb pizza recipes to make this meal and it turned out pretty darned good! They were quick, fun and Little B enjoyed helping making them, of course. I call them pizza pucks, not because they are overly hard or difficult to eat, but because you can pack them up, like pucks, and I am currently living in a place where hockey is popular. I am not yet ensconced in watching or playing the sport, I just went with it. And it is cold. What other time of the year can you call pretty much anything a puck? Besides being a good dinner, the leftovers worked well as a cold snack on the way to Little B’s soccer practice, or ballet, or whatever happens after five but before bedtime that does not involve crashing on the couch at home. What better snack than some protein before running around for an hour or more? Maybe I should come up with some pizza balls to go with the soccer theme, but that is for another day and time…

Mini Pizza Pucks

3 cups shredded mozzarella and cheddar cheese
1/2 cup golden flaxseed meal
1 egg
1 Tbsp dried parsley leaves
1 Tbsp dried basil leaves
1 tsp garlic powder
1 tsp sea salt
1 cup large black olives
6 roasted or pickled garlic cloves (you can use raw, but they may not cook through and cause problems for sensitive stomachs)
20 – 30 slices pepperoni
1/2 cup Parmesan cheese

Preheat oven to 350 degrees. In a food processor combine olives and garlic, then pulse until a rough paste forms. Set aside. In a medium bowl combine the mozzarella and cheddar cheeses with flaxseed meal. whisk the egg and add to cheese mixture, folding it in until the cheese is coated. Add the salt, parsley, basil and garlic powder, doing a final few stirs to distribute the spices. On two nonstick cookie sheets make flat piles of cheese, about 2 inches in diameter with about an inch between them. Spoon about 1 tablespoon of olive paste on each pile, spreading it gently with the bottom of the spoon. Place one to two slices of pepperoni on each pile, then sprinkle with Parmesan cheese. Bake in the oven (using two different rack levels) for 12 – 15 minutes, until the edges of cheese begin to brown and the pepperoni glistens. Yes, it must glisten to have the right flavor. Remove from oven and let cool for five minutes before serving.

Ghoulish Meatballs

ghoulish meatballs

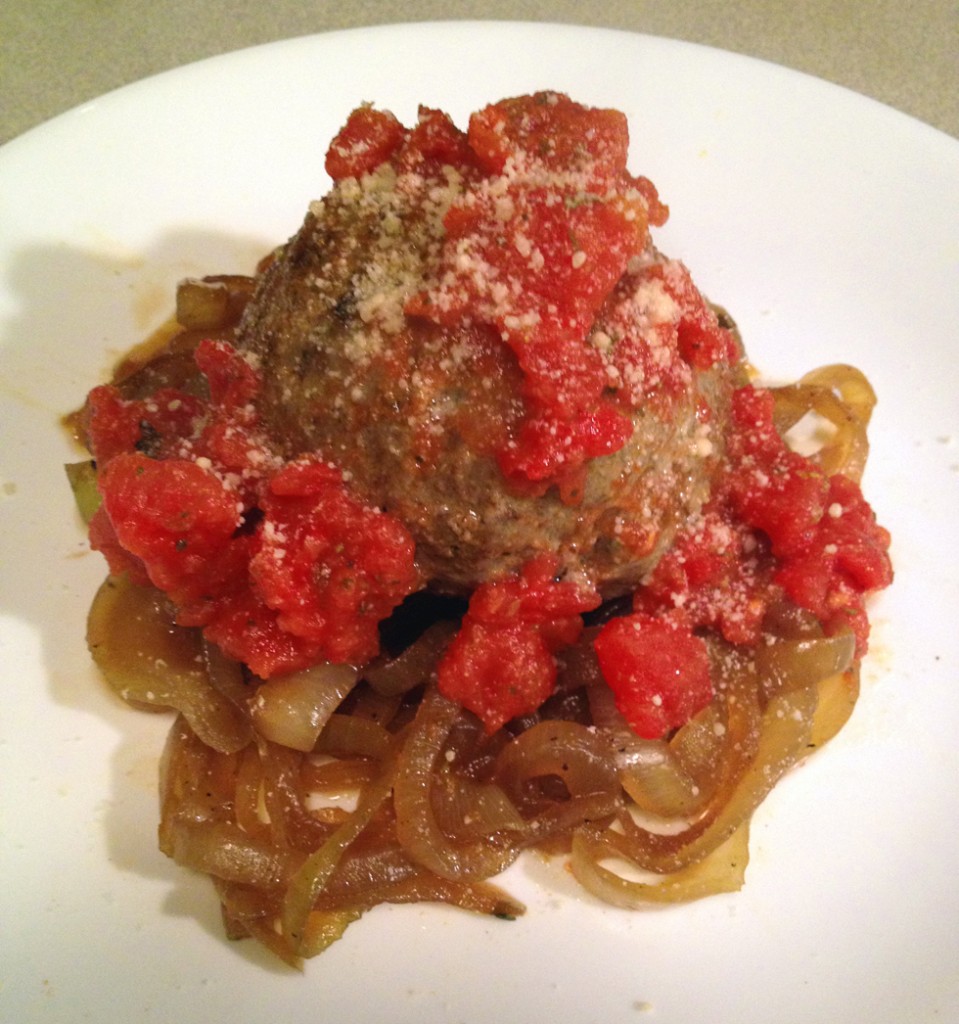
In honor of Halloween I made some quite delicious, ghoulish meatballs! They are massive and arrogant and a little scary. I maxed out my hands trying to form them into balls, but it worked! I have made meatballs before, but they were little and gooey and cheesy. All of those things I consider good, but a huge, ghoulish meatball is awesome! I originally planned on baking the balls, but we are still lacking in the shallow baking pan department as part of our reliance on a hotel room kitchenette. The stove top worked pretty well, allowing for browning on all sides, so all was good good good! The stove top was busy though, with making the sauce and onions and meatballs! It came together in low carb loveliness and is a new comfort food for me. The sweet of the sauteed onions balanced out the bite of the meatballs and tartness of the tomatoes. Today was a crazy busy day with much good news (we officially found a place to live in our new town), much fun, and a humongous amount of candy for Little B. Usually off limits, we let her eat and eat and eat candy with sugar all over and in it. Her glazed eyes and erratic, hyper behavior reminds us why we avoid it the rest of the year. I am writing a last line before bed, and look forward to Samhain tomorrow, the beginning our spiritual new year. Sweet, ghoulish dreams everyone!

Ultimate Meatballs

Balls
1 pound 15 -20 % fat ground beef
3/4 pound ground hot Italian sausage
2 eggs, lightly whisked
1 Tbsp dried oregano leaves
2 tsp dried basil leaves
1 tsp dried parsley leaves
2 tsp garlic powder
1 tsp sea salt
1/2 – 3/4 cup Parmesan cheese, finely grated, plus more for serving

Sauce
1  14.5 ounce can diced Tomatos with sauce
1 tsp dried oregano leaves
1 tsp dried basil leaves
1/2 tsp garlic powder
Salt and pepper to taste

Onions
1 large sweet onion, sliced into thin rings

SAUCE: In a small sauce pan over medium heat combine tomatoes, oregano, basil, garlic, salt and pepper. Stir. When bubbly, turn temperature down to low and simmer, covered, for at least 30 minutes. ONIONS: To prepare the onions, heat a deep pan over medium high heat until hot. It should be dry. Add the onion rings and let sit for a minute without stirring until they begin to brown and sweat. Stir them every minute or two, allowing the onions to brown more. When onions are about half browned add 1/2 cup water and scrape the bottom of the Pan. Stir and continue cooking until the liquid cooks away. Sprinkle with salt to taste. Turn off the heat and cover until time to serve. MEATBALLS: In a small bowl combine the spices – oregano, basil, parsley, garlic, salt and cheese. Set aside. In a large bowl squish together the ground beef and sausage until mixed up well. Add the eggs and make sure all the meat is coated. Pour in spice mixture and knead meat until spices are well distributed. Refrigerate until sauce and onions are ready. When time to cook the meatballs remove meat mixture from refrigerator (can be prepared the day before). Heat large frying pan to medium high heat. Form meat into six huge meatballs, placing them immediately into the hot pan. When forming the balls make sure to press the meat together firmly and roll it around in your hands to make them as round as possible. As one side of each meatball browns, gently turn them to another side. Repeat this a few times so three or four sides are a bit brown. Lower heat, Cover and cook until meatballs are cooked through, about 20 minutes. Depending on your stove you may need to move them around during the cooking time to prevent the outside from overcooking. To serve, arrange a layer of onion on the plate, add a meatball or two, and top with the tomato sauce and more Parmesan cheese. Serve immediately.


Portabello Pizza

portabello pizzaThe first time I ever cooked with portabello mushrooms was about 15 years ago. At the time I was making a lot of pizzas closely following my discovery of pizza stones. They make the crust crispy all around and are  great for even cooking. I got into the habit of topping each pizza with two to three veggies and a meat. On some occasions my dinner guests were vegetarians, so minus the meat, but what to add to make the pizza hearty? I explored the produce section of the grocery store and came upon the portabellos – huge caps sitting over a sign that described them as meaty. Well, why not? If they don’t eat meat, why not serve them meaty mushrooms? The pizza with portabellos turned out great, and marinating the mushrooms added an extra layer of flavor. Since my last pizza stone broke and I started leaning toward low carb, I never replaced it. One recent tendency has been to make pizzas with low carb crust, and another is to reach back into my pizza past and snatch up the portabellos. This time I used them as the crust. They are quick and of course Little B can help with every step. Using tomato paste adds a spike of tomato flavor without adding much liquid. The one flaw, but not really, in this recipe is the wetness of the mushrooms. I will continue to explore how to dry out the mushrooms, because they soaked up a bit of liquid and the result is not what I would call hand pizza, but it tasted great. Grab a fork and knife for this flavorful rounds and dig in!

Portabello Pizza

4 large Portabello mushrooms, stems removed
1 Tbsp lime juice
1 small can Italian herb tomato paste (or plain past mixed with 1 Tbsp Italian herbs)
2 tsp dried oregano leaves
2 tsp dried parsley leaves
2 tsp dried basil leaves
2 tsp garlic powder
8 ounces pepperoni, sliced thick
2 cups grated mozzarella cheese
½ cup Parmesan cheese
Salt and pepper to taste

Preheat oven to 350F. Place caps stem side up on baking sheet, then sprinkle with lime juice, salt and pepper. Spread tomato paste on mushrooms, followed by a layer of basil, oregano, parsley and basil leaves, along with garlic powder. Place a layer of pepperoni slices and top with mozzarella and Parmesan cheeses. Bake for 20-25 minutes, until mushrooms are tender and cheese is melted and browning.

Non Vodka Chicken

non vodka chicken

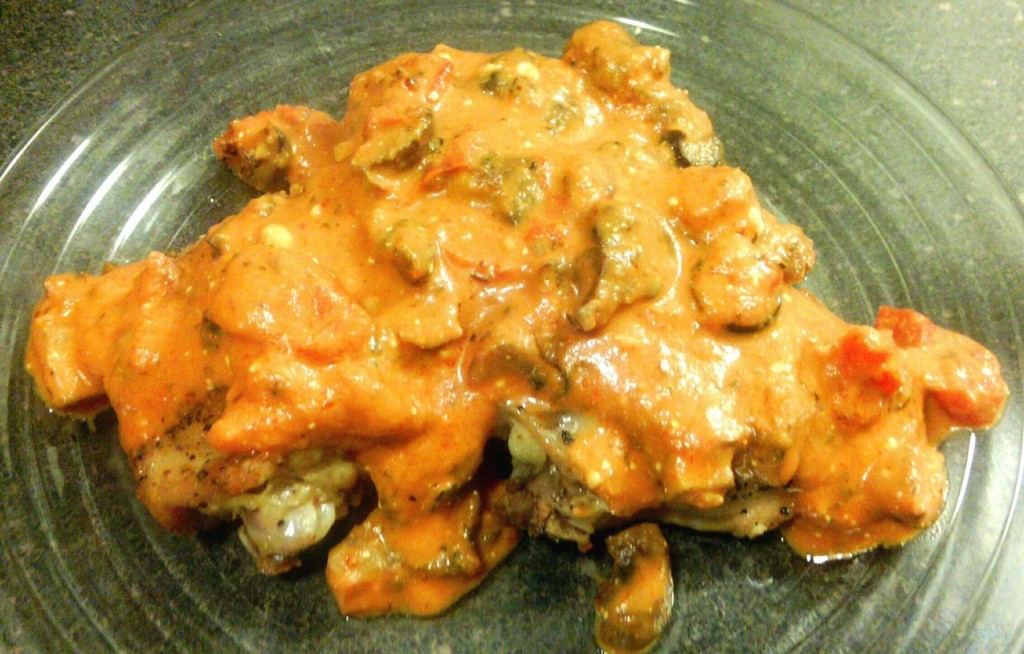
I have been absent for a bit, and so has chicken from my blog. I am always trying to find variety, because chicken is always chicken, and absence makes the heart grow fonder, right? Busy work and busy weekends made for a quiet kitchen lately, and the repeating of old, reliable recipes. Also, Big D has been on a culinary swing while I go about other things. Work is busy, and spending a bunch of time outside in the heat makes me groggy, so hanging out reading books to Little B is much more appealing than a hot oven or stove. This recipe I almost called pizza chicken, because when Big D first took a bite he said it reminded him of pizza. Did the same for me! I was inspired by my hankering to inhale a bowl full of pasta with vodka sauce. The thing about vodka sauce is not necessarily the vodka, but what it does to the flavor of the tomatoes. The vodka, when used, actually soaks into the tomatoes and enhances their flavor with a tart tanginess. The alcohol itself evaporates. If you have had the sauce before you know what I mean. If not, then imagine a mild bloody mary – a skidge of pepper and hot sauce – not to ferocious, but an extra bite beyond plain tomato. I decided to try to find the same flavor as the vodka sauce, but without the vodka. What else could I do with a hankering for vodka sauce while experiencing an absence of vodka? It was my own fault. I used the last of it from our stash to make a Greyhound (vodka and grapefruit juice with a twist). A little bit of this, a little bit of that resulted in the sauce taste I was looking for to go on top of chicken, and then I made it chunky, a la pizza. Yum!

Non Vodka Chicken

1 Tbsp butter
8 ounces mushrooms, roughly chopped
1/2 tsp sea salt
1/4 onion, finely diced
4 ounces chopped black olives
3 cloves garlic, minced
1 – 14.5 ounce can fire roasted diced tomatoes
1 – 15 ounce can tomato sauce
1 Tbsp dried parsley leaves
2 tsp dried oregano leaves
6 – 8 chicken thighs, skin trimmed, but some left on meat
4 ounces cream cheese
2 – 3 tsp Crystal hot sauce

In medium sauce pan over medium high heat melt butter. Add mushrooms, salt, olives and garlic. Saute for about five minutes until mushrooms and garlic soften and butter browns a bit. Add tomatoes and tomato sauce, parsley and oregano. Stir and lower heat. Let simmer for about 15 minutes. While sauce simmers place chicken thighs in frying pan over medium high heat, skin side down. When skin is crispy flip thighs, turn down heat to medium and cover. While chicken cooks finish the sauce. Add cream cheese to the sauce and stir occasionally until cheese is melted and sauce is smooth (except for vegetable chunks, of course). Sprinkle one to two teaspoons hot sauce and stir. Taste to confirm there is a tang in the sauce, but not necessarily a bite. If no tang, then add more hot sauce. Simmer for about 15 more minutes. When chicken is cooked through and juices run clear, remove from heat and let rest. Remove chicken from pan and place on serving dish. Pour sauce over chicken and serve immediately.

Salmon Patties

salmon patties
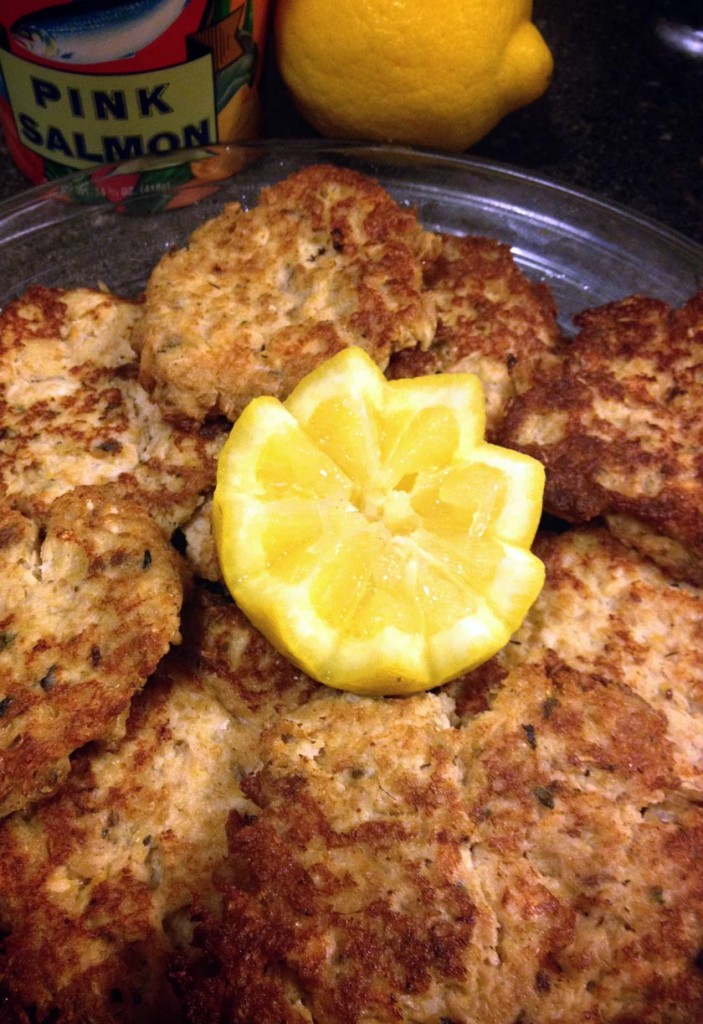
I got nostalgic on this one, in many respects. I was craving salmon and began remembering the patties my mom used to make with the canned stuff when I was little. I liked them, but always got a little shiver when I came across one of the soft, yet still crunchy pieces of bone from the canned salmon. I still recall not being able to decide whether the shiver was fun or not. The soft bone was easily chewable but always a surprise in the otherwise non-chewy dish. Another nostalgia point was from my time living in Juneau, Alaska. In late summer and early fall the salmon pile up on each other in an effort to swim upstream and practically jump out of the water into your arms. You have to make sure they are not aiming for bear arms, but after the all clear on the bear front, you can just grab the slippery suckers. Needless to say, even if you don’t fish there is a bounty of salmon, from ‘dogs’, also known as chum salmon, to the sweet, naturally bright red meat of the sockeye salmon. Living in Juneau you are surrounded by fisherpeople who get their maximum catch as often as they can and they share share share. It can be smoked, steamed, grilled, marinated, chopped, dried, jarred, canned….which brings me to this recipe. For this recipe I used canned pink salmon, which in this case is wild caught from Alaska. Not ideal, compared to the taste of the stuff that was swimming in the creek this morning, but effective in my effort to combine the nostalgie, and the fact that the only fresh salmon found in Maryland is Atlantic. Sigh. And as Big D said, these were the first salmon patties he ever had that were not dry and Little B enjoyed them, too. Score!

Salmon Cakes

1 can pink salmon, drained with spine and other bones removed
1/3 cup plain Greek yogurt
3 eggs
1 lemon, juiced with meat included
½ – 2/3 cup golden flaxseed meal
½ tsp sea salt
½ tsp dried dill
1 tsp dried thyme leaves
1 tsp dried parsley leaves
1 clove garlic, crushed
½ cup coconut oil

In medium bowl add salmon and break it up into small flakes. Make a pool in the middle of the salmon and drop in yogurt, eggs, salt, thyme, parsley, garlic and dill. Whisk together egg, lemon juice and yogurt mixture with a fork until eggs are broken up. Toss egg mixture with salmon until combined. Add ½ cup of the meal and stir. Let sit for a minute or two. While you wait add the coconut oil to a medium skillet and heat to medium high. If the salmon mixture is not thick enough to drop into the oil and hold shape as patties (thicker than pancake batter, thinner than, say, tuna salad) add some more meal and stir it in until thicker. Drop a large spoonful of mixture into the skillet and gently flatten so it is of even thickness and about two inches in diameter. Cook until the patties set and begin to brown on the edges, about 2 minutes. Gently flip the patties and cook for another minute or two. Repeat process until all the patties are cooked. Serve with zucchini wedges or other veggies.

Post Navigation