Any Kitchen Will Do

Give me a kitchen and I will cook.

Archive for the category “Silver Spring Kitchen”

Crunchy Cinnamon Chickpeas

crunchy chickpeas

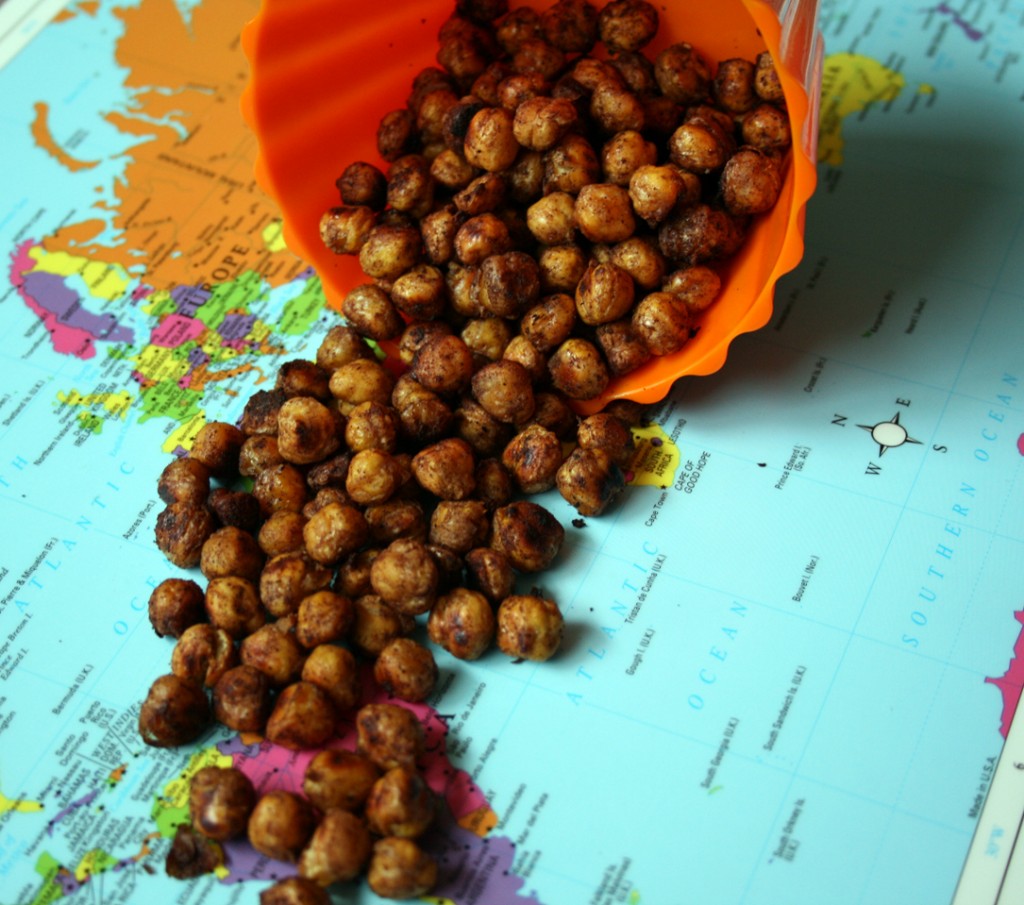
Spring is coming and the increase of daylight highlights in our home the pack rat tendencies we had over the winter. This time of year, especially when it begins to get warmer, I want to throw open the windows and refresh my surroundings. The refresh includes finding new ways to feed Little B. She is often open to trying new things, except when she isn’t. I thought some crunchy chickpeas would be right up her alley, and since I found a can of them in the pantry during spring cleaning, I decided to try and copy some chickpeas I found in a convenience store a while back. They were bought during a road trip when I was desperately trying to avoid potato chips – a traditional road trip food that is also traditionally not very good for a body. The chickpeas were crunchy and spicy, I suspect from cayenne or chili powder, and very satisfying. There was probably also mono sodium glutamate and other chemicals, but I don’t recall. I make a simple, less spicy version here for Little B, but the crunchy is definitely the same.

Crunchy Cinnamon Chickpeas

1 can chickpeas
1 Tbsp extra virgin olive oil
½ tsp sea salt
¼ tsp cinnamon
Tiny pinch of pure stevia

Preheat oven to 425 degrees. Rinse and drain chickpeas. In a medium bowl add chickpeas and drizzle with oil. Sprinkle in the salt, stevia and cinnamon. Toss until chickpeas are coated. Line a cookie sheet with aluminum foil, then spread out the chickpeas in one layer. Bake in preheated oven for 15 – 20 minutes until they begin to brown, then shake them around so they change positions, but are still spread out in one layer. Bake for 15 more minutes – if there is extra coating dropped on the foil it may make it smell like it is burning, but the chickpeas themselves should be fine. Remove from oven and let cool to room temperature. If there is any left after snacking on them, store at room temperature in an air tight container.

Chocolate Strawberry Bacon Cake

chocolate strawberry bacon cake

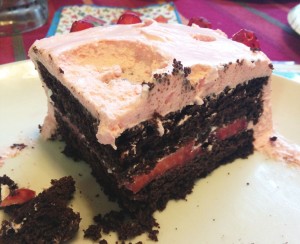
This cake is ninety percent harmless. The remaining ten percent is included to fulfill the wishes of a birthday girl. A young friend of ours came for a week long visit, which included her birthday! I wanted to make a cake for her, and asked what she wanted. Chocolate and strawberries, and boy does she love frosting made with cream cheese and cool whip! The combination does not bother her tummy like milkier versions of frosting. Hmmm….cool whip…..high fructose corn syrup, chemicals of fifteen plus letters per word…not typically ingredient in things I make. It worked really well, though, and the birthday girl loved her cake. She also wanted a bacon rosette….okay! I can do that, too! This may sound like an odd combination, but the lightness of the frosting and the bacon worked pretty well together, and for bacon lovers, like the birthday girl, this oddness is such a non-issue. The cake was light and airy and went well after a meal of steaks and greens. I will definitely be making it again. The chocolate cake idea came from here.chocolate strawberry cake piece

Bacon Rosettes
8 slices bacon
Muffin pan

Cake
2 cups almond flour
¾ cup cocoa powder
¼ cup whey protein powder, vanilla
2 tsp baking powder
½ tsp baking soda
¼ tsp sea salt
½ cup butter, softened
1 cup equivalent liquid stevia
2 large eggs
1 tsp vanilla extract
½ cup almond milk

Strawberry Cream Cheese Frosting
8 ounces cream cheese, room temperature
½ cup salted butter, room temperature
16 ounces cool whip
4 Tbsp sugar free strawberry syrup
8 – 10 large strawberries

First, make the bacon rosettes. Preheat oven to 350 degrees. In a muffin pan curl two pieces of bacon around themselves, starting on the outer edge and curling to the middle. Make a few buds by rolling a single piece tightly and securing it with two perpendicular toothpicks. Bake until the top edges are crispy, about 30-40 minutes. When done remove from the oven and set roses on paper towels to soak up any extra grease. Set aside until it is time to decorate.

Second, make the cake. Preheat oven to 325 degrees and butter/grease a 9×13 pan. In a medium bowl, whisk together almond flour, cocoa powder, whey protein powder, baking powder, baking soda and salt. In a large bowl, beat butter and liquid stevia until well combined. Beat in eggs and vanilla extract, followed by the almond milk. Add half of the almond flour mixture, stir, then add the remaining almond flour mixture and mix batter until combined. Spread batter in prepared pan (it will be thick, so spreading is a necessity) and bake about 20 minutes, or until a tester inserted in the center comes out clean. Let cool.

While the cake cools, make the frosting. In a stand mixer combine cream cheese, butter and strawberry syrup. When smooth and combined, add the cool whip. Mix until combined and again smooth. Let chill until time to frost the cake. Prepare the strawberries by hulling and slicing them in thin layers.

When the cake is cool, cut two equally sized layers out of the 9×13 pan. Carefully remove the layers. Place the bottom layer on a serving plate. Spread a thin layer of frosting on the layer, then add a layer of strawberry slices, overlapping the slices so there are no gaps. Add more frosting to level out the surface, then add the top layer of cake. Trim the edges until the sides are even, then clean the cuttings off the plate. Cover the cake with a thin layer of frosting to set the shape and catch crumbs. Follow the crumb layer with a thicker, final layer. Decorate the sides with more strawberry slices and arrange the bacon rosettes on top. Store in the refrigerator until serving, and keep leftovers chilled.


Shepherd’s Pie with Cauliflower

shepherds pie whole

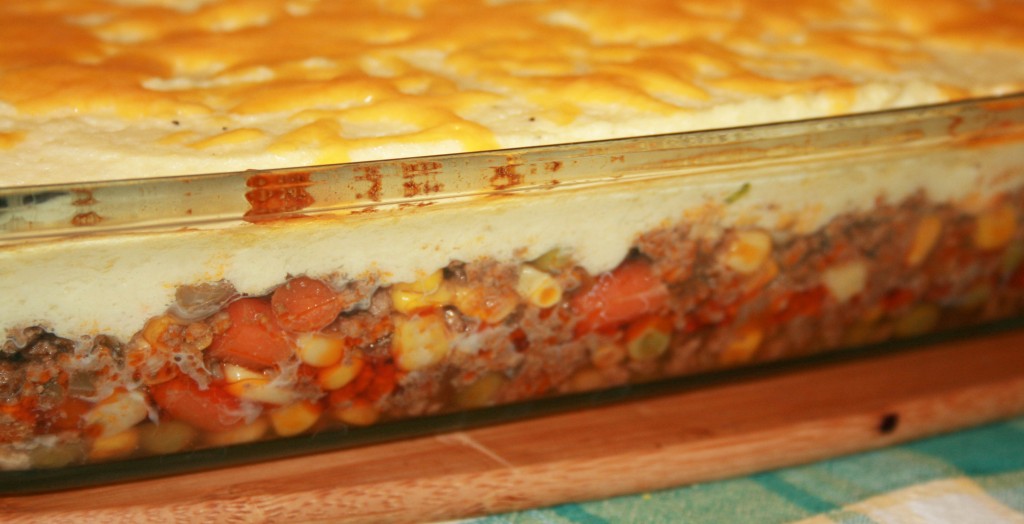
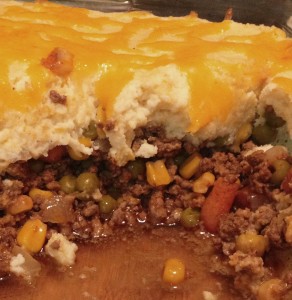
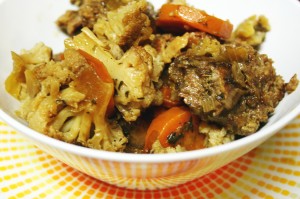
Last year for St. Patrick’s Day I made the traditional American St. Patrick’s Day meal with corned beef. That is all well and good, but not the only Americanized Irish food available. The Shepherd’s Pie is another dish that actually has Irish roots much closer than the corned beef. Here is a version that is very Americanized, or more accurately low carb-ized, for it has not a speck of potato, but as with other manipulations that can be done with cauliflower, you might not miss the ‘taters. This dish is usually called cottage pie when beef is used, and Shepherd’s Pie when lamb is used. I used ground lamb, so I at least kept to some traditional aspects, even if the top is from a cauliflower patch! If I did not tell you, you would never have known. I got the idea for the topping here. I hope for you fun and festivities on this St. Patrick’s Day, and eat cauliflower!shepherds pie piece

Shepherd’s Pie

For the Stew

2 Tbsp butter
1 pound stew beef or lamb, ground or cut into small bite-sized pieces
½ – 1 cup red wine
2 Tbsp tomato paste
2 cloves garlic, crushed
2 Tbsp Worcestershire sauce
1 cup chopped carrots
1 small onion, chopped
1 cup frozen peas
1 cup frozen corn

For the Topping
1 medium head of cauliflower
2 Tbsp heavy cream
2 Tbsp butter
½ cup plus 1 cup shredded sharp cheddar cheese
4 egg whites
Salt & pepper to taste

Clean and trim cauliflower, adding florets to a microwave safe bowl with ¼ cup water. Cover with cling wrap or a vented cover and microwave for 5 – 8 minutes until soft. Drain water. Add the cream and butter to the bowl and toss until butter is melted. Add the cauliflower and ½ cup of cheese to a food processor or use a hand blender to process until the mixture is a smooth consistency. It should look like thick mashed potatoes. Season with salt and pepper. Let cool.

Preheat oven to 375 degrees. In a skillet over medium high heat melt the butter, then add the meat. Saute until browned, about five minutes. If an overwhelming amount of liquid is in the meat, partially drain and continue cooking. Add red wine and cook until sauce bubbles. Add tomato paste, garlic and Worcestershire sauce, stirring until blended. Add onion, corn and peas. Cover and let simmer for 30 minutes over low heat. Turn off heat and set aside while you finish the topping.

Right before putting the cauliflower on top of the meat filling, whip the egg whites to a stiff peak. Fold 1/3 of the egg whites into the cauliflower mixture to lighten it up. Then fold the remaining egg whites into the cauliflower mixture and gently mix until combined. In a 9×13 baking dish add the stew and spread until even. Gently top with cauliflower topping, spreading it evenly and not pressing down too far. Sprinkle the remaining 1 cup of shredded cheese over the top. Bake for 15 – 20 minutes until topping is puffed and cheese is browning slightly. Remove from heat and serve immediately. Sprinkle more Worcestershire Sauce on individual servings if needed.

Dad’s Spaghetti Sauce

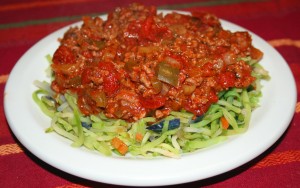
dads spaghetti sauceYou may not have noticed, but earlier this month I began a greenish/Irish theme, which will lead us up to St Patrick’s Day and beyond. Last year I covered traditional stuff like corned beef and cabbage, colcannon and the less traditional but politically symbolic white chocolate frito popcorn. This year I started with coleslaw, which has green cabbage, followed by some chicken with the green of spinach, then the Dublin Coddle, with a slightly more Irish leaning. I really enjoy St Patrick’s Day. Not only because I am about 87% Irish, or that I have a dual citizenship, or that it is another excuse to drink a little too much, but also because when I was growing up we laughingly called everything my dad made ‘Irish’. Irish popcorn, Irish fajitas, Irish potato salad, Irish steak…you get the idea. The dishes did not necessarily have a historically Irish origin, but because a big Irishman with blue eyes put effort into making it for his loved ones. My dad’s specialties were typically products from the outside charcoal grill. He cooked meat exceptionally well. Whether it was fajitas, steak, chicken or a whole passel of meats in his tower smoker – ribs, ham, turkey, roast – if it used to walk he could cook it, and it tasted great. He was the reason I rarely ever ordered steak in a restaurant until I moved out of the house. Restaurant steak always tasted salty, but not flavorful. I know most of his secrets, and I may share them one day, but today is not the day. Today I share with you his spaghetti sauce. One of his two significant non-grill, non-smoker dishes. In case you were wondering, his other dish was potato salad. Now on with the spaghetti sauce. I have done other tomato-based sauces, but this one is consistent with what he always made. Huge batches filled a big old aluminum pot that simmered on the stove top all day. It smelled heavenly, especially walking into a warm house on a cold, wet Texas day. It smelled like comfort, which is what I often sought on a wet Saturday after playing soccer or doing yard work. When I got older I helped him make it, discovering his penchant for perfectly sized chopped veggies and just the right combination of herbs. Another thing about his sauce – he rarely used fresh ingredients. I don’t consider it a good or bad thing. The sauce was always full of flavor and satisfying. He grew up during the Great Depression, which I think established for him certain habits, including the stockpile of canned and dried goods. You should have seen our pantry when I was growing up – we never failed to have fresh meat, fruit or veggies, but if we didn’t there were always canned. I still love the taste of canned spinach and pineapple – separately, of course. I recognize the canned and dried elements in this recipe. I don’t think you can beat the finished product very easily. I have made a version of this from scratch – fresh tomatoes, fresh herbs…it was good, but you know, after cooking it for so long, I could hardly tell the difference. Maybe it was because I tweaked it until it tasted like Dad’s version, or maybe because after enough cooking the fresh version tastes like the Hunt’s canned version. On top of everything else, I found a great new base to hold the sauce – broccoli slaw. In the past I have used traditional spaghetti pasta, gluten free pasta, spaghetti squash and just chopped sauteed squash. This time I saw some broccoli slaw on sale at the store – it is basically broccoli stems cut julienne and packaged with a bit of carrot and red cabbage. I microwaved it straight from the freezer for five minutes to soften, salted it then set it on a plate and topped it with sauce. The texture worked great – not pasta-y, but definitely a strong texture that worked with the sauce. It is my new favorite to pour things over. I can imagine a decadent cheesiness next time, or maybe some kind of lasagna concoction…

Dad’s Spaghetti Sauce

2 Tbsp extra virgin olive oil
1 small white onion, chopped
6 cloves garlic, crushed
1 pound ground beef, 15% fat or less
1 medium green bell pepper, chopped
3 stalks celery with leaves, chopped
1 tsp sea salt
½ tsp ground black pepper
2 Tbsp dried parsley leaves
1 ½ Tbsp dried oregano leaves
1 Tbsp dried basil leaves
42-56 ounces Hunt’s brand canned diced or plum tomatoes
6 – 8 ounces tomato paste
1 tsp truvia, or one small pinch of pure stevia
More salt to taste

In a deep stock pot heat to medium high and add olive oil. When oil is hot add onions and garlic, saute until the onion sweats (gets shiny and releases liquid). Add ground beef. Break meat up with a wooden spoon and saute until browning begins, but not until it is completely cooked. Add bell pepper, celery, salt, pepper, parsley, oregano and basil. Stir and cook until vegetables begin to soften. Add tomatoes and stir some more. Bring to a boil, cover, reduce heat and simmer for 2 hours (or more). Sprinkle in sweetener, to bring out the tomato flavor, and stir well. For an additional 30 minutes to an hour simmer with the top tipped so steam escapes. The sauce should thicken noticeably. Turn off heat and cover. Let sit until ready to serve, or cool to room temperature and refrigerate overnight. If you double or triple the recipe there will be plenty to freeze in reasonable portions. Reheat slowly on the stove top. Serve over your preferred base – either al dente pasta, spaghetti squash, or my new favorite, cooked broccoli slaw.

Dublin Coddle

dublin coddleI adore the name of this dish. And oh my flippin’ floopie, it is rich and delish! It reminds me of a chilly, rainy day I spent in Dublin many years ago, popping into a pub to warm up a bit with some food and drink. I did not have a coddle, but the feeling was the same. It totally has a comfort food vibe, and is considered such in Ireland. I thought of it with St. Patrick’s Day coming up and my Irish-ness starting to raise it’s head here in my blog. It is called a coddle because of the slow simmering manner of cooking the dish. Dublin, of course, comes from the popularity of the dish in the Dublin area. I read one place once that the convenience of slow cooking the one-dish meal and the ease of keeping it warm in the oven has a logical basis – it allowed for a warm meal to be ready for the man of the house when he came home late from the pub, after the rest of the family was already in bed. Heh. From my experience there are almost as many variations of this dish as there are mothers and grandmothers. Just like in the US there are delicious recipe variations for meatloaf, chicken soup and apple pie, each cook makes it their own way. I probably committed some form of blasphemy by excluding potatoes from my version of this dish, but we are stubborn about our use of cauliflower as a potato substitute in our diet, so I happily blasphemed. The results were like a beef stew. I know, I know, there is no beef in the recipe. It is just a bunch of pig. That is what I thought! I think the beer mixes with all the other juices and just makes a darned rich broth that is reminiscent of beef broth. Sooooo good! A layer of thinly sliced potatoes as the top layer is the more traditional route, so I included it as an option in the recipe. I thought the quantities would serve four, but we did not have any sides, just a big bowl of coddle. Since there were so many veggies and protein in the coddle it ended up being healthy servings for two very hungry people. If you are not serving sides with the coddle I would recommend doubling the recipe for a party of more than three.

Dublin Coddle

8 slices thick bacon
6 thick pork sausages (mild Italian or ideally some Irish bangers)
1 Tbsp butter
1 large yellow onion, roughly chopped
3 cloves garlic, sliced
1 cup water
1 head cauliflower or 3 medium potatoes
1 large carrot
1 12-ounce beer or hard cider
1 Tbsp dried parsley leaves
2 tsp dried thyme leaves
Salt and Pepper to taste

Cut bacon into 1-inch pieces. In a large frying pan cook the bacon over medium heat until browned. Transfer cooked bacon to Dutch oven. In bacon grease over medium high heat add sausages and cook until browned, but stop before they are completely cooked through. Cut the sausages into one-inch pieces and transfer them to the Dutch oven. In what is left of the bacon grease add the butter. When the butter is melted add the onion and garlic. Saute until onions are softened but not browned. Transfer onion and garlic to Dutch oven. You are now done with the frying pan. Salt and pepper the stuff in the Dutch oven to your liking, then pour in the water. Slice the carrot into coins, no more than ¼ inch thick. Chop cauliflower into bite-sized floret pieces, or peel and slice potatoes, no more than ¼ inch thick. Add to the Dutch oven a layer of carrot, followed by a layer of cauliflower. You may not need the whole head of cauliflower, but there should be an even layer of it over the top of everything else. If using potatoes make an even layer of slices on top, overlapping them so the other ingredients are substantially covered. Sprinkle the parsley and thyme on top of the cauliflower/potatoes, followed by salt and pepper to your liking. Add the beer or cider. The liquid in the Dutch oven should come up to about the middle of the pot and not totally submerge all the ingredients. Cover the Dutch oven with a tight fitting lid or two layers of foil. Place in 400 degree preheated oven and cook for 45 minutes, then turn heat down to 325 degrees and cook for another 1 to 1 ½ hours, until the cauliflower/potato layer is soft and ready to eat. Turn off the oven and leave the coddle inside it until time to serve. It will stay hot for quite a while.


Baked Chicken with Cheese and Spinach

chickenspinachcheese1

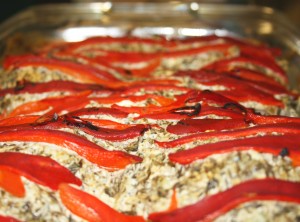
I noticed that it’s been a while since I posted a chicken recipe. I can’t go too long without doing chicken. We eat it often and I try to vary the preparation. It is always easy to roast a bird, but a nice sauce on top of baked pieces is comfort food extraordinaire. I did a slightly similar recipe a while back, but this dish is much more rich and thick, with a completely different result. This stuff is pretty rich, and I spooned up every bit of the sauce when the chicken was long gone. Our young charge Lanky P, who is living with us now, is not a vegetable eater, which makes for a lot of scrambled eggs in his belly. I was nice and did a few thighs without the sauce for him. I think he seriously missed out, but whenever someone dislikes vegetables I respect it, but think it is a little sad. There are so many wonderful flavors you can get from vegetables. Maybe I will do some recipes and sneak in veggies – I did it the other day with spaghetti sauce and he cleaned his plate. I never have to sneak with Little B – she eats frozen broccoli florets straight from the freezer as a snack, for goodness sake – so I can hone my veggie sneaking skills with Lanky P. Heh. Heh. Heh. That is an evil laugh if you don’t recognize it.

Baked Chicken with Cheese and Spinach

6 – 8 chicken thighs, skin on but edges trimmed
3 cups fresh spinach, roughly chopped (or 13.5 ounce can spinach, with liquid squeezed out)
1 Tbsp extra virgin olive oil (if using fresh spinach)
6 cloves garlic, crushed
8 ounces cream cheese
4 ounces goat cheese
6 ounces sour cream
½ tsp sea salt
2 Tbsp lime juice
3 roasted red peppers, jarred or fresh roasted with skin removed
Salt and pepper to taste

Preheat oven to 375 degrees. Lightly salt and pepper chicken thighs after trimming off excess fat and skin – leave enough skin on to cover the top of the chicken thigh meat. Place one layer of chicken in 9×13 baking dish. Slice red peppers into thin strips, no more than ¼ inch width and set aside. In a medium pot over medium high heat add garlic and spinach (if using fresh, add oil first until heated, then garlic and spinach). When spinach is hot add cream cheese, goat cheese, sour cream, salt and juice. Stir until cheeses are melted and combined with spinach and garlic. Spread cheese and spinach mixture over chicken. Lay slices of red pepper over cheese mixture so they are evenly distributed. Cover pan with aluminum foil. Bake for 20 minutes. Remove foil and cook for 20 – 25 more minutes until peppers are dried out a bit, cheese is bubbly and chicken is cooked through. Let sit for about five minutes before serving.


Coleslaw Perfection

coleslaw_edited-2

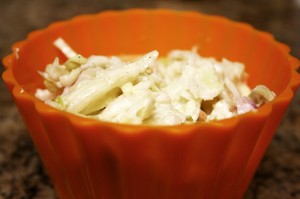
Big D and I have issues. I like tart coleslaw and he likes slightly sweet coleslaw. It makes for a challenge when making, well, coleslaw. I could make two batches, but that seems silly, so I just kept experimenting until I figured out a just right combination of sweet and tart in one bowl of slaw. I previously tried to use sweetener and wine vinegar to get a balance, but then had a revelation and tried – duh – a different kind of vinegar. The apple cider vinegar has just enough sweet and tart to get to the balance we like. Viola! The perfect coleslaw.

Coleslaw

4 cups shredded green cabbage
1 cup shredded purple cabbage
½ cup shredded carrot
½ cup finely chopped red onion
1 clove garlic, crushed
1 cup mayonnaise
¼ cup apple cider vinegar
1 tsp sea salt
½ tsp ground black pepper

In a medium bowl combine garlic, mayonnaise, vinegar, salt and pepper. Whisk until combined. Add green cabbage, purple cabbage, carrot and onion. Toss vegetables until coated with dressing. Chill for at least an hour before serving.

Little Cheesy Meatballs

cheesy meatballs_edited-1

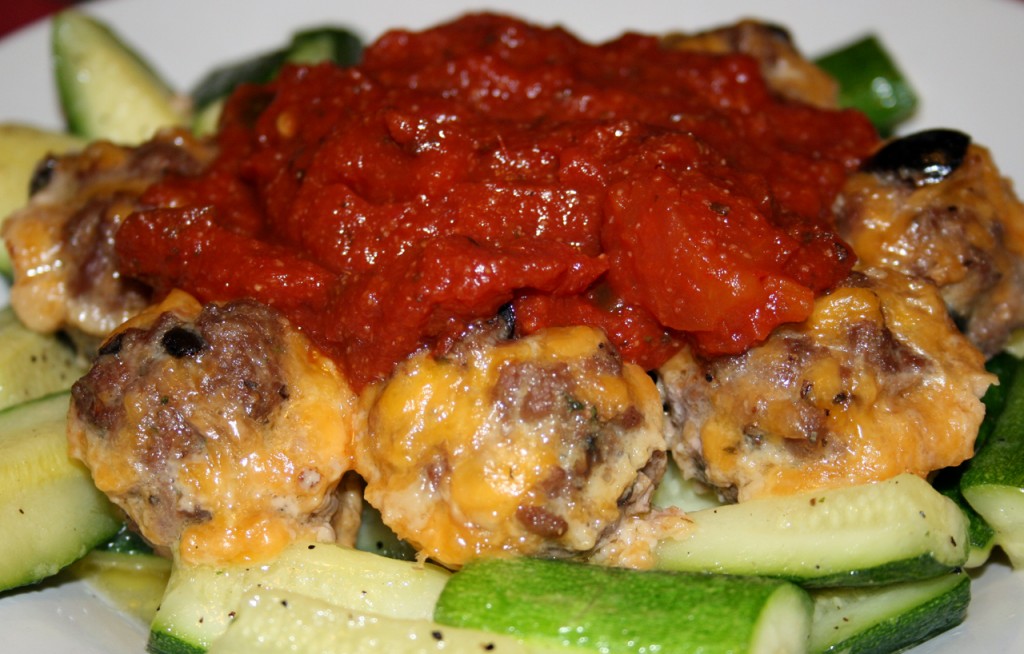
Little B requested meatballs. Since there was some ground beef in the fridge, how could I refuse? She wanted to ‘have a conversation’ (her favorite phrase lately) about what else to include in the balls besides meat. We decided on garlic, black olives and cheese. We tossed it all into a bowl and had a blast smooshing it all together with our hands. They were just yummy, especially for me with the spicy sauce on top. Little B ate them plain with a side of veggies. I was tempted by pasta and currently in the absence of spaghetti squash, but decided to serve these meatballs over some sauteed zucchini and top with some spicy sauce, which Little B did not care for. She has a pretty diverse palate, but has not yet acquired a taste for the hot side of spicy. We will work on that. Eat up!

Little Cheesy Meatballs

2 pounds ground beef
1 cup sharp cheddar cheese, grated
¾ cup black olives, chopped
2 eggs
2 cloves garlic, crushed
1 Tbsp dried parsley leaves
1 Tbsp dried basil leaves
1 tsp onion powder
½ tsp cumin powder
½ tsp sea salt
¼ tsp black pepper, ground

Preheat oven to 350 degrees. Set out mini muffin pans to accommodate approximately 40 meatballs (large baking sheets will work too, but the cheese might leak out a bit and leave the meatballs). In a large bowl add all ingredients. Pull up your sleeves up. Using your hands, squish all the ingredients together until well combined. Mold balls to about one inch in diameter and place one in each muffin spot. Bake for about 20 minutes until bubbly. Remove and let cool about five minutes before plating and serving.

To serve the meatballs as shown in the picture, it is easy to prepare stuff while the balls are baking. For the sauce combine a small can of tomato paste and medium size can of tomatoes and chiles (or just diced tomatoes if you want mild sauce). Let simmer with a sprinkle of salt until heated through. For the zucchini, cut up squash in two-inch pieces. Heat 1 – 2 Tbsp of butter, then add zucchini. Saute with a sprinkle of salt and pepper until softened a bit, about five minutes. Add the meatballs on top of the zucchini and under the sauce.

Dolmas

dolmas_edited-1To conclude coverage of our Greek feast I share with you dolmas. Dolma generally means ‘stuffed thing’, and depending on where you are, the stuffed thing is some sort of vegetable – potatoes, squash, peppers, or tomatoes. After room is made in said vegetable they are filled with stuffing made of grains, vegetables and seafood or meat, which is then cooked. In this case we are leaning towards a Greek variation that involves stuffing grape leaves. The grape leaf version of dolmas can be eaten with fork and knife, or picked up as finger food. Personally, my method depends on how long it has been since I last had dolmas. I am more likely to use utensils if my last encounter with dolmas occurred recently; otherwise, fingers it is. To make them healthier and lower the carb count we used cauliflower instead of rice. I always like having dolmas  as part of a Greek meal – they are great hot or cold, can be made in advance (ideally at least the day before), and a plate of them can be easily shared if eaters are willing and generous. I hardly noticed the absence of rice in this version, since the cauliflower gave them a very similar texture to grain or rice. The lemon and egg coating gives them a nice tang, but it does not hurt to serve them up with a dollop of tzatziki as well. If you know me at all you would not be surprised that my dollops are more like glops, but to each her own. Big D helped with the logistics of making the dolmas, especially with separating the grape leaves, which he referred to as “a real pain in the a**”, and with filling them. I was not ignorant to the fact he got such an annoying, leafy task – the poor, innocent guy. Only through this post will he realize my true evil intentions when I sweetly said “can you help for a sec?” We are excited about using the steaming water as a base for soup. Maybe he will forgive me. Yay and Yum! I got some good suggestions for making the dolmas with cauliflower here.

Dolmas

1 8-ounce jar grape leaves (you will probably have extras)
½ head raw cauliflower
½ cup pine nuts (optional)
½ cup raisins (optional)
1 pound ground lamb (or chicken – I know, blasphemy, but can’t find lamb sometimes)
½ medium raw onion
1 Tbsp dried mint
½ cup fresh parsley leaves
2 garlic cloves, crushed
1 ½ tsp sea salt
½ tsp ground black pepper
2 fresh lemons
1 large egg

Carefully remove the leaves from the jar and place in the sink or a large bowl. They are usually tightly rolled together in the jar and can easily be torn. Cover the leaves with hot water and allow to soak at least 15 minutes. Meanwhile, break the cauliflower into florets, removing the stems. Place the florets in the food processor bowl and pulse until the cauliflower looks like rice. This takes about 10 to 15 one-second pulses. Place “rice” in a large mixing bowl and put the bowl back on the food processor; no need to clean it yet.

(Optional) Heat a dry skillet over medium high heat, then add pine nuts and raisins, stirring often and cooking until the pine nuts are lightly toasted, about 3-5 minutes. Set aside to cool, then coarsely chop. Add the nuts and raisins to the rice in the bowl.

Place the lamb, onion, mint, parsley, garlic, salt, and pepper in the bowl of a food processor and steadily pulse the mixture until the ingredients form a paté and everything is combined. I have also used a pastry cutter when a processor is not available – it takes a little longer, but results work. Add the lamb paté to the “rice” and mix well. The easiest way to do this is with your hands: run them under a little cold water and dig in.

In a steamer basket place a few leaves — the ones that are torn or small — to mostly cover the bottom of the pan. There can be some gaps. Put enough water in the steamer base so it does not rise above the bottom of the basket. Cut half of one lemon in half and drop the quarters in the water. Bring the water to a boil while you prepare the dolmas. Drain the water from the rest of the leaves. Place a leaf on a flat surface with the shiny side facing down, veins facing up. Snip off the stem, and place about one mounded tablespoon of filling on the end of the leaf closest to you, where the stem attached before you whacked it. The filling amount can vary, depending on the size of the leaf you are using. Roll from the bottom until the filling is covered by one layer of leaf. Fold in the side flaps and keep rolling until you have a cigar shape. You want to roll them pretty tightly so they don’t come apart during the cooking process. This is different than traditional dolmas where you want to leave a little wiggle room for the rice to expand during cooking. The cauliflower actually shrinks as it cooks, so roll them up tight, but be gentle not to tear the leaves! Place the rolls in the pan and nestle them up against each other. There can be multiple layers if needed, but place the layers crosswise so air can circulate. They will all get cooked.

Cut half of one lemon into thin slices circles and arrange the slices on top of the dolmas in the steamer. Place the filled basket over the boiling water. Cover with a lid, turn the heat way down to a gentle simmer and cook 25-30 minutes, until the leaves are tender but not falling apart. Remove the steamer and pour out the water from the base pot. Replace the steamer into the base.

In a small bowl, whisk the juice from the remaining lemon with the egg until frothy. Remove lemon slices from the top of the dolmas. Pour the frothy mixture over the dolmas, then put the lid back on and let the sauce set. The hot dolmas gently cook the egg/lemon sauce to create a tangy coating.

When the sauce sets, about ten minutes, remove the dolmas from the pan, place covered in the fridge, and wait until they’re chilled. They taste great cold, room temp, or hot — but are best if reheated the day after preparation, rather than eaten immediately when they come out of the pan.
Tzatziki

tzatziki_edited-1

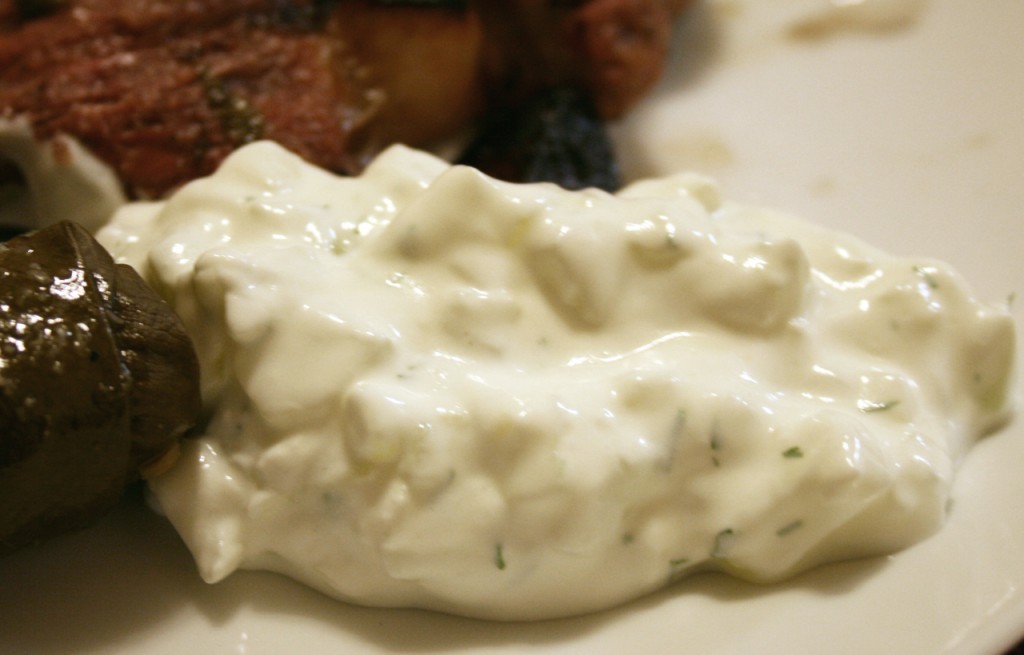
I could just eat this stuff straight from a bowl, with a big spoon, as in “would you like some lamb with your tzatziki”? Forget daintily dipping or drizzling it on food. Sometimes I get a Greek salad just to be able to mix tzatziki in with it. I used to love dipping pita bread into tzatziki and hummus – oh, what a bite exploding with flavor! These days, since I don’t eat pita anymore, I rely on roasted meats and veggies as my tzatziki conduits. Beyond the lovely, tangy creaminess of the sauce, I just like saying the word – tzatziki, tzatziki, tzatziki. I eat salsa with Mexican food, I eat wasabi with sushi, I slather steaks with chimichurri, I put mustard on hotdogs and I top Greek food with tzatziki. So there.

Tzatziki

2 cups plain Greek yogurt, or half sour cream and half yogurt
1 medium cucumber
2 large garlic clove, crushed
1 Tbsp finely chopped fresh mint
2 Tbsp finely chopped fresh dill
1 Tbsp olive oil
2 Tbsp fresh lemon juice
Salt, to taste

Peel, halve and remove seeds from the cucumber, then finely dice. Sprinkle salt on the diced cucumber and let sit for about five minutes. Place diced cucumber it between two towels and press gently to remove any excess water. You may need to repeat with more dry towels to get all the water. In a medium bowl combine yogurt/sour cream, garlic, mint, dill, olive oil and lemon juice. Stir until combined. Fold in cucumber and mix until it is evenly distributed. Add salt to taste. Chill overnight before serving.

Post Navigation