Any Kitchen Will Do

Give me a kitchen and I will cook.

Archive for the category “Mom’s Kitchen”

Shortcakes

straw shortcake

Summer is so  much about bright, ripe fruit I could strangle myself. I grew up in South Texas, where they have at least a dozen fruit-based festivals every summer – watermelon, blueberry, tomato, peach, grapefruit, cantaloupe, gourde, hot sauce, wine, strawberry….oh wait, some of those aren’t fruit, but they might as well be, the way Texans consume them in the summertime. My favorite is strawberries. We would get strawberries by the flat. They would go in our cereal, salads, on toast and waffles, and of course dessert. One year I ate so many I got hives while in a movie theater watching Steel Magnolias. First there was the itch, then the welts, then the freaking out because I never had them before and wondering what I caught at work serving frozen yogurt. Friends assured me they would go away and they did, after a day or two. Strawberries were the obvious culprit. It has not happened since, but I am very careful when faced with an entire flat of the berries.

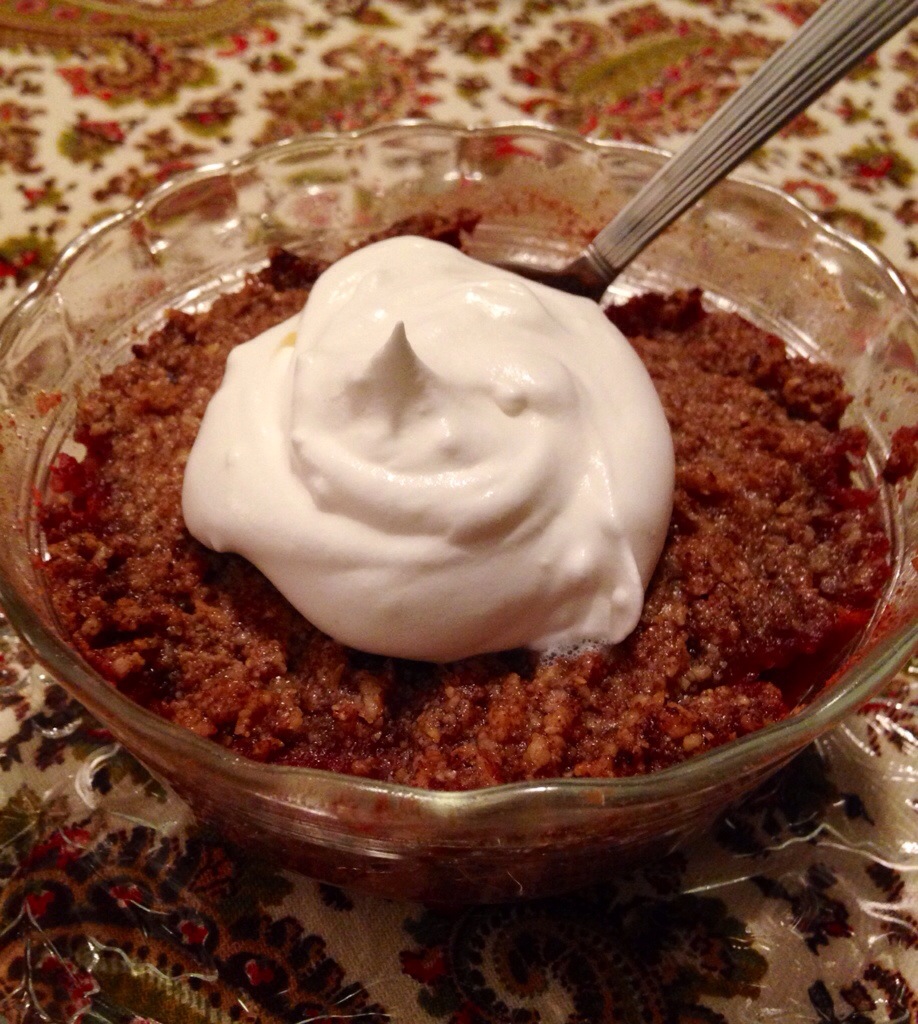
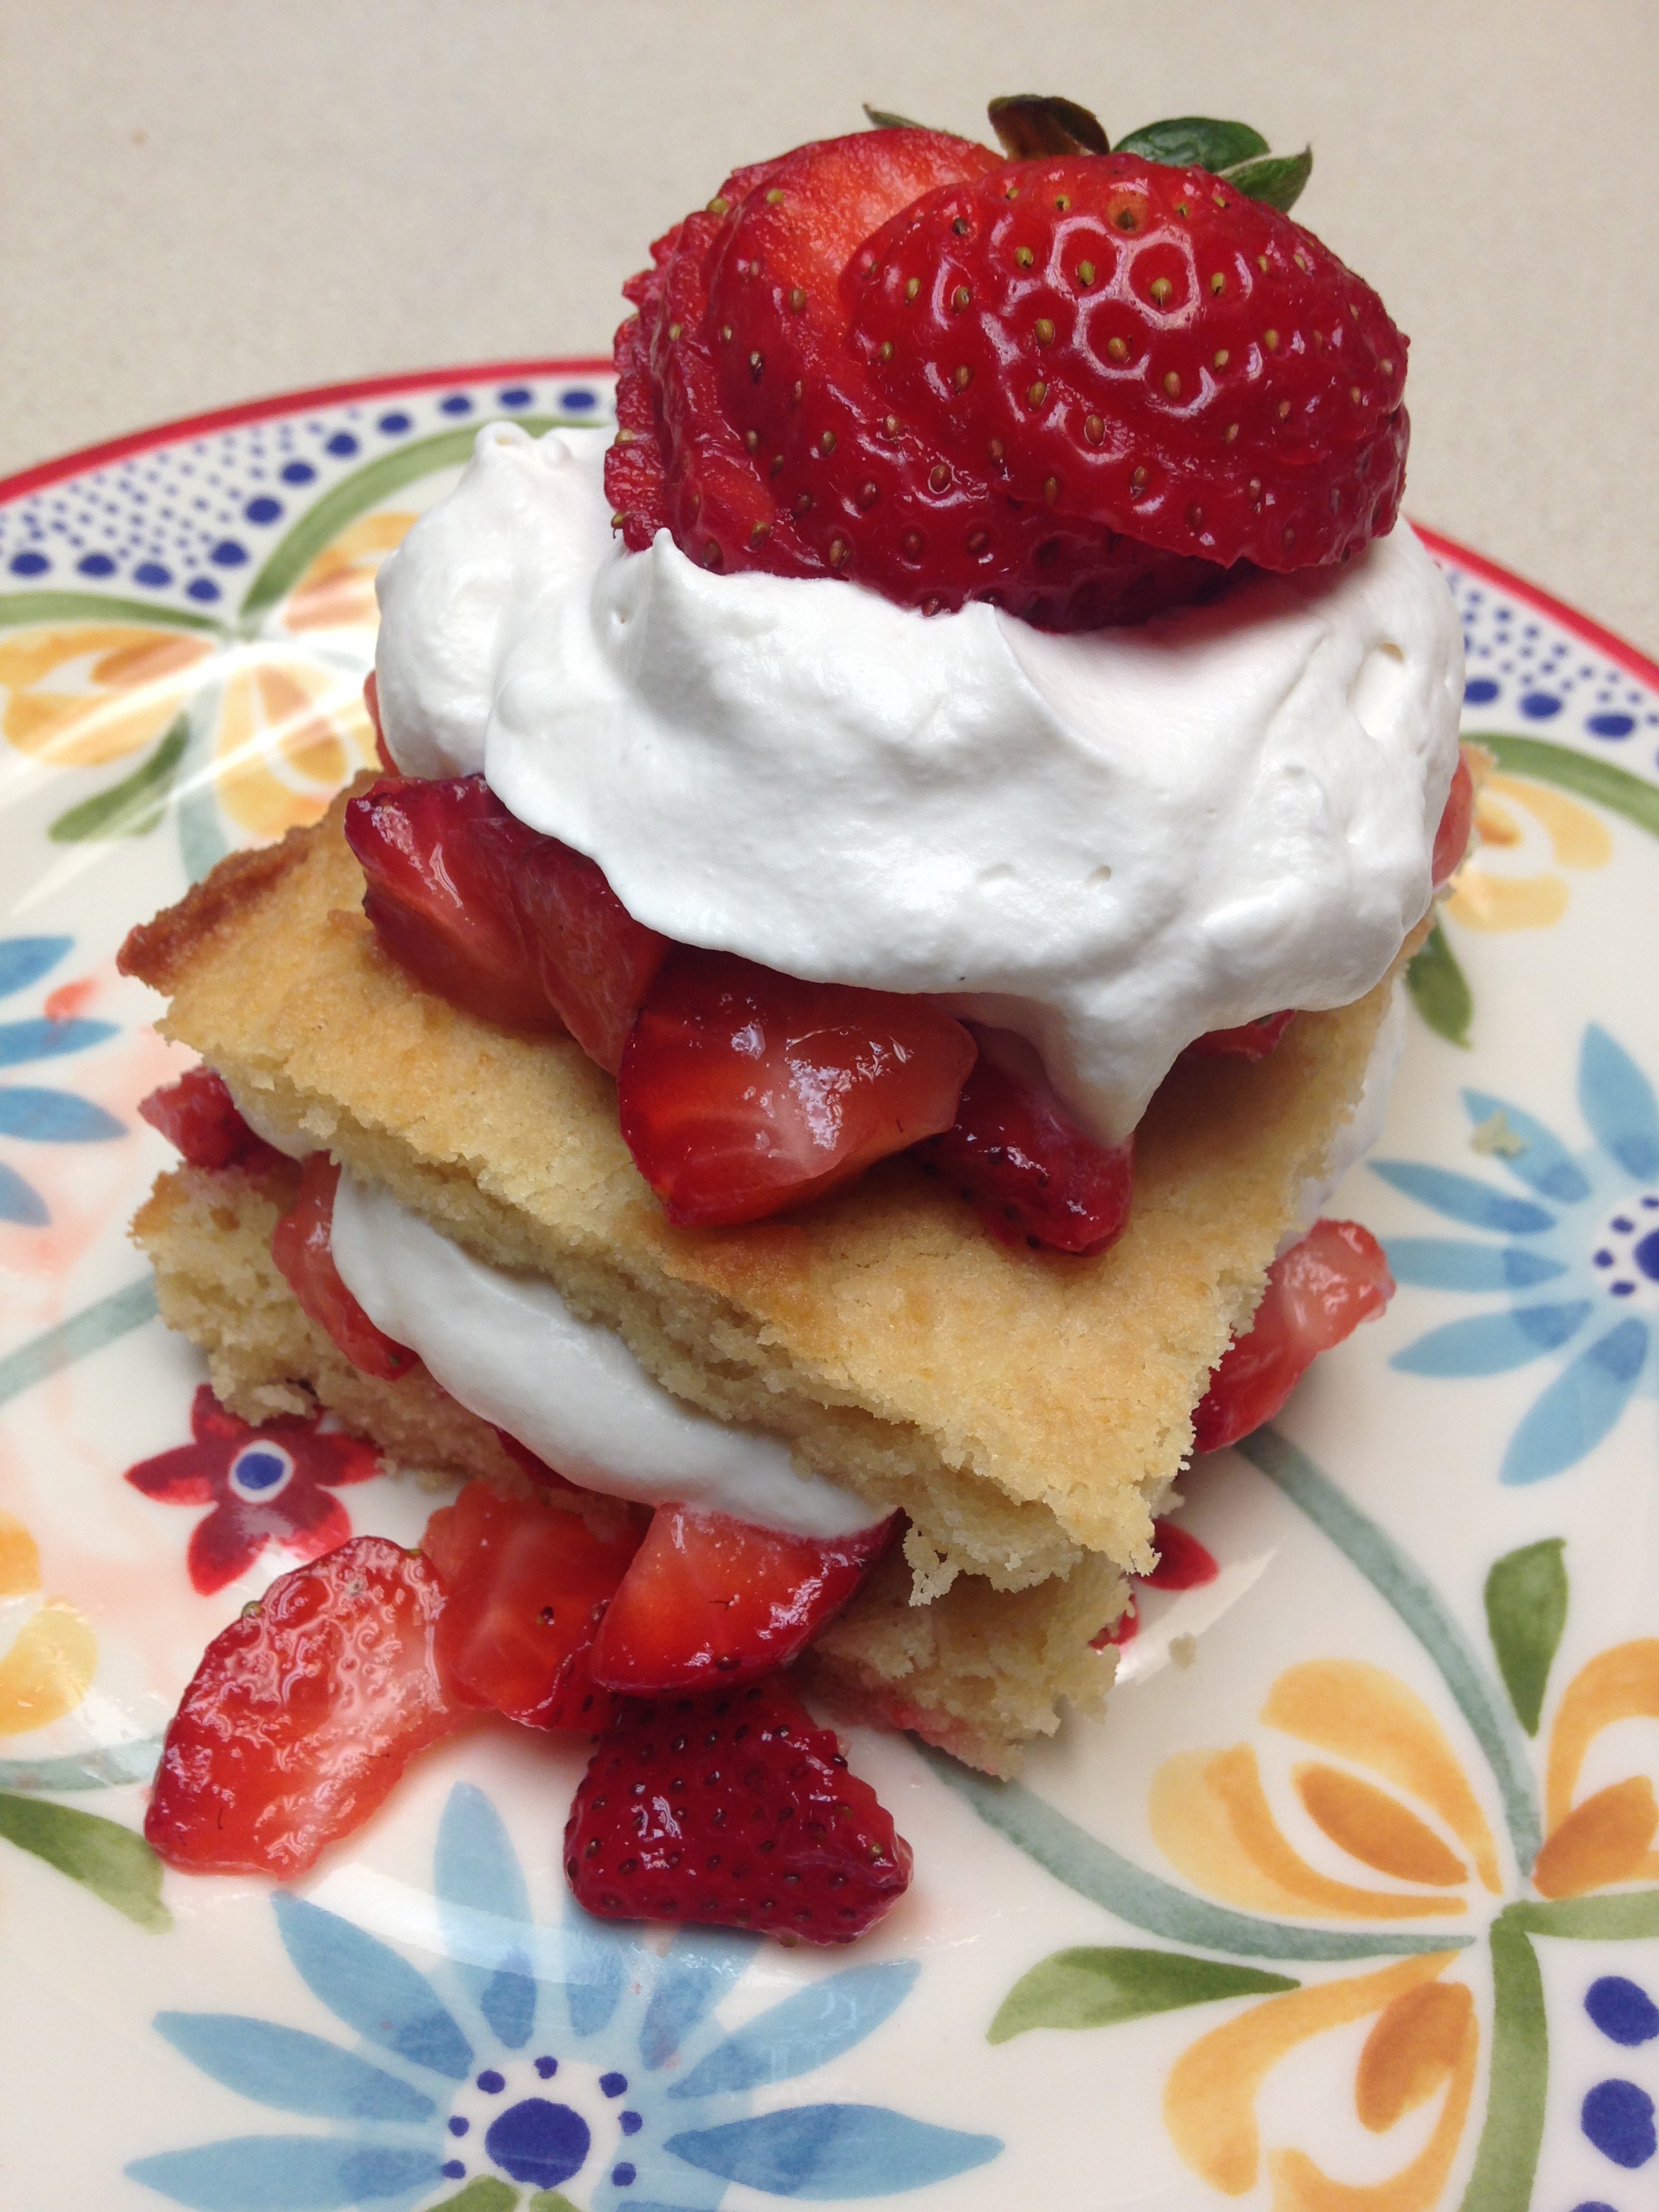
Because of the higher carbohydrate count of the stuff, I am also careful, in spite of the fact they fall very short of the most wonderful stuff on earth. To balance the carbs of berries I have come up with this otherwise pretty low carb dessert. My favorite version is with strawberries, but any berry will do. I took a chance and tweaked some successful almond meal based muffin recipes, in the hope that there would be enough sponginess and firmness to honor the berries. The cake came out wonderfully – moist and cakey but not too dense. You cannot believe how happy I am to have strawberry shortcake in my grain free, lowish carb repertoire!

Shortcakes

1 1/2 cups almond meal
1 1/2 tsp baking powder
1 Tbsp granulated sweetener
2 eggs
1/2 cup butter, melted and cooled slightly
1 Tbsp lemon juice
1 tsp vanilla
Fresh Berries (see below for strawberry version, other berries can be left whole)
Whipped Cream (see step 3 below in strawberry version)

Preheat oven to 350 degrees. Line the bottom of a 9×9 baking dish with parchment paper. In a medium bowl combine the meal, sweetener and baking powder. Add the eggs, butter, lemon juice and vanilla. Stir until completely combined. Pour into prepared baking dish and with a spatula even out the top. Bake for 25 minutes, until toothpick comes out clean from the center and the top begins to turn golden. Remove from oven and let cool completely or place in refrigerator until ready to serve. Trying to manipulate it before completely cool or cold will result in a crumbly mess. Slice in squares or rectangles and layer with whipped cream and berries.

Strawberry Shortcake

Preparing strawberries for shortcake is a little different from using other berries. Other than strawberries can be left whole and layered with whipped cream and cake. To make a traditional strawberry shortcake take the following steps:

1) Set aside enough pretty, whole berries to put one on top of each planned servings (one cake will serve 6-8).

2) Gather three to four additional berries per person. Slice and dice the berries, tossing them with 1 Tbsp of granulated sweetener and a splash of lemon juice. Let sit for about ten minutes and the juices will release. Mush them up a bit to add to the sauce.

3) Place one cup heavy whipping cream, 1/2 tsp vanilla extract and 1 tsp granulated sweetener to a bowl. Whisk them together until cream makes stiff peaks. Double quantities for every four servings. This whipped cream does not have any stabilizers and will not keep for more than a day or so.

4) To prepare the dessert it is recommended that steps are completed in a production line, doing every layer for all servings at the same time, evenly distributing chopped berries and whipped cream. Cut the cake into 6 – 8 pieces. For each serving slice a square of cake in half lengthwise. Place the bottom half on a plate. Drop a spoonful of strawberries on the cake slice and spread, pressing it into the cake a bit. Drop a dollop of whipped cream and another spoonful of berries. Place the top half of the cake square on top and lightly press it down. Add more chopped strawberries, top with a final dollop of cream and finish with a pretty, whole berry. Serve immediately.

Almost Easiest Brunch

bruch food

To me the best thing about making brunch these days is a nice meal after sleeping in and the inclusion of sweet plus savory dishes. The sleeping in part was not always true. When I was growing up brunch was often a big buffet at the local club after getting up early for church services. There was always so much to choose from and I could fill my plate with breakfast and lunch. The food was okay, but after sitting above steam baths and being poked and prodded by dozens of other diners before I got to it, not always as tasty as what was made at home. My favorite parts of the buffet was always the omelet station and dessert table. When I make brunch I like including the variety representing lunch and breakfast.

When doing a brunch at home it can be made very simple or very complicated. Dishes like Eggs Benedict or souffles or perfectly poached seafood can be good, but hard to time when people are arriving. In my experience the level of complexity is a choice and I lean towards hosting brunches that don’t take a lot of prep or maintenance. Stick with fresh ingredients and you will be fine. With a little prep the day before (but not absolutely necessary) you can serve your guests a variety of foods and cook them at the pace you prefer. Here is how I did Sunday morning brunch recently at my mom’s house, adding a little bit of complexity, but with a small party it was fun to do so.

brunch omelet stationI was a living, breathing omelet station! As you can see from the pictures there was a wealth of fresh, raw fruits and vegetables with dip, some wheat free muffins and little personal menus for people to choose their omelet ingredients. It was a small party, so the kitchen table that seated six was perfect. I could make omelets and still participate in the conversation. I prepared some omelet ingredients and muffins the day before, so I just had to pull them out of the fridge right before people arrived.

I call it the Almost Easiest Brunch because in my opinion the easiest would not include the omelet station, but something eggy and cooked en masse. Things like meaty or salmon frittatas and egg muffins can be popped in the oven right before people arrive, and be hot and ready by the time the first round of mimosas is sipped away. That is easier when hosting a brunch, but I wanted a little more challenge this time; thus, the omelets! The great part of the omelets is complete absence of guessing about what people want. We had salmon lovers and haters, Little B currently dislikes mushrooms, and a couple of serious vegetable eaters. As long as you do not burn the eggs there is little room for omelet content consternation. Try making a brunch for a bunch this weekend then take a nap, especially after the morning cocktails!

Omelet Station

2 small omelet/saute pans with cover (use foil or large plate if covers unavailable)

1 stiff spatula

1/2 cup butter

Whisked eggs – plan for two eggs and 1 Tbsp milk per person. Add eggs and milk to large measuring cup, whisking them together with a dash of salt and pepper. Note: using a large measuring cup or pitcher with a pouring spout allows for easy pouring into pans when time to make omelets.

At least 3 meat ingredients. Suggest meats pre-cooked and chopped, like bacon, breakfast sausage, poached or smoked salmon, ham. Plan for about 1 tablespoon of meat per person.

At least 3 vegetable ingredients. Suggest blanching or cooking until soft any raw vegetables to speed up omelet preparation, like sauteed mushrooms, peppers or onions, blanched broccoli and raw, chopped spinach. Plan for about 2 tablespoon per person.

At least 2 cheese ingredients. Suggest at least one mild and one sharper flavored cheese, like cheddar, feta and cream cheese. Plan for about 2 tablespoons per person.

brunch omelet orderHand out small pieces of paper with the guest name and available omelet ingredients listed. Have guest mark what they want in their omelet. When ready to make omelets preheat the omelet pans to medium. Melt a pat of butter. When butter begins to bubble pour in thin layer of egg to cover the bottom of the pan, about 1/3 cup. Add cheese to entire surface of egg (cream cheese would be dropped in with other ingredients, unless you want to try to spread it on with uncooked egg surface – good luck!). Add a spoonful of each vegetable/meat ingredient to one half the egg surface. When egg edges and bottom begin to firm up (can’t see the color of the pan bottom through the egg), fold over the cheese only egg layer on top of the vegetables and meat half. Cover pan for one minute to allow cheeses to melt, ingredients to heat and egg to finish cooking. Slide on to serving plate. Repeat until all omelets are made.

Other Dishes

Vegetable Tray. Provide about 1 cup per person of prepared seasonal raw vegetables that dip easily: grape/cherry tomatoes, celery sticks, carrot sticks, red or green bell pepper strips, snap peas, cucumber coins or sticks, radishes, zucchini sticks.

Fruit tray. Provide about 1/2 cup per person of prepared fruit: berries (slice strawberries if they are big!), apples, oranges, grapes and pineapple.

Dips. Provide at least one sweet and one savory dip: with fruit include Peanut Butter Yogurt Dip or whip together some cream cheese and pureed fruit like this frosting, and for the vegetables include French Onion Dip, hummus, or tzatziki.

Sweet Muffins. To balance the savory egg dish include some sweet muffins, like cranberry, blueberry, or oatmeal apple.

Savory Crisps. To go along with the dips serve some chips or crackers. A great item to serve is crispy veggie chips – beets, sweet potatoes, zucchini, carrots and green beans baked and salted. Very crunch addition to the meal!

Signature Drink. Although drink preferences of guests will vary, suggest having ingredients for a signature cocktail, like Mimosas, Caesars or Bloody Marys. Make available coffee, herbal iced tea and at least one type of juice as well.

French Onion Dip

french onion dip

My favorite dip EVER is French onion dip. Onion soup has been around since recorded ancient times, but French onion soup was the inspiration for the dip which became popular in the United States about 60 years ago. I have not asked any of them lately, but I bet the French would happily disown the dip version of their lovely soup. Growing up we always had packets of French onion soup mix in the pantry. I was in my 30s before I actually used the mix to make soup. Until then I had only used the packets for making dip or seasoning meats. Not bad tasting as a soup, but fresh, from scratch versions tastes better in pretty much every case.

Of late, I have been looking closely at ingredients of everything I buy, especially anything processed or convenient. This led to me being unimpressed with some of the packet ingredients – sugar, corn syrup, monosodium glutamate….I am pretty sure the Romans did not use much of those in their onion soup, and I am not keen on consuming them. It is easy to make packet-free French onion dip, and it is fun too! It takes a bit longer, but if you are in the kitchen doing other things anyway, you probably won’t notice.

Have you ever caramelized onions? It is a kitchen task I always enjoy if I have the time. Onion, water and a little salt makes for an impressive result. The biggest challenge is carefully watching while they cook (but not burn) and avoiding the temptation to stir. A while back I made some onion paste, which can also be used to make French onion dip, but I am going to elaborate a bit here on making chunky, caramelized onions that lead to the dip’s main ingredient.

French Onion Dip

1 large onion (Vidalia works great, but any yellow or white type will do)
2 cups water
1 cup sour cream or plain Greek yogurt
1 cup mayonnaise
2 cloves garlic, minced
2 Tbsp dijon mustard
Salt and pepper to taste

Roughly chop the onion, making sure all the pieces are broken up. Heat a medium saute pan to medium high. When the pan is hot add the onion to the dry pan. Let cook for about five minutes without stirring, allowing the onion to release moisture and begin to brown. Toss onion and let cook undisturbed for another three minutes. Add 1/2 cup water and stir, making sure to scrape the brown bits from the bottom of the pan. Let cook undisturbed for 3 – 5 minutes, allowing the liquid to reduce. When liquid is almost gone and onions begin to brown and caramelize again, stir and add another 1/2 cup of water. Repeat the liquid reduction and stirring two more times, until all the water is incorporated. Sprinkle onions with 1/4 tsp salt. Stir and set aside to cool. In a medium bowl combine the sour cream, mayonnaise, garlic, mustard, pepper and more salt to taste. Add the cooled onions and stir until combined. Refrigerate at least two hours or overnight before serving. Serve with vegetables, chips and crackers.

Dessert Cashews

dessert cashews

In preparation for our recent visit my mom bought some cashews, for Little B loves them. Specifically, she likes roasted, salted cashews. The generous container of purchased cashews was very much not salted. I had to come to the rescue for all our sakes!

The need to ‘fix’ the cashews reminded me of festival nuts. They are often our diet downfall. As we walk through a festival all day it is easy to walk by the funnel cakes, cobbler, ice cream, pastries, battered pig on a stick…you know, sugary and wheaty stuff. There are two or three danger zones, and they are all roasted nut stands. They typically roast the nuts and coat them with cinnamon and sugar. You can smell them about 100 yards away, so when you finally come up to the booth the brain has gone through the battle of yes, no, yes, no, oh well hell why not. We usually rationalize the purchase by assuring ourselves that splitting a bag among six people is not the worst thing in the world, and it is not. What usually happens is everyone has a few, then one or two people absentmindedly nibble on the entire bottom half of the bag and they are suddenly gone. Oops! I blame the ambiance and my nose – if I could not smell I bet I would care less about those darned nuts.

I noticed the festival nut seasoning combination worked well on pecans and almonds, but not so well on the cashews. They seemed to not capture the flavors as well and were just sad. It was not the fault of the nuts – they are more gentle and softer flavor-wise than their almond and pecan kin. The cashews needed something more than cinnamon and sugar. My first inclination was to add some bite, maybe cayenne, but Little B is not a fan. Pondering mom’s pantry and keeping Little B in mind, my eyes fell upon a can of cocoa powder. Of course! I relied on the general process I figured out for savory nuts and came up with these lovely chocolate cashews. They are sweet and rich and satisfying – a handful makes for a great dessert or snack when the chocolate craving bug comes around. I love nipping a few now and then. My mom had some mixed with popcorn for dinner the other day. Oh yeah, Little B liked them too!

Dessert Cashews

1/2 cup butter
2 Tbsp vanilla extract
1 Tbsp ground cinnamon
2 tsp cocoa powder
2 tsp Stevita granular sweetener
1 tsp sea salt (discard if using salted nuts)
8 cups roasted, unsalted cashews

Preheat oven to 350 degrees. Line two medium sized shallow baking sheets with foil. In a large bowl melt the butter in a microwave. Add vanilla extract, cinnamon, cocoa, stevita and salt. Stir until combined. Add the nuts and toss until well coated. With a large slotted spoon drop nuts onto baking sheets and spread evenly into a single layer – additional liquid on the pan may result in a burning smell before the nuts are done baking, so reduce the ‘drizzle’ as much as possible. Place sheets into oven on different shelves. Bake for 5 minutes. Remove nuts from oven. Toss nuts and again spread evenly into single layer. Return to oven, making sure the sheets are switched from the first baking period. Bake for 5 – 8 more minutes, until nuts are sizzling a bit and barely beginning to brown. Note that the point of being brown and being burned are very close together, so stay nearby during the second baking period. Remove from oven and let cool completely. Store at room temperature in air tight container.


Mediterranean Meatloaf

mediterranean meatloaf 2
I have shared a couple different meatloaf recipes with you in the past, like the spicy one and the veggie one, but never one wrapped in bacon! This one has a bit of a Greek twist, like my recent foray into stuffed mushrooms. I would blame other things, but the extreme moistness of this loaf I attribute to the bacon. It is great for the loaf protection. As with many baked meals, it tastes great the day it is made, but after sitting in the fridge and reheating, it is even better! I may even get all crazy next time I make this and serve a little tzatziki on the side!
Mediterranean Meatloaf
1 1/2 – 2 pounds ground beef
2 eggs
2 cups crumbled feta cheese
1 cup chopped raw spinach
1 cup chopped kalamata olives
1 cup chopped marinated artichoke hearts
1 cup finely chopped onion
4 cloves garlic, crushed
1/4 cup chopped fresh mint
1/4 cup fresh oregano leaves
1/2 cup chopped fresh parsley
1 Tbsp sea salt
1 tsp ground black pepper
8-10 slices bacon, uncooked
Preheat oven to 350 degrees. In a large bowl place the ground beef, making a lower section in the beef. Add the eggs, cheese, spinach, olives, artichoke hearts, onion, garlic, herbs, salt and pepper. Using your hands, break up egg yolks and squish other bowl contents together with meat until well combined. Press meat mixture evenly into 9×9 inch baking dish or large loaf pan. Arrange bacon slices on top of the meat in a criss cross pattern, tucking the ends around the sides of the meat. Gently press down on the loaf to avoid any uneven shaping resulting from tucking the bacon. Bake in oven for one hour. Remove and let sit for about ten minutes before removing to serving dish, then serve.

Soft Boiled Eggs

image

I almost feel guilty making this a post, but decided that doing so from my mom’s kitchen was so very appropriate. When I was growing up my brother and I were taught cooking basics and how to eat basics. They included the typical topics, like the use of fork, knife, spoon and napkin. Little B’s current challenge is elbows on the table, but that is a different story altogether. In addition to the basics we were also taught more specific skills we used less often, but practice never hurts! Things like getting every bit of meat off bones of roast chicken with a fork and knife (no fingers allowed), escargot with shell fork and tongs, crab with mallets and picks, grapefruit halves with serrated spoons, rolling long pasta with spoons and separating mussels and clams from their shells (again, no fingers allowed). I promise we did not end up snooty, just knew how to mind our manners in pretty much any food situation. We also learned how to sop roast meat off a platter using bread chunks, double dipping chips, licking our fingers and nibbling while we cooked. I am sure my mom loooves this disclosure! It was always interesting to see what mom and dad would come up with next. A fun breakfast skill we learned quite young was how to eat a soft boiled egg from a cup. It sounds almost silly. Why not just peel it and eat from your hand, you ask? The practice is actually used in many parts of Europe. My dad learned it from his Irish father and both my parents ate them in this manner while living in France, Germany, etc. Most people probably don’t have the requisite egg cups or tiny spoons, but you can probably adapt. I was very happy to introduce such a breakfast to Little B during our most recent visit to Texas. She was more excited about opening the egg than eating it all, but that’s okay. I was always around to finish it up. You may not believe me, but eggs cooked and eaten like this taste different than using your hands or frying some up over easy. Maybe it is the gentle cooking of the yolk while protected by the white, but a spoonful with a little yolk, white, butter, salt and pepper is a wonderful way to start the day, and appreciate the humble egg.
Soft Boiled Eggs
Large fresh eggs (quantity varies)
Water
Salt
In a medium pot add water, enough to cover the eggs, and a sprinkling of salt. Bring water to a full boil. With a large spoon gently lower each egg into the boiling water. Lower heat slightly but maintain the boil, and cook for exactly six minutes. Remove eggs with large spoon to serving cups or serving bowl. Serve with salt, pepper, butter, breakfast meats and bread.
To Eat: place an egg in an egg cup, pointy side down. Some eggs may not have a pointy end, so just guess – typically the round end will have the yolk closer to it in a boiled egg (think where the filling goes in a deviled egg) so the next step will more likely reveal yolk. While gently steadying the egg with one hand and using a knife in the other, tap the egg about 1/4 inch from the top, turn the egg and continue tapping until there is a ring of cracked shell all the way around. Using the point of the knife pierce all the way through and lift the knife away from you, catching the egg top with your knife-free hand. There should be soft yolk showing. Place a small piece of butter into the yolk and sprinkle with salt and pepper. Using a small spoon scoop out a bite, making sure it includes white and yolk. Eat. Repeat. Don’t forget to scoop the yummy bite from the egg top!

Kelley’s Killer Stuffed Mushrooms

image
Have you ever felt like you are being watched? I did just the other day. I was sitting on my mom’s patio and suddenly felt like I was being observed, with the strong need to figure out what was doing it. No people. No pets. A few birds were out there, but they were busy with the feeders. In the end I decided it was the basil. Tall, healthy stalks rising out of a huge pot, with big, bright green leaves soaking up the morning sun. They were leaning slightly in my direction, so the little leaves at the very tips of the stalks worked like cyclop eyes…I decided the only way to rid myself of the paranoia was to use some basil. It wants me to, right? A functional plant that just happens to be pretty, too? I was sure mom’s well stocked fridge would reveal a wealth of ingredients to go with the stalking stalks. As you can see from the list of ingredients I was right. I called them Kelley’s Stuffed Mushrooms because Kelley likes all things Greek, and these have a leaning in the Greek direction, and they would be consumed at her house. Besides all that, she is one of the most awesome people on the planet. This is not my first Greek themed dish, but it is the first time I remember splitting kitchens when making a dish – prepared in one kitchen and cooked in another. These lovely ‘shrooms went stuffed but uncooked with us to a dinner party, and were baked in S&K’s kitchen right before serving. I do think transporting the broth separate from the dish was a good idea, though. Adding the little lime wedges helped add a bit of color, and squeezing a bit on right before enjoying them brought out the lovely flavors of the cheese and olives.
Kelley’s Killer Stuffed Mushrooms

12 baby Portabello mushrooms
2 garlic cloves, finely diced
1/4 medium white onion, finely diced
12 kalamata olives, pitted and finely chopped
3 slices of bacon, cooked crisp and crumbled
4 quarters marinated artichoke hearts, finely chopped
1 cup crumbled feta cheese
8-10 fresh basil leaves, chopped
1/2 tsp ground oregano
1/2 lime, juiced
2 Tbsp extra virgin olive oil
1/2 cup chicken broth
Salt to taste
Lime, thinly cut into small slices (garnish)
Remove stems from mushrooms. With a small spoon scrape out brown gills from each mushroom cap, making more room for the stuffing. Finely chop the stems and scrapings. In a large skillet over medium high heat add the oil. When oil is hot add onion and garlic. Cook until soft. Before onions and garlic begins to brown add the chopped stems, olives, bacon, artichoke hearts, basil and oregano. Stir occasionally until stems are soft and combined with the other ingredients. Add feta to the pan and stir until it is melted and combined. Remove pan from heat, add juice from the half lime and stir. Preheat oven to 375 degrees. Divide stuffing among the mushroom caps, placing them, spaced evenly, in a 9×12 inch baking dish. Slowly pour the broth in the pan, making a shallow pool under the caps. Place pan in oven and bake for 30 minutes, until mushrooms sweat and shrink. Remove from oven and let sit for about five minutes. Garnish with small lime slices and serve.

Apple Strawberry Crisp

20141113-204155.jpg

Unlike the other German themed dish I made recently and broke our typical non-starchy rule (shame), this crisp is intended to follow the theme of German sweets, but not so much to the letter. It is why I include berries, apples and cinnamon. According to the numerous people if know who have visited the lovely country it was accurate to think of apple cakes, berry strudels and lederhosen when I concocted it. The ‘crumble’ top could be thinner, but  why reduce yumminess?!

Apple Strawberry Crisp

Filling
2 green apples, peeled and sliced
2 cups strawberries, stems removed and sliced
3 Tbsp Stevita
2 Tbsp lemon juice
2 tsp ground cinnamon

Topping
1/2 cup almond meal
1/4 cup golden flaxseed meal
2 cups finely ground raw pecans
1/2 cup butter, melted
1 Tbsp stevita
1/2 tsp sea salt

Preheat oven to 350 degrees. Place apple and strawberry slices in a medium bowl. Sprinkle with sweetener, lemon juice and cinnamon. Toss fruit until it is all coated. Let sit while preparing topping. In a small bowl add the almond meal and ground pecans. Pour in butter and stir to combine. Add stevita and salt. Stir to combine. Divide fruit mixture among four or five single serve ramekins, or place it all in a 9″x9″ baking dish. Spread topping on top, completely covering fruit. Bake for about 30 minutes, until fruit is bubbly. Cooking time for using a larger baking dish may need to be 45-50 minutes. Serve plain, with whipped cream or ice cream.

German Potato Salad

20141108-103935.jpg

I am a bit evil on this one. The good thing is, I can blame Little B. We were doing a multi-day lesson with her about Germany, leading up to local Wurstfest celebrations. Believe me, she was absolutely adorable in her uncle’s old lederhosen! As always, if there is a slim chance that food can be included in a learning experience I will find it. There was cabbage at bratwurst and apples flying all over the kitchen. For this salad I was sorely tempted to find a substitute for the starchy new potatoes, but in the end went with the real thing. My big excuse was that I was trying to make as authentic a German dinner as I could, with guests coming over for it to boot. I had already tweaked a dessert to be less than authentic, and got store bought saurkraut, so I caved and went pure with the salad. This by no means prevents me from making a less starchy, lower carb version in the future, but I can definitely say that I know how to make an absolutely delicious German potato salad now! I really don’t see why turnips or parsnips (and maybe a little cauliflour) can’t be substituted for the taters. If you try a version of this recipe with them let me know how it goes! Back to behaving now…

German Potato Salad

2 pounds small new potatoes
4 quarts water
1 Tbsp sea salt
8 thick cut slices of bacon
1 medium white onion, roughly chopped
1/2 cup chicken stock
1/3 cup apple cider vinegar
1/4 cup chopped fresh chives
Salt to taste

Place the water and salt in a large stock pot. Add potatoes. Bring water to a boil and continue cooking for about twenty minutes, until potatoes are tender. Drain water and set aside potatoes to cool. While potatoes boil prepare the bacon. In a large skillet over medium high heat cook the bacon until crisp. Remove the bacon and crumble, then set it aside, retaining the bacon grease in the pan. Lower heat under the grease to medium and add onions. Cook onions until soft. While onions cook slice the potatoes into halves or quarters so they are bite-sized. Return crumbled bacon to the pan with onions, along with the stock and vinegar. Continue cooking until mixture is hot. Add potatoes to onion mixture, tossing gently until they are coated and hot. Sprinkle with salt if needed to enhance flavors. Add chives and toss again. Serve immediately or reheat to serve warm.

Adapted from http://www.foodnetwork.com/recipes/anne-burrell/german-potato-salad-recipe.html#!

Meaty Squash Bake

meaty squash bake

This dish was purely delish and purely a result of leftovers. We had spaghetti squash left over from serving as a side dish with the rolled chicken, and a lovely brisket our friends brought over was still calling to us from the fridge. Knowing we would have leftovers from the leftovers, I wanted to make sure it would be something that would freeze and reheat well. I think we hit the jackpot! I don’t know of many savory leftovers that can’t be combined and topped with cheese, do you? The nice thing about it is you can also cook up some fresh spaghetti squash, and maybe some ground beef for it if you don’t have leftovers to manipulate. It freezes well too! As you see, I made this in my mom’s kitchen, and while I was visiting her I definitely cooked more than we and our visitors could possibly consume, so freezer friendly is a good thing.

Meaty Squash Bake

1 pound chopped meat (leftover brisket, chicken, pork, etc)
2 1/2 cups cooked spaghetti squash
2 tsp garlic powder
1 tsp sea salt
1 cup heavy whipping cream
3 eggs
2 cups Colby jack cheese, shredded

Preheat oven to 350 degrees. In large bowl stir together squash, garlic powder and salt. Add meat and stir again. In small bowl whisk together eggs and cream. Add cream mixture to squash and meat. Fold until everything is coated with cream mixture.  Pour mixture into 9×12 baking dish. Sprinkle top with cheese. Bake for 35 – 45 minutes until outer edge of cheese begins to brown. Remove from oven and let sit for about ten minutes before serving.

Post Navigation