Any Kitchen Will Do

Give me a kitchen and I will cook.

Archive for the category “onion”

Apple Herb Pork Loin

applestuffedporkloin 
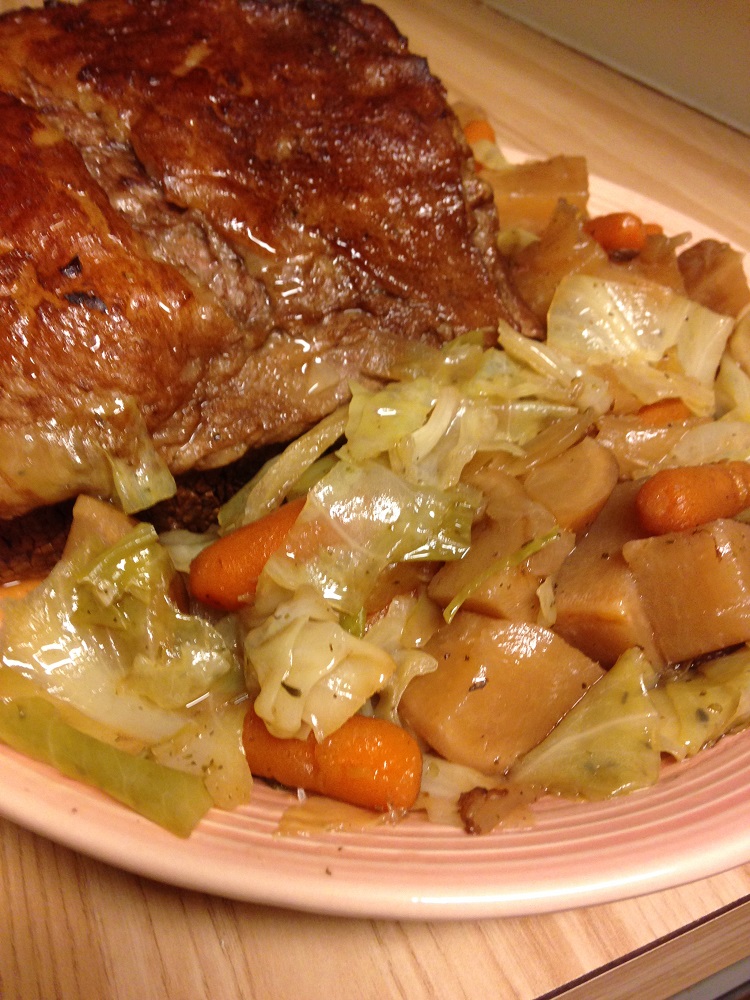
I made this roast for my mom’s birthday. She is on the verge of a milestone birthday and generously came to us instead of us travelling to her, since I am so busy on weekends with Grain Free Haven. I knew she loved apples with her pork, but wanted to do something other than apple sauce to serve with it. The garden is still bursting with herbs so I poked around in it for inspiration. The finished roast ended up being a beautiful, seasonally stuffed centerpiece to a celebratory dinner, surrounded by steamed veggies, hollandaise sauce and wine, of course.

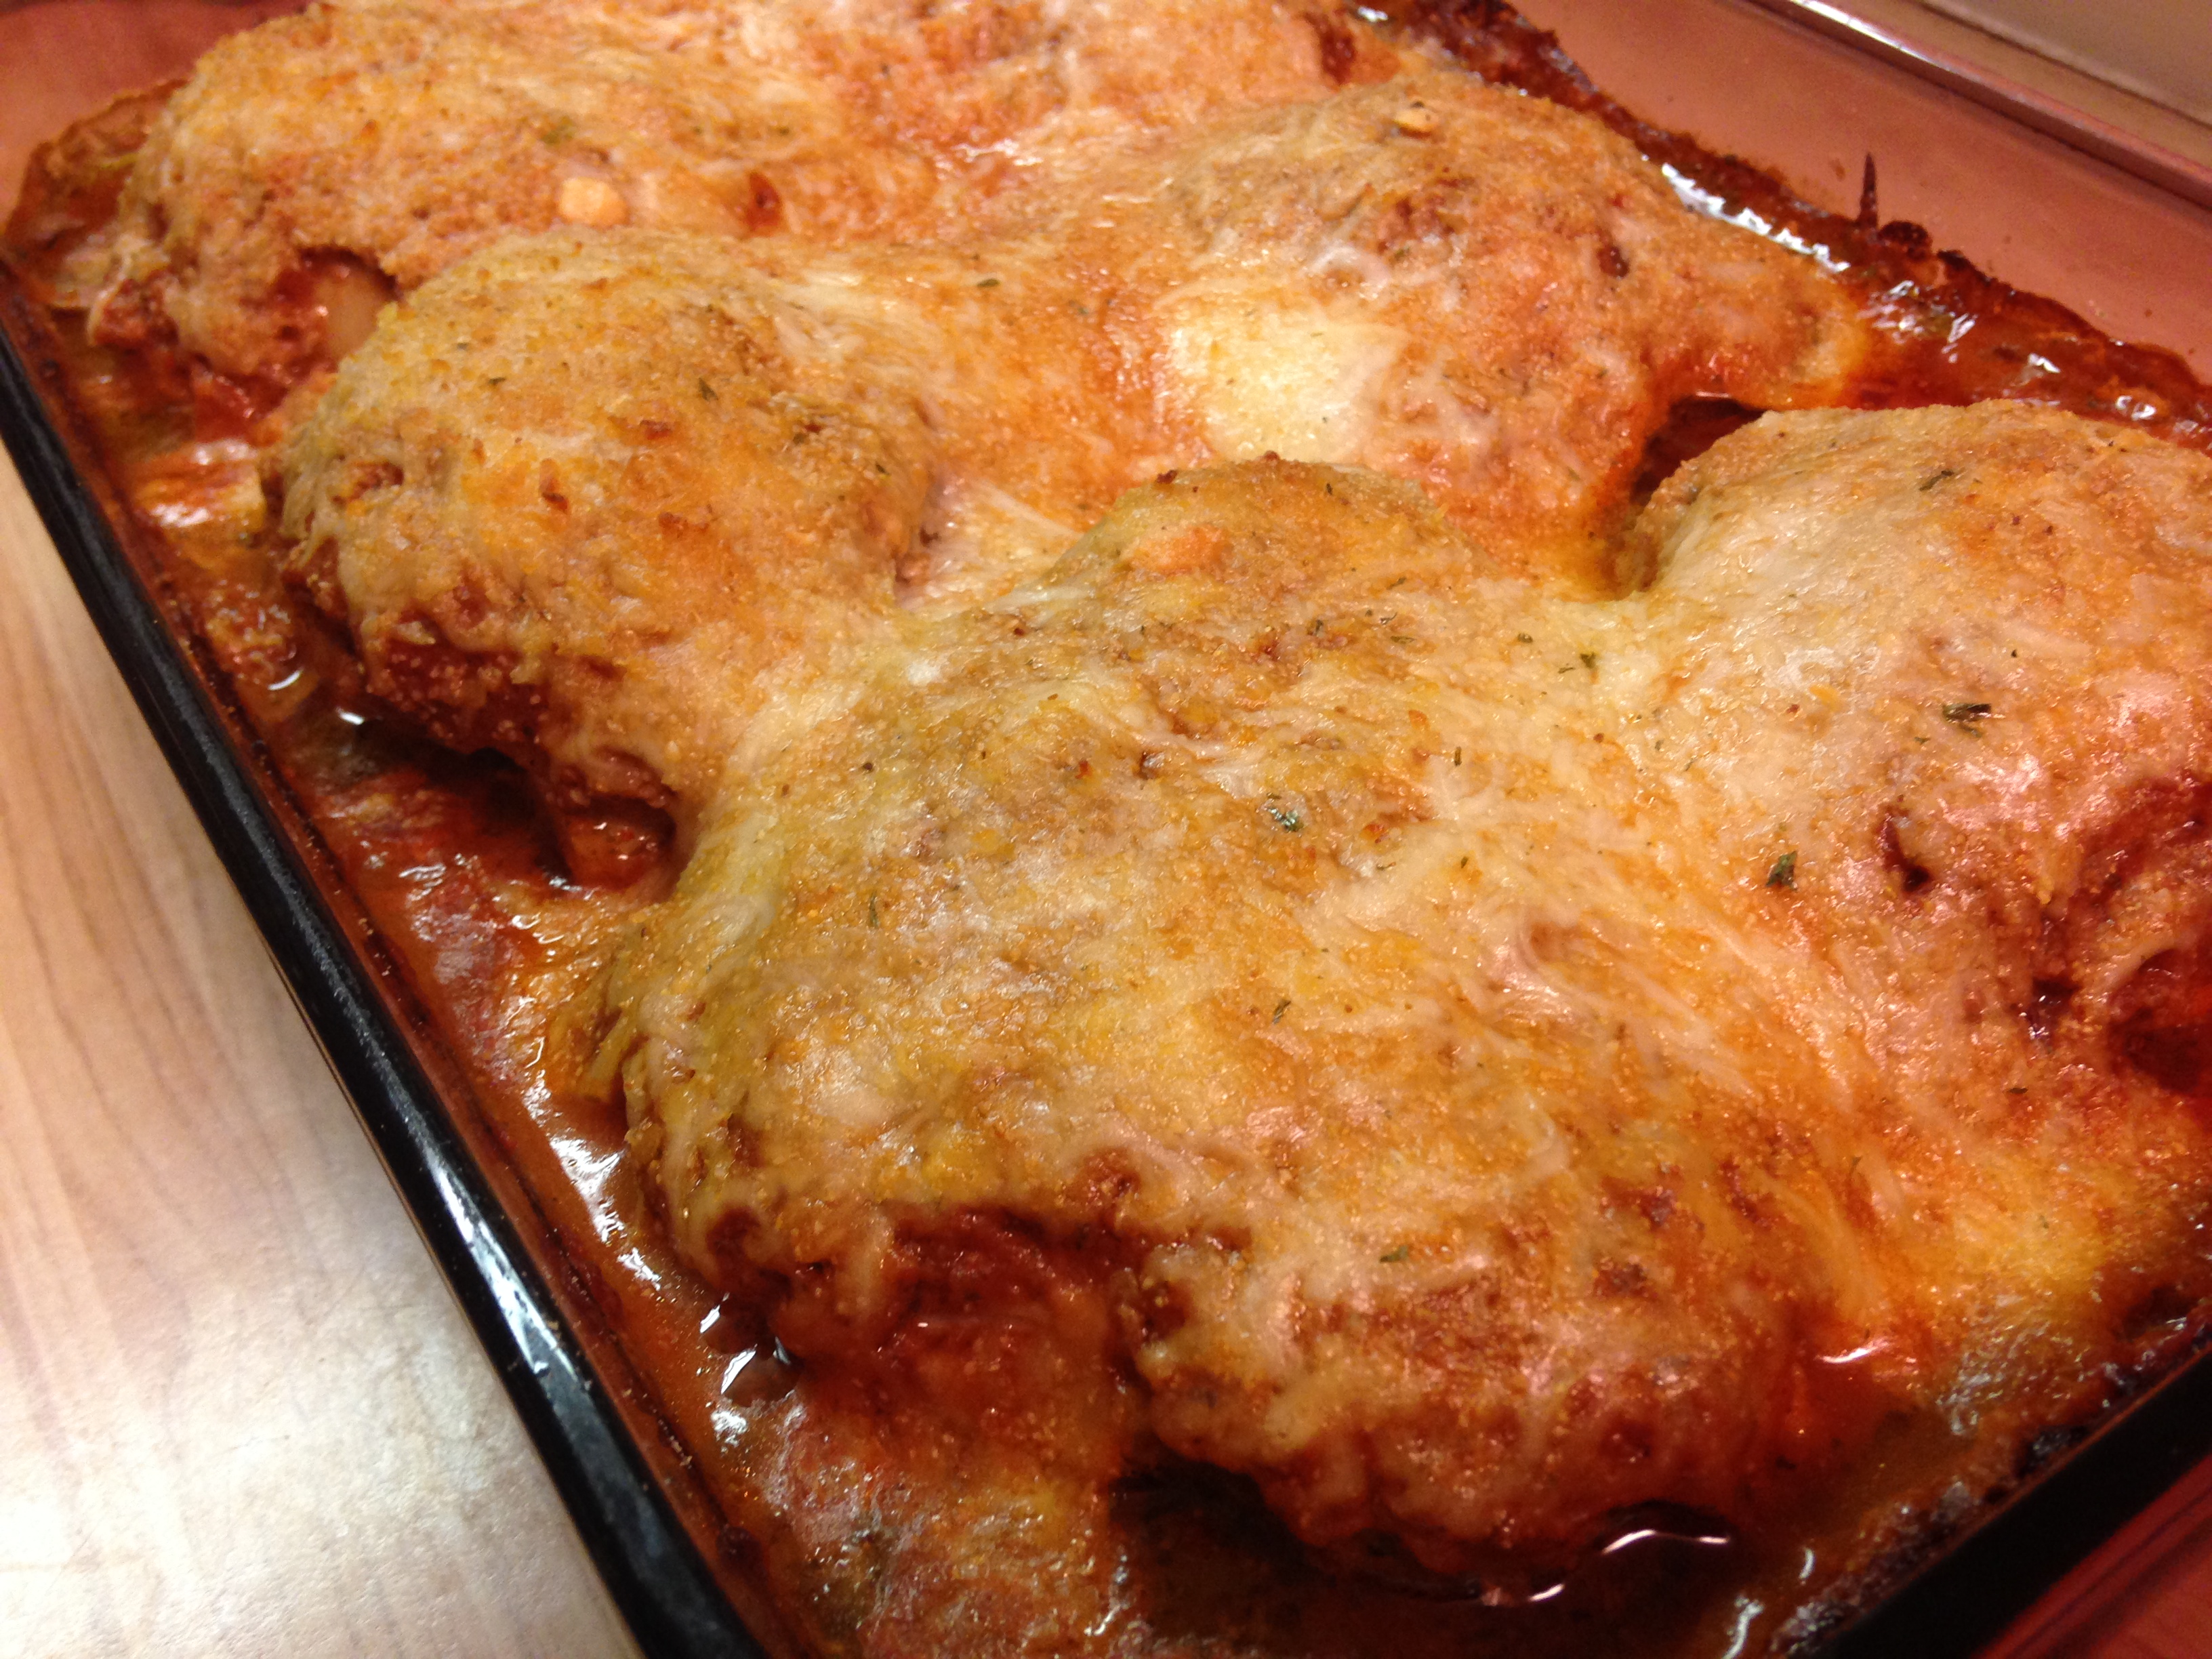
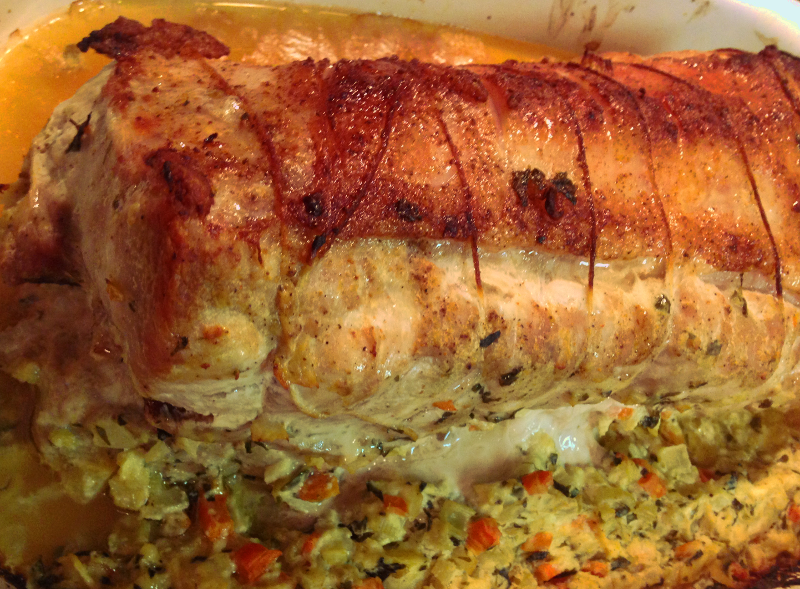
As you can see from the picture my rolled roast did not stay fully rolled – a trimmed roast may have stayed in place better, but I love how moist pork is when fat is still attached. The unrolling of the roll did not seem to detract from the ability of the flavors to spread through the pork and the stuffing complimenting it in a wonderful way. The final product may have ended up even better with the stuffing having spilled out, mixing with the roast juices. We just used a spoon to drizzle the stuffing and juices over the top of each served slice. Of course, when I make this again the stuffing will stay put and dribble out the ends. I will let you know!
Apple Herb Stuffed Pork Loin
1  4 1/2 – 5 pound pork loin, fat on
1 Tbsp butter
3 small Granny Smith apples
1/2 large carrot
1 celery heart with leaves (or 2 stalks)
1 medium white onion
4 ounces goat cheese
1/2 cup chopped fresh basil leaves
1/4 cup chopped fresh oregano leaves
1/4 cup chopped fresh parsley leaves
3 garlic cloves, finely minced
Seasoning salt or salt and pepper to taste
Roughly chop apples, carrot, celery and onion. In medium sauce pan over medium high heat melt the butter. Add garlic, onion, celery and carrot. Cook, stirring occasionally for about five minutes. Add apples, basil, oregano and parsley, cooking for three more minutes. Drop in goat cheese and stir until melted. Let mixture simmer until bubbly. Remove from heat.
Preheat oven to 400 degrees. With a fillet knife gently cut into the loin about 1/2 inch below the fat layer, curving around to continue the 1/2 inch thickness until the loin lies flat. Generously sprinkle all sides of the loin with seasoning salt or salt and pepper. Place the loin with fat face down. Using kitchen twine place a length under the loin every inch, making sure there is sufficient length to tie knots.
Place the apple mixture on the end opposite the face down fat. Carefully roll the loin over the filling, ending with the fat side facing up. Tie each length of twine to secure the roll. Place in shallow 9×13 baking dish.
Bake in 400 degree oven for 20 minutes. Reduce temperature to 300 degrees and bake for an additional 40 minutes. Remove from oven and let rest for about ten minutes before serving.


Garden Chicken

2015-08-29 17.59.51Since I began my new business, Grain Free Haven, I have spent a ton of time in the kitchen, but not so much on new stuff. I have been making large quantities of the reliable recipes we love, to share with all my new customers. In my continued effort to contribute to the healthy eating of my family, I share with you now ANOTHER chicken recipe. I swear it is different enough from this chicken recipe, and this one and this one and this one to warrant sharing…. Even with all the bulk baking for the business I still want to spend time in the kitchen making new stuff, so I am making a concerted effort to still come up with new stuff.

Much of what you need for it comes from your garden, or your neighbor’s garden, or even your local farmers’ market vendor gardens…in my case it came from my brother’s garden. The dish is full of summer and the sauce, which can be made in advance of baking the chicken, is addictive. I warned you.

Garden Chicken

2 pounds fresh tomatoes (or 2-14 1/2 ounce cans diced tomatoes)
3 garlic cloves, crushed
1/2 medium yellow or white onion, chopped
1 cup fresh basil leaves
1/4 cup fresh oregano leaves
1 cup fresh parsley leaves
4  cups fresh, raw spinach
2 tsp sea salt
1 tsp ground black pepper
1/3 cup heavy whipping cream
8 – 10 chicken thighs, bone in and skin on
Salt and pepper, to season chicken
1 cup finely grated Parmesean cheese
2 cups grated mozzarella cheese
1/4 cup finely chopped mixed fresh herbs (optional)

Roughly chop tomatoes and place in large sauce pan uncovered over medium high heat. Add onion, garlic, basil, oregano and parsley. When mixture is bubbly reduce heat to medium and continue cooking uncovered for 30 – 45 minutes, until liquid from tomatoes is released and reduced by about half. Add the spinach, salt and pepper, stirring until the spinach wilts and mixes with the tomatoes. Let simmer for ten more minutes. Remove pan from heat. With an immersion blender (or carefully pour the hot stuff into a stand blender) purée the sauce until tomatoes, spinach and herbs are blended into a smooth sauce. Simmer for five more minutes to reheat sauce, then thoroughly stir in heavy whipping cream. Remove from heat.

Preheat oven to 350 degrees. Season chicken on both sides with salt and pepper, then place them in large baking dish. Sprinkle half the Parmesean cheese over the chicken thighs. Pour tomato sauce over chicken, making sure it is covered and there is a layer on the bottom of the dish. Sprinkle mozzarella cheese and optional chopped herbs over chicken, followed by the rest of the Parmesean cheese. Place in oven for 30  minutes. Cheeses should begin to brown. Cover dish loosely with aluminum foil (to prevent cheese from getting too brown) and bake for 15 more minutes.

Remove from oven and let sit for 10 minutes before serving. When serving gently lift the chicken out of the dish, trying not to disturb the sauce and cheese that has moulded on top of each thigh – as the dish cooked the tomato solids settled on top of the chicken with the cheeses and the juices ran down, so serving with the ‘topping’ intact makes for a pretty presentation.


Tex Mex Dip

2015-07-03 18.34.43Dip is a sure fire thing to always have around. Having last minute dinner guests? Pull out the dip with crudite. Feeling nibbly? Pull out the dip with some chips. Faced with raw chicken that needs to be dinner? Pull out the dip and slather the fowl with it before tossing it in the oven. Headed over to someone’s place for drinks? Pull out the dip. It can come in all shapes and sizes and colors and quantities. It can be hot, or cold or both. People can eat it, or not. Dips can be made to taste like just about any dish.

We like queso. When we don’t want to break out the crock pot, processed cheese and can of tomatoes we don’t have to miss out on the flavors. We just pull out the can of tomatoes and veer in another direction. Here is a dip I came up with that gives us the flavor and tang of Tex Mex without the logistics. When I say queso I don’t mean the Spanish word for cheese. I mean chile con queso, the warm cheese dip with tomatoes, onions and chiles often served with a Tex Mex meal. I like queso, but it needs melting and oversight so it does not burn and reheating when it cools off, then if the crock pot cord does not reach to the nearest plug there is need for an extension and the possibility of tripping on it…not that I ever trip on anything. 🙂 None of these logistical elements are insurmountable barriers, but are way beyond what is needed for this dip. Nothing can replace chile con queso in my book, or plate, but this is a nice, cool variation.

Tex Mex Dip

2 cups sour cream
1 Tbsp lime juice
1 Tbsp ground cumin
1 tsp garlic powder
1 tsp sea salt
1/2 tsp ground black pepper
1 can tomato and chiles, well drained
1/4 cup finely chopped onion

In a medium bowl combine sour cream, lime juice, cumin, garlic powder, sea salt and pepper. Whisk until combined. Add onion, tomatoes and chiles. Stir until well combined. Chill at least two hours or overnight before serving.

French Onion Dip

french onion dip

My favorite dip EVER is French onion dip. Onion soup has been around since recorded ancient times, but French onion soup was the inspiration for the dip which became popular in the United States about 60 years ago. I have not asked any of them lately, but I bet the French would happily disown the dip version of their lovely soup. Growing up we always had packets of French onion soup mix in the pantry. I was in my 30s before I actually used the mix to make soup. Until then I had only used the packets for making dip or seasoning meats. Not bad tasting as a soup, but fresh, from scratch versions tastes better in pretty much every case.

Of late, I have been looking closely at ingredients of everything I buy, especially anything processed or convenient. This led to me being unimpressed with some of the packet ingredients – sugar, corn syrup, monosodium glutamate….I am pretty sure the Romans did not use much of those in their onion soup, and I am not keen on consuming them. It is easy to make packet-free French onion dip, and it is fun too! It takes a bit longer, but if you are in the kitchen doing other things anyway, you probably won’t notice.

Have you ever caramelized onions? It is a kitchen task I always enjoy if I have the time. Onion, water and a little salt makes for an impressive result. The biggest challenge is carefully watching while they cook (but not burn) and avoiding the temptation to stir. A while back I made some onion paste, which can also be used to make French onion dip, but I am going to elaborate a bit here on making chunky, caramelized onions that lead to the dip’s main ingredient.

French Onion Dip

1 large onion (Vidalia works great, but any yellow or white type will do)
2 cups water
1 cup sour cream or plain Greek yogurt
1 cup mayonnaise
2 cloves garlic, minced
2 Tbsp dijon mustard
Salt and pepper to taste

Roughly chop the onion, making sure all the pieces are broken up. Heat a medium saute pan to medium high. When the pan is hot add the onion to the dry pan. Let cook for about five minutes without stirring, allowing the onion to release moisture and begin to brown. Toss onion and let cook undisturbed for another three minutes. Add 1/2 cup water and stir, making sure to scrape the brown bits from the bottom of the pan. Let cook undisturbed for 3 – 5 minutes, allowing the liquid to reduce. When liquid is almost gone and onions begin to brown and caramelize again, stir and add another 1/2 cup of water. Repeat the liquid reduction and stirring two more times, until all the water is incorporated. Sprinkle onions with 1/4 tsp salt. Stir and set aside to cool. In a medium bowl combine the sour cream, mayonnaise, garlic, mustard, pepper and more salt to taste. Add the cooled onions and stir until combined. Refrigerate at least two hours or overnight before serving. Serve with vegetables, chips and crackers.

Savory Watermelon Salad

IMG_9048As kids my brother and I spent summer afternoons outside a lot. We were able to cavort around our neighborhood bicycling, rollerskating, swimming, playing soccer and other things kids did in the 80’s ‘on the streets’. One of the snacks we ate was messy, juicy, sweet watermelon. Mom would cut it up and bring a bowl out to the back yard. We would take a break from gardening or playing in the sprinkler to feast on it, sprinkling each wedge with a bit of salt and letting the juices run down our chins. After we were done we often had seed spitting contents. The watermelons we  had were always riddled with slippery black seeds. We would save them up as we ate, then would have the contest. There were occasional arguments about whether seed bounces counted in spitting distance, or whether one of us stepped over the spitting line when getting a running start on a spit. To this day I am surprised there weren’t more watermelon plants growing rogue in the yard. This may be the oddest sounding salad I have ever made, but it was curiously satisfying. On a warm summer day in Texas I was looking for something other than a green side salad at dinner. We don’t eat much watermelon, considering the higher carbohydrate count for the fruit, but I am glad I plunged in with this salad. Very refreshing, and quite a different slant compared to the spiked Whiskey Watermelon I made a few years ago…different type of satisfying…

Savory Watermelon Salad

1 small seedless watermelon
1 cup crumbled feta
1 cup kalamata olives, pitted and sliced
1/2 cup finely diced sweet yellow onion
1/3 cup extra virgin olive oil
1 lemon, juiced with meat retained
1 tsp sea salt (plus more to taste)
1 tsp ground black pepper
1/4 tsp red chili flakes
1/2 cup chopped fresh mint leaves

Prepare about 8 cups of watermelon in bite-sized pieces by cutting it into 1-inch cubes or using a melon baller. In a medium bowl combine the olive oil, lemon juice, salt, pepper and chili flakes. Whisk until combined. Add the feta, olives and onion. Stir to coat with the dressing. Add mixture to watermelon and gently toss, trying not to crush the watermelon pieces.  Sprinkle mint and more salt to taste on top. Serve immediately or chill until served.

Note: as you can see from the picture the watermelon juices will mix with the dressing build up as the salad sits. It is recommended that a slotted spoon is used to serve, to reduce the soupiness of the salad when plated.

Beef in Wine

beefwine4

This may make some shudder. I had a craving for beef bourguignon. Knowing I did not have all the ingredients or time to prep before leaving it to cook accurately to the version by the great Julia Child, I decided to wing it. I found out that some things still exist that were true when Little B was, well, smaller. The needs are different but the level of desired attention is the same. Not that I have not been present, but the flurry of a full time job has broken up the timing of focus. Instead of squeezing in project research at lunch, grabbing supplies after work and doing them after dinner when Big D was working, I have all the time in the world to prepare, right? Wrong! The planning and purchasing were much more efficient when doing it solo. This is soooo much a first world problem. I know. Having a dollar store a mile away (instead of a thousand miles) makes more projects tempting. The challenge now is getting in and out of the store without being accosted by my own daughter for random things that make her pile of toys higher. The size of the pile is not troublesome, but the amount of abandonment of said toys after a week is the troublesome part. We did a big purge when we moved recently, and Little B did a lot of work to help with her stuff. I don’t want to create the same pile of stuff for her to deal with, but trying to tell her that when she is starry eyed in front of a wall of cheap toys is not very helpful. We are working on earning and managing her own money, but the more important concept is contributing to our household, not earning money. I don’t want to be in a situation where I am debating with her on one or two dollars to sweep the kitchen or pick up her clothes. It is part of living with people. Needless to say, transition means finding a balance, so dinner was good but not traditional. Even if it is not a traditional version, it came out great, allowed for project preparation, gave me time to give Little B attention, tidy up after the dogs (one of which is still in a chewing stage) and and still feed seven people for dinner. Phew! This domestic thing can be lazy or not. Maybe lazy for now…

Beef in Wine

5 pound beef roast (rump or other)
3 medium turnips
1 large yellow onion
3 large carrots
1 cup dry red wine
2 cups beef or vegetable broth
1/2 cabbage head, roughly chopped
Salt and pepper to taste

Preheat oven to 300 degrees. Heat medium oven-proof stock pot to medium high. Chop turnips, onion and carrots into bite-sized pieces. Season roast generously with salt and pepper. Sear meat on all sides in heated pot until browned. Add vegetables and stir, slightly coating with the browning bits. Arrange meat so fat side is facing up. Pour wine and broth over meat and vegetables. Cover pot and place in oven. Cook for four hours, leaving it covered the whole time. Remove pot from oven and uncover. Add cabbage, stir vegetables, trying not to disturb crusty fat layer on top and replace cover. Return to oven and cook for one more hour. Remove from oven, arrange meat and vegetables on serving tray and serve immediately.

Red Eggs

red poached egg

We had leftover sauce! My aptly named Red Chicken was delish, and left us with some sauce that was taunting us from the fridge the other morning. I was reminded of the simple egg bake I posted about a few years ago. It is also reminiscent of Indian shakshuka or Mexican huevos rancheros, which have a bit more than smooth sauce and eggs, but the concept sounded really good, easy and filling.

We were in the middle of a significant effort to reduce our worldly belongings and using up stuff from our food stores before moving. Such a process is pretty emotionally draining. More so than I ever expected. Not the use of food stores, but the reduction of belongings. I would think that getting rid of sweaters not worn in years would be easy, but remembering wearing them when spending time with family and friends brought a bunch of memories to the forefront,  good and bad. After the sweaters were done I shifted over to sorting other stuff. The same type of memories rise, everywhere from who gifted them to me to remembering all the places I wore them. If I was doing the process over the span of months is one thing, but we were doing this type of sorting day after day for a week. Although most of the time was spent sitting or standing and sorting, we were all exhausted at the end of the day. We were all doing it (me, Big D and Little B) and all felt the energy drain.

red poached egg platedThe cooking during this week of great purging helped us relax and talk about our goal – keep the things that serve us and we cherish, not being tempted by keeping stuff just because we always did before. We successfully got through the grand project and winnowed down our stuff to the amount we agreed to (two pick up trucks worth of bins, etc). We make no promises of avoiding the rut of collecting things again, but I think the experience will make us think twice before nonchalantly filling the cart at the big box stores. Keeping things simple provides clarity and encourages creativity – things we can never have too much of. On another note, we are so very proud of Little B. It would have been easy to send her off to a friend’s house and quietly sort through her stuff in absentia, but since we consider her a little person, we thought it important to take her through the process with us. It was not easy, but we took the time to work with her about what she used, what she had outgrown, what she had not touched in a year, and what she cherished. Of course, she is looking forward to more stuff as her interests change in the future, so she leapt in with both feet and made very thoughtful decisions, way beyond her five years on this earth. We surrounded ourselves with comforting food as we moved forward with the purge, including these eggs. Fortunately I did not step away from the pan at the wrong minute, so the poachiness of the eggs was pretty darned perfect. They helped us move on and gave us a new go to dish.

Red Eggs

2 Tbsp butter
1/2 white onion finely chopped
4 cloves garlic, finely chopped
1/2 cup natural peanut butter
15 ounces tomato sauce
1/2 cup lemon juice
2 Tbsp ground turmeric
2 tsp ground ginger
1 tsp ground cinnamon
1 Tbsp cayenne pepper
1 tsp sea salt
1tsp ground black pepper
8 ounces full fat coconut milk
4 – 6 eggs

In medium saute pan over medium high heat melt butter. Add the onion and garlic, cooking until browning begins. Add remaining ingredients except for coconut milk. Stir until all ingredients are combined, turning down heat to low. Stir in coconut milk and simmer until steam is rising from sauce. With the back of a spoon make a divet along the edge of the sauce in the pan. Drop a raw egg into the divet. Repeat with remaining eggs, evenly distributing them in the sauce. Cover pan and let simmer until eggs are cooked to desired doneness – about five minutes for soft. Serve immediately by scooping egg(s) onto a place and drizzle sauce on top.


Cheesy White and Green Bake

image

We have been very busy lately, so you may have noticed more often than not my posts include quick, easy recipes, good as leftovers for days we don’t have time to cook. I am so busy I noticed how much of a run on sentence I just wrote. Everything is moving quickly for us at the moment, but we still enjoy cooking a good meal, and want to make sure there is variety and a healthy dose of vegetables. This bake is filled with staples we always have in our kitchen. I hope you try it. As of the date of this posting, Little B inhaled this side dish the day I made it (along with a hunk of steak) then proceeded to request it three days in a row until the leftovers were all gone. This is noteworthy for two reasons: 1) although Little B is a fruit and vegetable nut, she tends toward raw rather than baked, so interest in this dish was refreshing, and 2) Little B is not a fan of leftovers, which may be rooted in our penchant for constant variety, or just a general tendency of a typical five year old. Regardless, she inhaled it and we happily watched! I may throw in some tuna or chicken next time and make it a full on casserole…

Cheesy White and Green Bake

1 small head cauliflower
1 stalk broccoli
1/2 small onion
2 eggs
1 cup heavy whipping cream
1 tsp sea salt
1 tsp ground black pepper
2 tsp granulated garlic
1/2 tsp ground thyme
2 Tbsp lemon juice
3 cups shredded mozzarella cheese

Preheat oven to 350 degrees. Roughly chop onion, cauliflower and broccoli into bite-sized pieces. Toss together then spread vegetables evenly in a 9×13 inch baking dish. In medium bowl combine eggs, cream, salt, pepper, garlic, thyme and lemon juice. Whisk together until eggs are combined with other ingredients. Pour sauce over vegetables, gently tossing vegetables until they are coated. Sprinkle cheese on top of vegetables. Bake for 30 minutes until edges are browning and middle is bubbly. Remove from oven and let rest for five minutes before serving.

Onion Paste

onion paste

I like adding onion to all kinds of savory stuff. Although it is convenient to add onion powder or dehydrated onion flakes from the pantry, it is different from real onion. Not that cooking onions to varying levels of doneness takes very long, but sometimes it seems like it when every other part of a dish is quicker. I am fickle sometimes and just have to live with it. To overcome what sometimes feels like the huge expanse of time it takes to cook onions, I have come up with this paste. It adds onion flavor quickly from a jar in the fridge, even when you are feeling fickle. Very nice to have around for omelets, quick soups and dips – the flavor gets distributed in a dish much faster, compared to the pantry versions.

Onion Paste

2 large onions
2 Tbsp fat (bacon grease, butter, olive oil)
1 1/2 tsp sea salt

Peel and roughly chop onion. In a medium skillet over medium high heat add fat. When fat is hot add onion and sprinkle with salt. Sauté until onion softens and browns. Remove from pan and let cool until it is safe to handle. Place onions in food processor and pulse until a smooth paste forms. Store in airtight glass or metal container in the refrigerator. Use 1 tablespoon for every 1/4 onion in a recipe.

Antipasto Salad

antipasto salad

During the past few years I have posted Irish themed dished leading up to St. Patrick’s Day. Things like colcannon, shepherd’s pie, corned beef and cabbage (which I must mention is not actually Irish), and even a traditional Irish breakfast! This year I did not quite ramp up to the day in such a thematic day. I did do some bright, green leeks recently, but that is far as it went. This year we are enjoying some of my past creations instead of new ones. I guess in a way I am reaching back part of the roots of Ireland’s history, just not the most recent – the Gauls! Their influence spread across not only Ireland, but France, Swithzerland, Netherlands, Spain, Italy and Greece. Yes, I am stretching it, but it is fun! In spite of the name, antipasto does not mean it does not like pasta, or that it is after pasta, but it HAS no pasta, and it comes BEFORE pasta. Just the way we like it. We recently had a Greek kick and did some dishes I posted a few year ago, including dolmas, tzatziki and some Greek burgers. We needed a salad to go along with it, because there was a gap on the plate. Hoping that the Greeks and Italians would cooperate, we mixed up some traditionally Italian non-pasta, savory elements, with some Greek, and boy did they go well! The leftovers were great, too, after hanging out in the dressing. I think the Gauls would enjoy it.

Antipasto Salad

1 cup mixed green, black and kalamata olives, pitted
1 cup pepperocini peppers, chopped
1/2 cup crumbled feta cheese
1/2 cup marinated artichoke  hearts, diced
3 plum tomatoes, seeds removed and diced
1/4 yellow or white onion, finely diced
4 ounces thin sliced salami, diced
1/3 cup Greek salad dressing or other vinaigrette

Roughly chop olives so they are of similar size. Place olives in medium bowl. Add peppers, cheese, artichoke hearts, tomatoes, onion and salami. Lightly toss. Add dressing and stir until well coated. Let sit for about 15 minutes then toss again and serve. The salad can also be made a day in advance and chilled until time to serve.

Post Navigation