Any Kitchen Will Do

Give me a kitchen and I will cook.

Archive for the category “wheat free”

Tangy Feta Pork Chops

tangy feta pork chops

Just like chicken, pork is quick and easy to make, so the challenge is adding variety to the flavors surrounding them. A lot of my chicken and pork recipes are interchangeable, like this one, because both proteins represent mild flavored bases. They can be smothered easily enough, or done in a skillet with a light sauce like these mustard cider chops.

Another easy way for me to make pork chops is to sear, make sauce, pour it on chops and bake for a bit. I call it SSPB – Sear Sauce Pour Bake. The prep is quick, and if forces beyond my control delay dinner, then letting them sit in a turned off oven after they are done cooking does no damage. I know such things NEVER happen to anybody else, but if it ever may happen to me, this is the type of dish I make. Things like traffic delaying dinenr participants, discovery of a new spider, a Minecraft world I just HAVE to see, or the wonders of a summer thunderstorm that must be observed from outside. Here is a recent SSPB using citrus to go along with the tang of the feta. Dinner indeed got delayed about twenty minutes because of an art project, so the delay factor was indeed tested on this one!

Tangy Feta Pork Chops

2 Tbsp extra virgin olive oil
6 thin cut pork chops (with or without bone)
1 lemon, juiced with meat retained
1 lime, juiced with meat retained
1 clove garlic, minced
Salt and pepper to taste
1 cup crumbled feta cheese
½ cup heavy whipping cream

Preheat oven to 350 degrees. With kitchen scissors or a knife make a ½ inch slit in the curved edge of each pork chop, towards the center. Generously season pork chops with salt and pepper. Place three chops in a large pan over high heat, cooking until downward facing side is seared, about two minutes. Flip chops and repeat searing. Remove chops to 9×13 baking dish. Repeat searing with remaining three chops. Remove to baking dish. Turn heat to medium low. Add lemon and lime juice to pan, scraping brown bits from bottom. Add feta and cream. Stir until sauce is bubbly, about 3-4 minutes. Pour sauce over pork chops. Cover baking dish with foil and bake for 20 minutes, until pork is cooked through and juices run clear. Chops can be served immediately, or left in oven with heat turned off for about an hour to keep warm.

Salmon Stuffed Mushrooms

salmon stuffed mushrooms

I came up with these when thinking about my in-laws. They are very special people I have known since I was about eight years old. One loves salmon, one not so much. She can usually find shrimp acceptable, but not at all with the salmon. When the salmon eater comes to dinner without the other we often do salmon. The situation came up at dinner a few days ago, and there was some poached salmon left over. There is always the opportunity to use salmon leftovers at a brunch or in a frittata, but I wanted something for dinner. Not breakfast-for-dinner, but dinner-for-dinner.

I didn’t want to overwhelm the salmon with other flavors, so I stuck with ingredients used when poaching the salmon. Being surrounded by mushroom, cream cheese and egg whites the salmon did not get dried out or overcooked. Funny the way things worked out – the salmon loving in-law was also at dinner to enjoy these mushrooms! Go figure!

Salmon Stuffed Mushrooms

15-20 miniature Portabello mushrooms
3 garlic cloves, minced
1 Tbsp extra virgin olive oil
2 egg white
6 ounces poached salmon
1/2 + 1/4 tsp fresh dill
1/2  cup cream cheese, softened
1/2 cup water
Salt and pepper to taste

Scoop out stem and meat from caps of mushrooms. Chop the stems finely. In a small skillet over medium heat add the oil. When oil is hot add the mushroom stems and garlic. Stir occasionally until mushrooms have released moisture and liquid is reduced. Remove from heat. In medium bowl whisk egg white until foamy, about 15 seconds. Add to the whites cheese, salmon, 1/2 tsp dill and stir until combined. Add the stem mixture. Add salt and pepper to taste. Preheat oven to 350 degrees. Fill mushroom caps with cheese mixture. Place filled caps evenly distributed in a 9×13 baking dish. In a measuring cup mix the water with 1/4 tsp salt and 1/4 tsp dill. Stir until salt is dissolved. Pour water into bottom of baking dish. Bake in oven for 30 minutes, until mushrooms shrink and filling puffs up. Remove from oven. Place mushrooms onto platter and serve immediately.

Peach Fool

peach fool

I adore the name of this dessert! Fool! I don’t know much about it’s history, short of it being English and traditionally made with gooseberries. I do know it is not heavy and is easy to make ahead when you have dinner to get ready. I was reminded of the dessert during a recent weekend road trip. If you have ever been to Texas you may have discovered that the Hill Country is prime for grape growing and wine making, and the people there know it. There are more than forty wineries west of the Fort Worth/Austin/San Antonio corridor. The area is also prime for growing other fruits, like peaches. There is an abundance of the sweet stone fruit during the summer, sold at produce stands and grocery stores all over the state and beyond.

During a recent overnight adventure to sample wines between Johnson City and Fredericksburg we discovered it was a prime peach picking period. It was a beautiful trip, full of wonderful company, wines and food, as well as beautiful arts and crafts we discovered along the way. If you want to create your own adventure in the area this website was extremely helpful to us: www.texaswinetrail.com. On the way home we sought out some fresh produce, including the lovely and talented Fredericksburg peaches. The ripe mound we claimed for ourselves were freestone, so they did not stick to the pit.

They are much more sweet that what I usually eat, but here is the thing: enjoying such things in moderation really makes a difference to me when experiencing the seasons, especially summer. I am not a summer fan. Correction – I am not a hot summer fan. Anything above 75 degrees has the potential to make me grumpy. I am currently hanging out in a place that is lucky to have that temperature as the LOW each day. If I can find a bit of summer joy by eating a few peaches with whatever iced beverage I choose to have with me every minute of my waking hours, then I will eat them. To balance out their natural sugariness I took a stab at this fool. I have attempted to make a good tasting fool that is sugar free (except for those wondrous juices in the peaches) and abundant in protein. Hope you like it!

Peach Fool

3 cups sliced, pitted peaches, skin on
2 tsp lemon juice
1 Tbsp + 2 tsp granulated sweetener (recommend erythritol/stevia mix)
1 1/2 cups heavy whipping cream
1/2 cup plain Greek yogurt (or sour cream)
1 tsp vanilla extract
Mint leaves and thin peach slices (optional, for garnish)

In a medium skillet over medium heat add the peaches, drizzle lemon juice and 1 Tbsp sweetener and gently toss. Cook for about five minutes until peaches soften and begin to break apart. Gently toss again and remove from heat, allowing to cool completely at room temperature or in the refrigerator. When peaches are cool prepare the cream. In a mixing bowl add the whipping cream, yogurt, 2 tsp sweetener and vanilla. Whisk or beat on high until stiff peaks form. Fold in peaches and their juices just until combined, creating a swirled effect – over stirring can cause the cream to collapse and loss of the swirl. It is recommended that the folding step occur in the serving bowl, to avoid over stirring. Serve ‘family style’ from the larger serving bowl, or carefully transfer to individual dessert dishes. Garnish with mint and thin peach slices (optional), then serve with crisp cookies or squares of shortcake.

Note: this dessert can be made with berries as well, with a much more dramatic swirl effect. The cooking time for the berries will probably need to be doubled to make sure the juices are released enough to make the fool swirly.

Shortcakes

straw shortcake

Summer is so  much about bright, ripe fruit I could strangle myself. I grew up in South Texas, where they have at least a dozen fruit-based festivals every summer – watermelon, blueberry, tomato, peach, grapefruit, cantaloupe, gourde, hot sauce, wine, strawberry….oh wait, some of those aren’t fruit, but they might as well be, the way Texans consume them in the summertime. My favorite is strawberries. We would get strawberries by the flat. They would go in our cereal, salads, on toast and waffles, and of course dessert. One year I ate so many I got hives while in a movie theater watching Steel Magnolias. First there was the itch, then the welts, then the freaking out because I never had them before and wondering what I caught at work serving frozen yogurt. Friends assured me they would go away and they did, after a day or two. Strawberries were the obvious culprit. It has not happened since, but I am very careful when faced with an entire flat of the berries.

Because of the higher carbohydrate count of the stuff, I am also careful, in spite of the fact they fall very short of the most wonderful stuff on earth. To balance the carbs of berries I have come up with this otherwise pretty low carb dessert. My favorite version is with strawberries, but any berry will do. I took a chance and tweaked some successful almond meal based muffin recipes, in the hope that there would be enough sponginess and firmness to honor the berries. The cake came out wonderfully – moist and cakey but not too dense. You cannot believe how happy I am to have strawberry shortcake in my grain free, lowish carb repertoire!

Shortcakes

1 1/2 cups almond meal
1 1/2 tsp baking powder
1 Tbsp granulated sweetener
2 eggs
1/2 cup butter, melted and cooled slightly
1 Tbsp lemon juice
1 tsp vanilla
Fresh Berries (see below for strawberry version, other berries can be left whole)
Whipped Cream (see step 3 below in strawberry version)

Preheat oven to 350 degrees. Line the bottom of a 9×9 baking dish with parchment paper. In a medium bowl combine the meal, sweetener and baking powder. Add the eggs, butter, lemon juice and vanilla. Stir until completely combined. Pour into prepared baking dish and with a spatula even out the top. Bake for 25 minutes, until toothpick comes out clean from the center and the top begins to turn golden. Remove from oven and let cool completely or place in refrigerator until ready to serve. Trying to manipulate it before completely cool or cold will result in a crumbly mess. Slice in squares or rectangles and layer with whipped cream and berries.

Strawberry Shortcake

Preparing strawberries for shortcake is a little different from using other berries. Other than strawberries can be left whole and layered with whipped cream and cake. To make a traditional strawberry shortcake take the following steps:

1) Set aside enough pretty, whole berries to put one on top of each planned servings (one cake will serve 6-8).

2) Gather three to four additional berries per person. Slice and dice the berries, tossing them with 1 Tbsp of granulated sweetener and a splash of lemon juice. Let sit for about ten minutes and the juices will release. Mush them up a bit to add to the sauce.

3) Place one cup heavy whipping cream, 1/2 tsp vanilla extract and 1 tsp granulated sweetener to a bowl. Whisk them together until cream makes stiff peaks. Double quantities for every four servings. This whipped cream does not have any stabilizers and will not keep for more than a day or so.

4) To prepare the dessert it is recommended that steps are completed in a production line, doing every layer for all servings at the same time, evenly distributing chopped berries and whipped cream. Cut the cake into 6 – 8 pieces. For each serving slice a square of cake in half lengthwise. Place the bottom half on a plate. Drop a spoonful of strawberries on the cake slice and spread, pressing it into the cake a bit. Drop a dollop of whipped cream and another spoonful of berries. Place the top half of the cake square on top and lightly press it down. Add more chopped strawberries, top with a final dollop of cream and finish with a pretty, whole berry. Serve immediately.

Almost Easiest Brunch

bruch food

To me the best thing about making brunch these days is a nice meal after sleeping in and the inclusion of sweet plus savory dishes. The sleeping in part was not always true. When I was growing up brunch was often a big buffet at the local club after getting up early for church services. There was always so much to choose from and I could fill my plate with breakfast and lunch. The food was okay, but after sitting above steam baths and being poked and prodded by dozens of other diners before I got to it, not always as tasty as what was made at home. My favorite parts of the buffet was always the omelet station and dessert table. When I make brunch I like including the variety representing lunch and breakfast.

When doing a brunch at home it can be made very simple or very complicated. Dishes like Eggs Benedict or souffles or perfectly poached seafood can be good, but hard to time when people are arriving. In my experience the level of complexity is a choice and I lean towards hosting brunches that don’t take a lot of prep or maintenance. Stick with fresh ingredients and you will be fine. With a little prep the day before (but not absolutely necessary) you can serve your guests a variety of foods and cook them at the pace you prefer. Here is how I did Sunday morning brunch recently at my mom’s house, adding a little bit of complexity, but with a small party it was fun to do so.

brunch omelet station
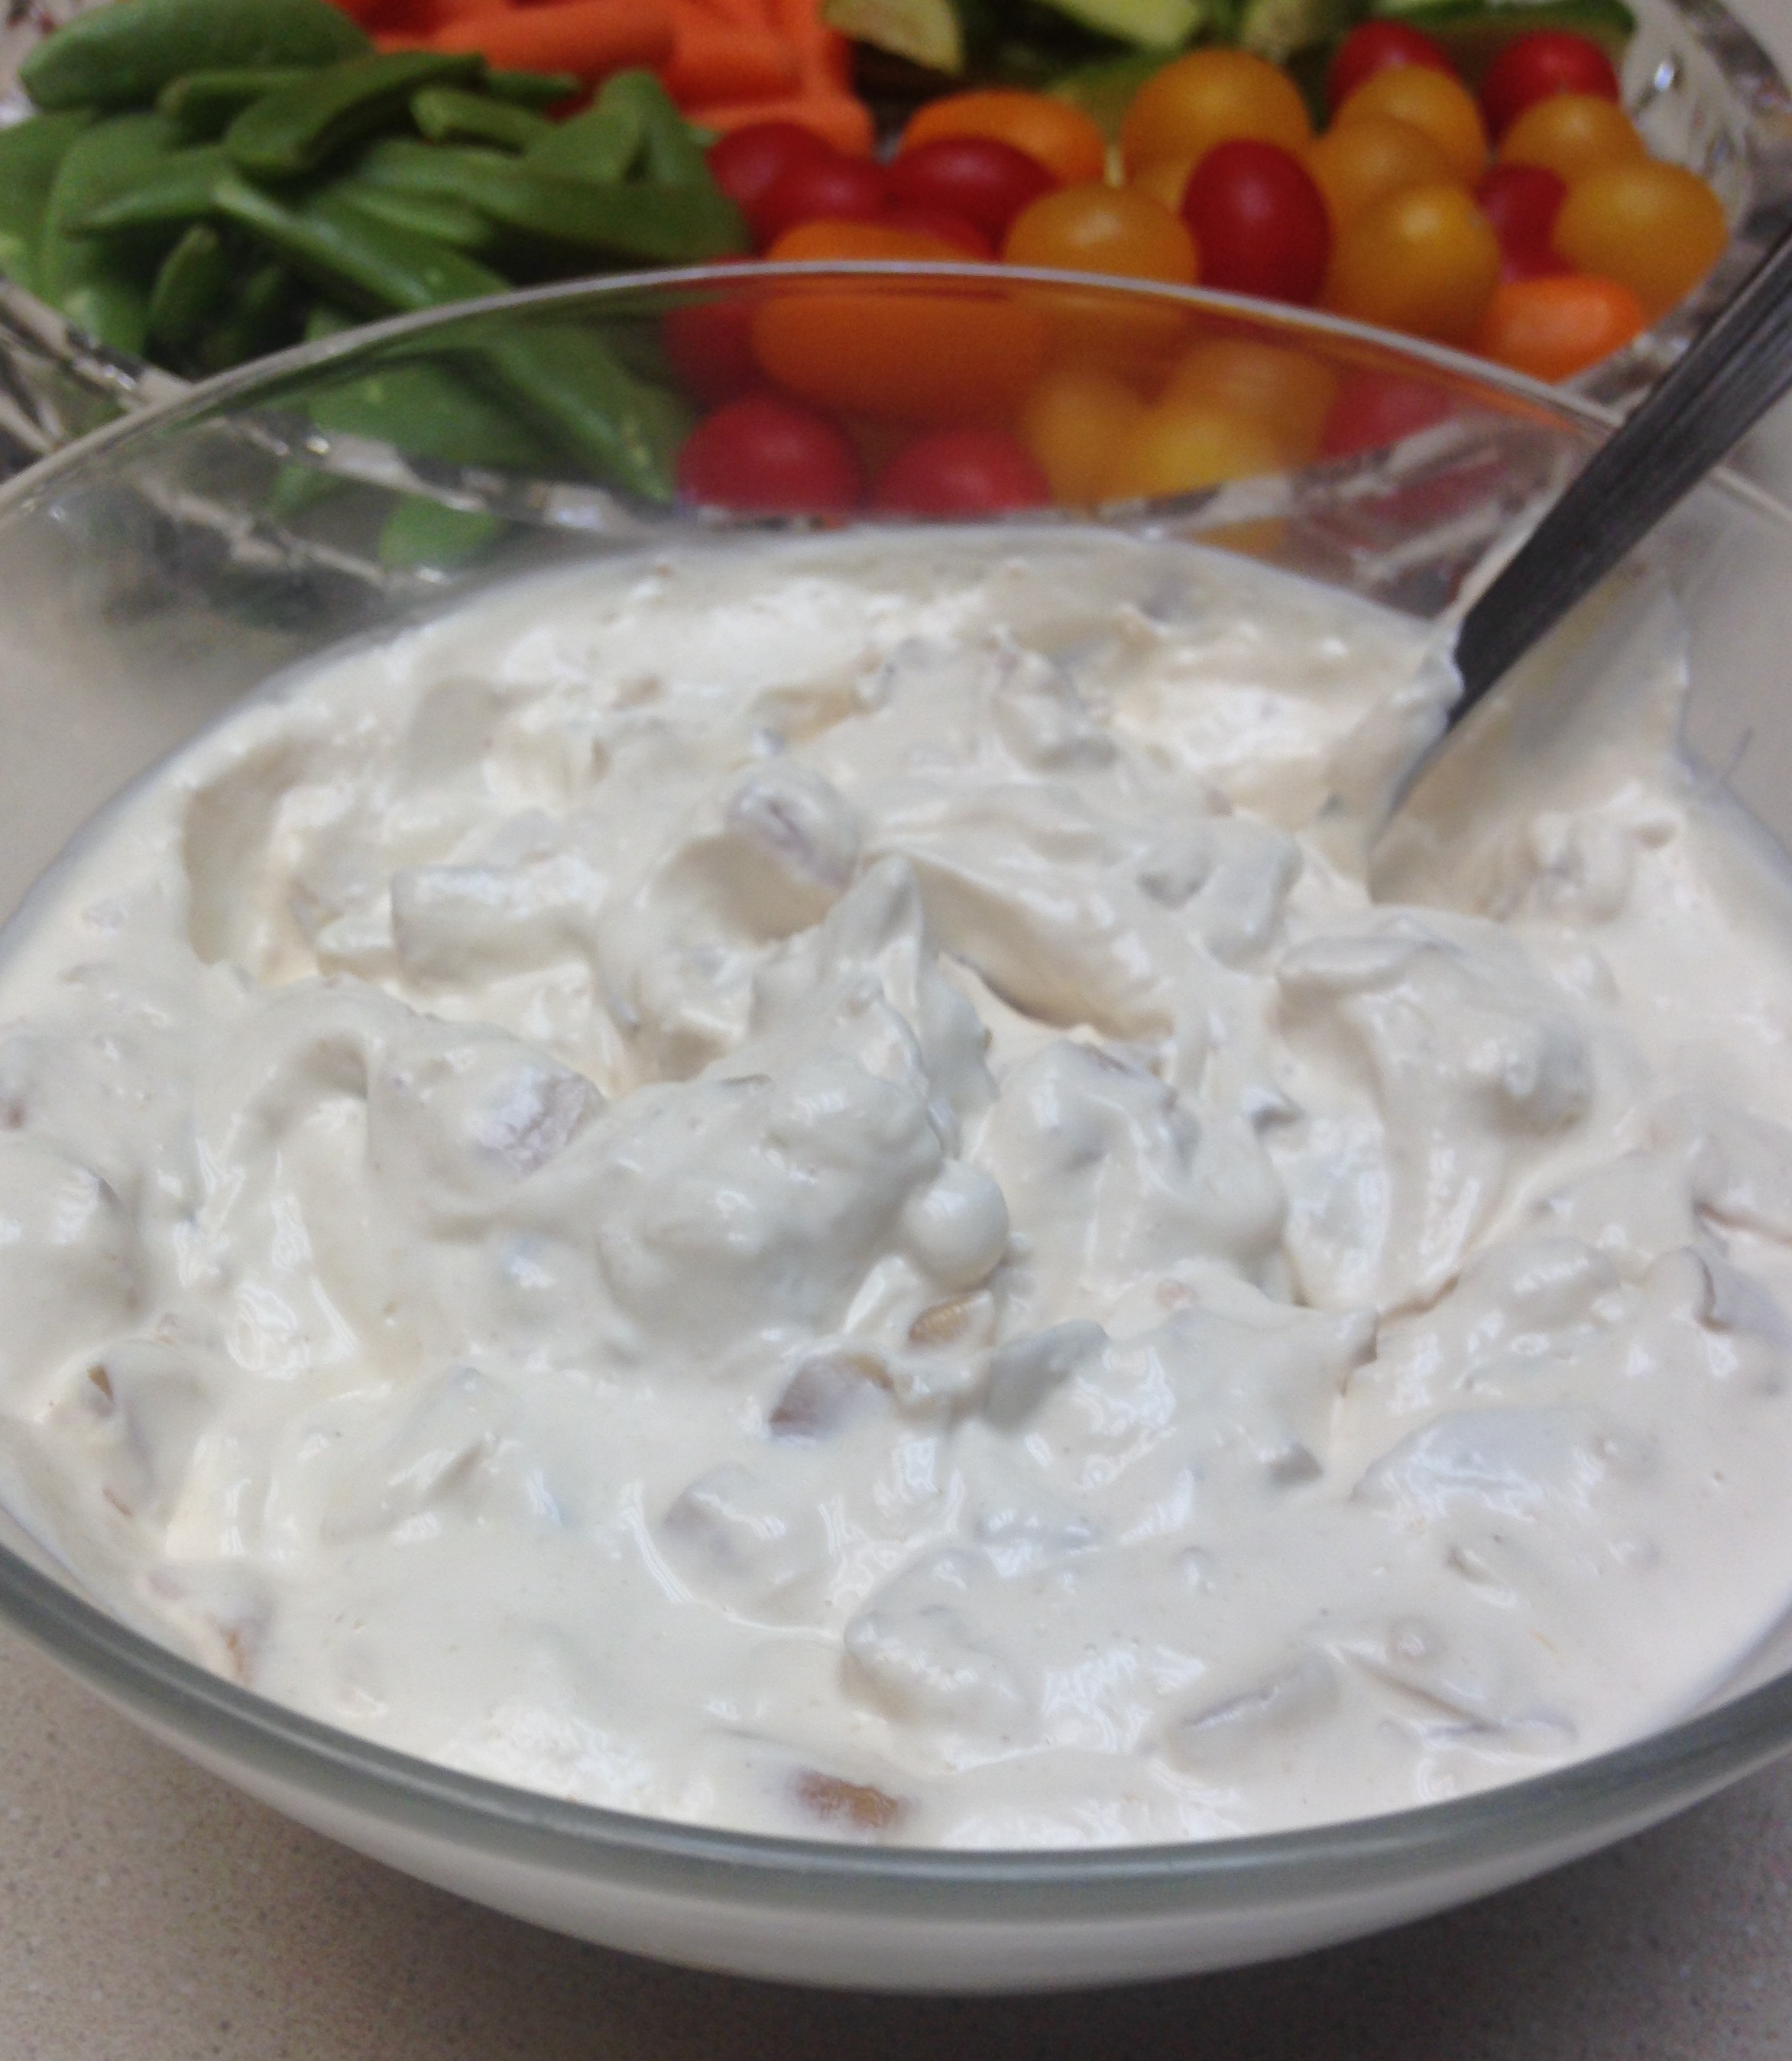
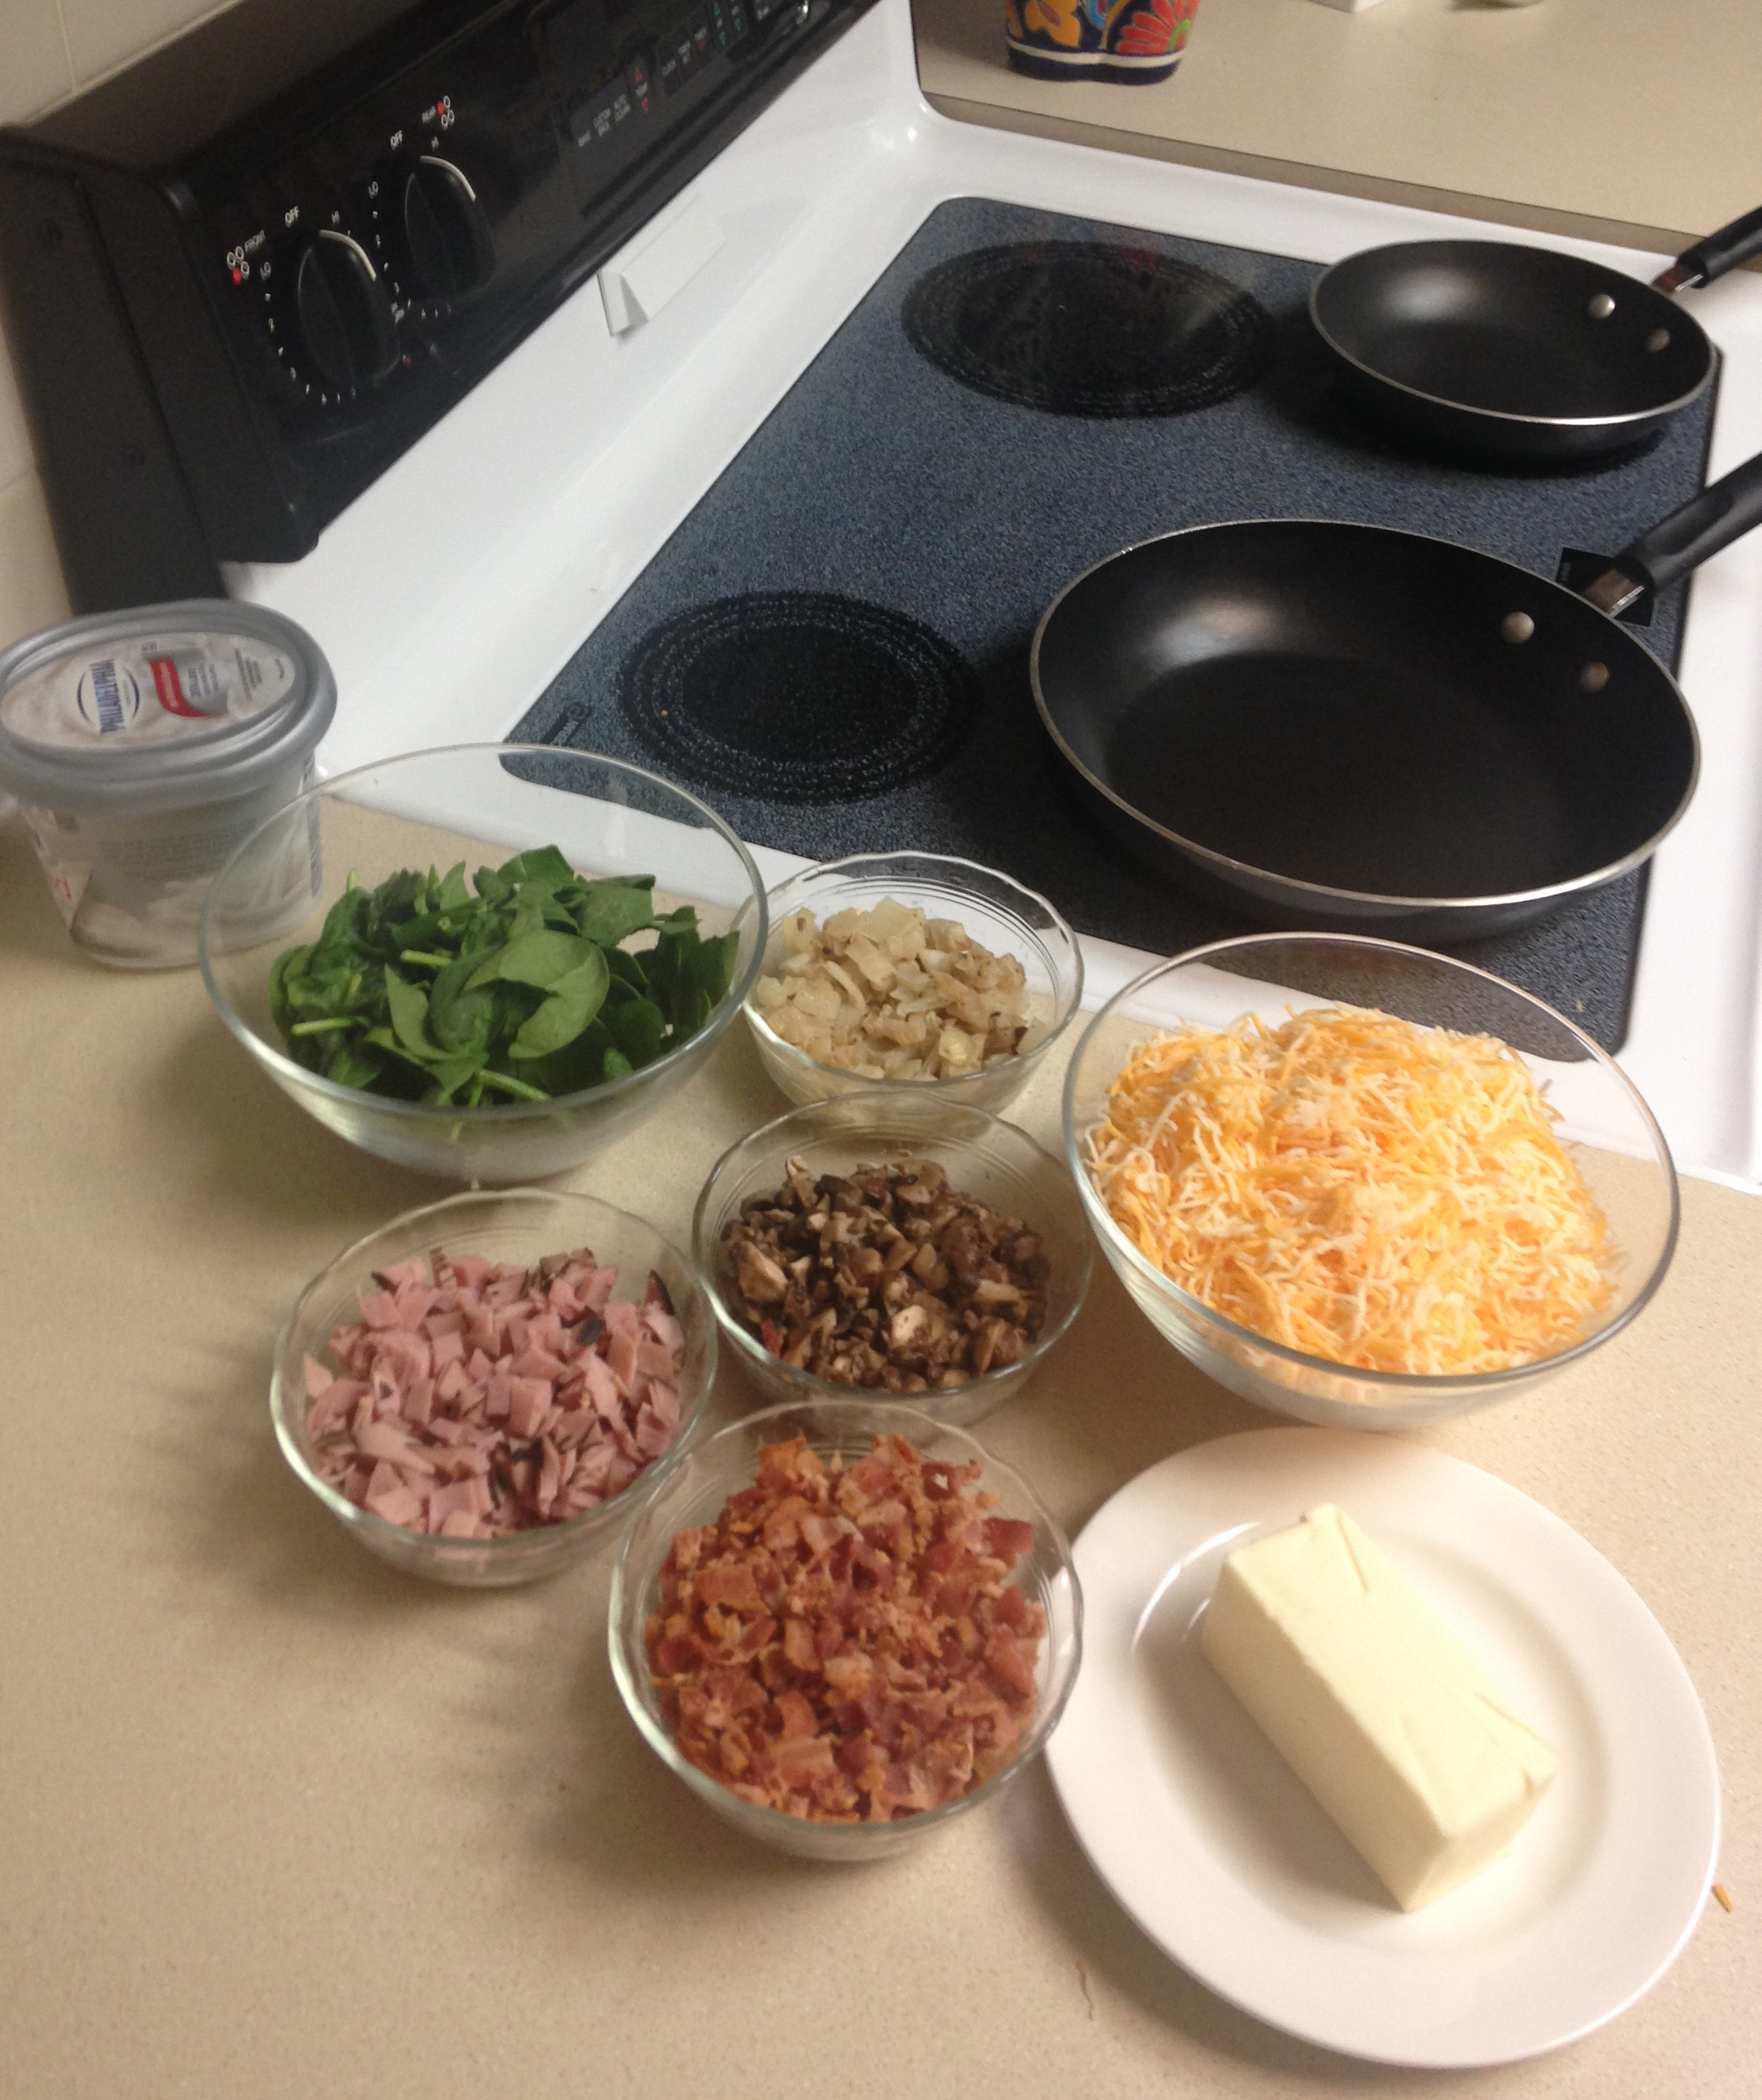
I was a living, breathing omelet station! As you can see from the pictures there was a wealth of fresh, raw fruits and vegetables with dip, some wheat free muffins and little personal menus for people to choose their omelet ingredients. It was a small party, so the kitchen table that seated six was perfect. I could make omelets and still participate in the conversation. I prepared some omelet ingredients and muffins the day before, so I just had to pull them out of the fridge right before people arrived.

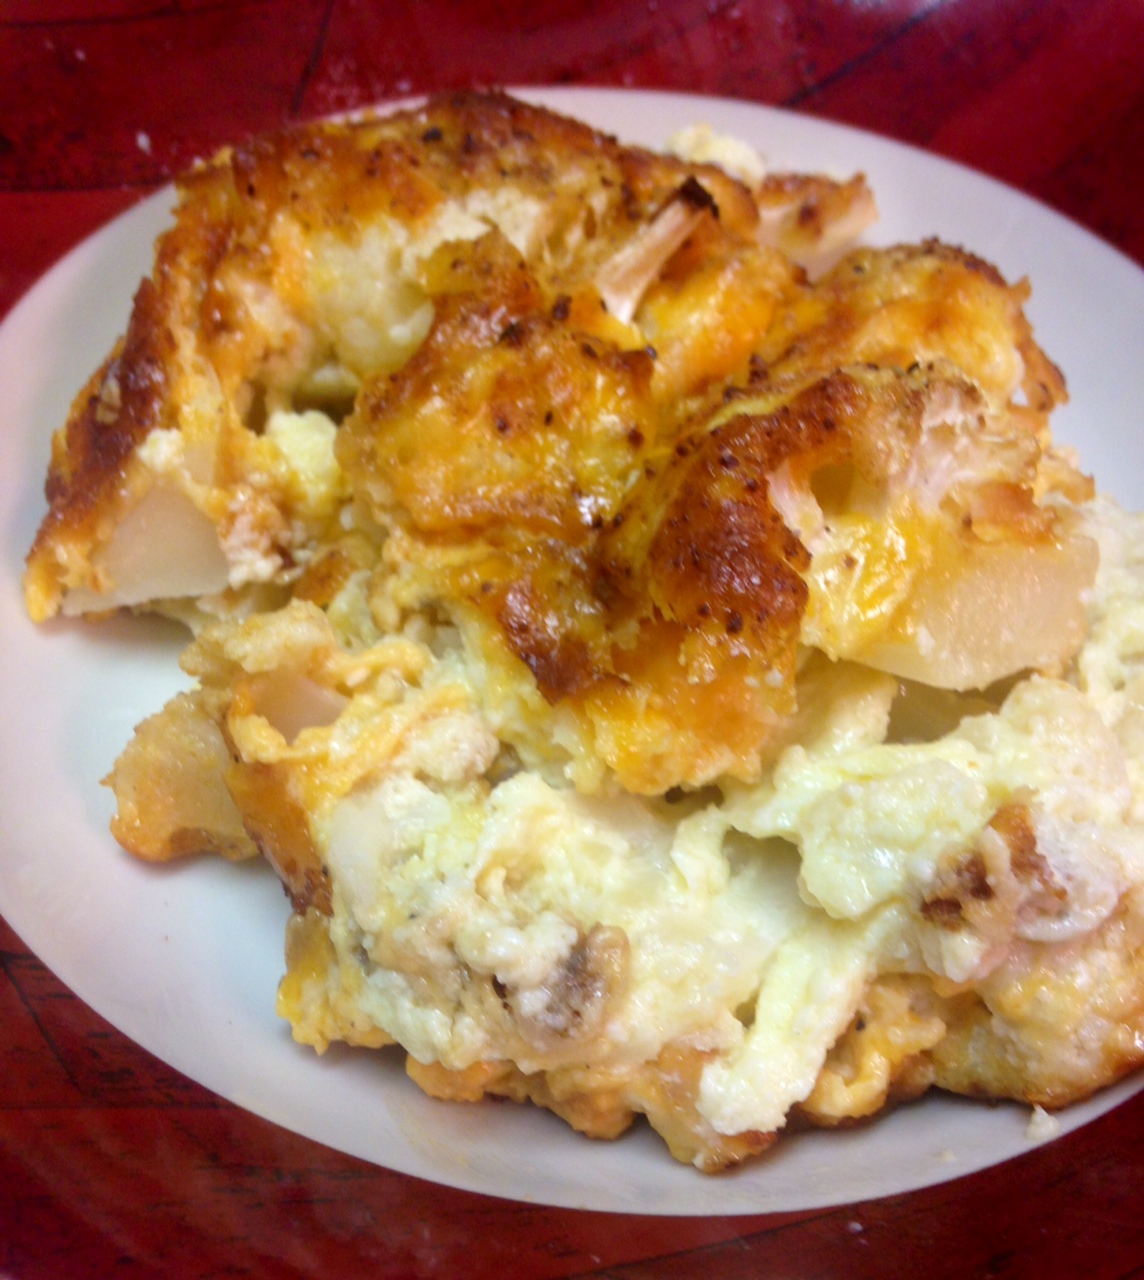
I call it the Almost Easiest Brunch because in my opinion the easiest would not include the omelet station, but something eggy and cooked en masse. Things like meaty or salmon frittatas and egg muffins can be popped in the oven right before people arrive, and be hot and ready by the time the first round of mimosas is sipped away. That is easier when hosting a brunch, but I wanted a little more challenge this time; thus, the omelets! The great part of the omelets is complete absence of guessing about what people want. We had salmon lovers and haters, Little B currently dislikes mushrooms, and a couple of serious vegetable eaters. As long as you do not burn the eggs there is little room for omelet content consternation. Try making a brunch for a bunch this weekend then take a nap, especially after the morning cocktails!

Omelet Station

2 small omelet/saute pans with cover (use foil or large plate if covers unavailable)

1 stiff spatula

1/2 cup butter

Whisked eggs – plan for two eggs and 1 Tbsp milk per person. Add eggs and milk to large measuring cup, whisking them together with a dash of salt and pepper. Note: using a large measuring cup or pitcher with a pouring spout allows for easy pouring into pans when time to make omelets.

At least 3 meat ingredients. Suggest meats pre-cooked and chopped, like bacon, breakfast sausage, poached or smoked salmon, ham. Plan for about 1 tablespoon of meat per person.

At least 3 vegetable ingredients. Suggest blanching or cooking until soft any raw vegetables to speed up omelet preparation, like sauteed mushrooms, peppers or onions, blanched broccoli and raw, chopped spinach. Plan for about 2 tablespoon per person.

At least 2 cheese ingredients. Suggest at least one mild and one sharper flavored cheese, like cheddar, feta and cream cheese. Plan for about 2 tablespoons per person.

brunch omelet order
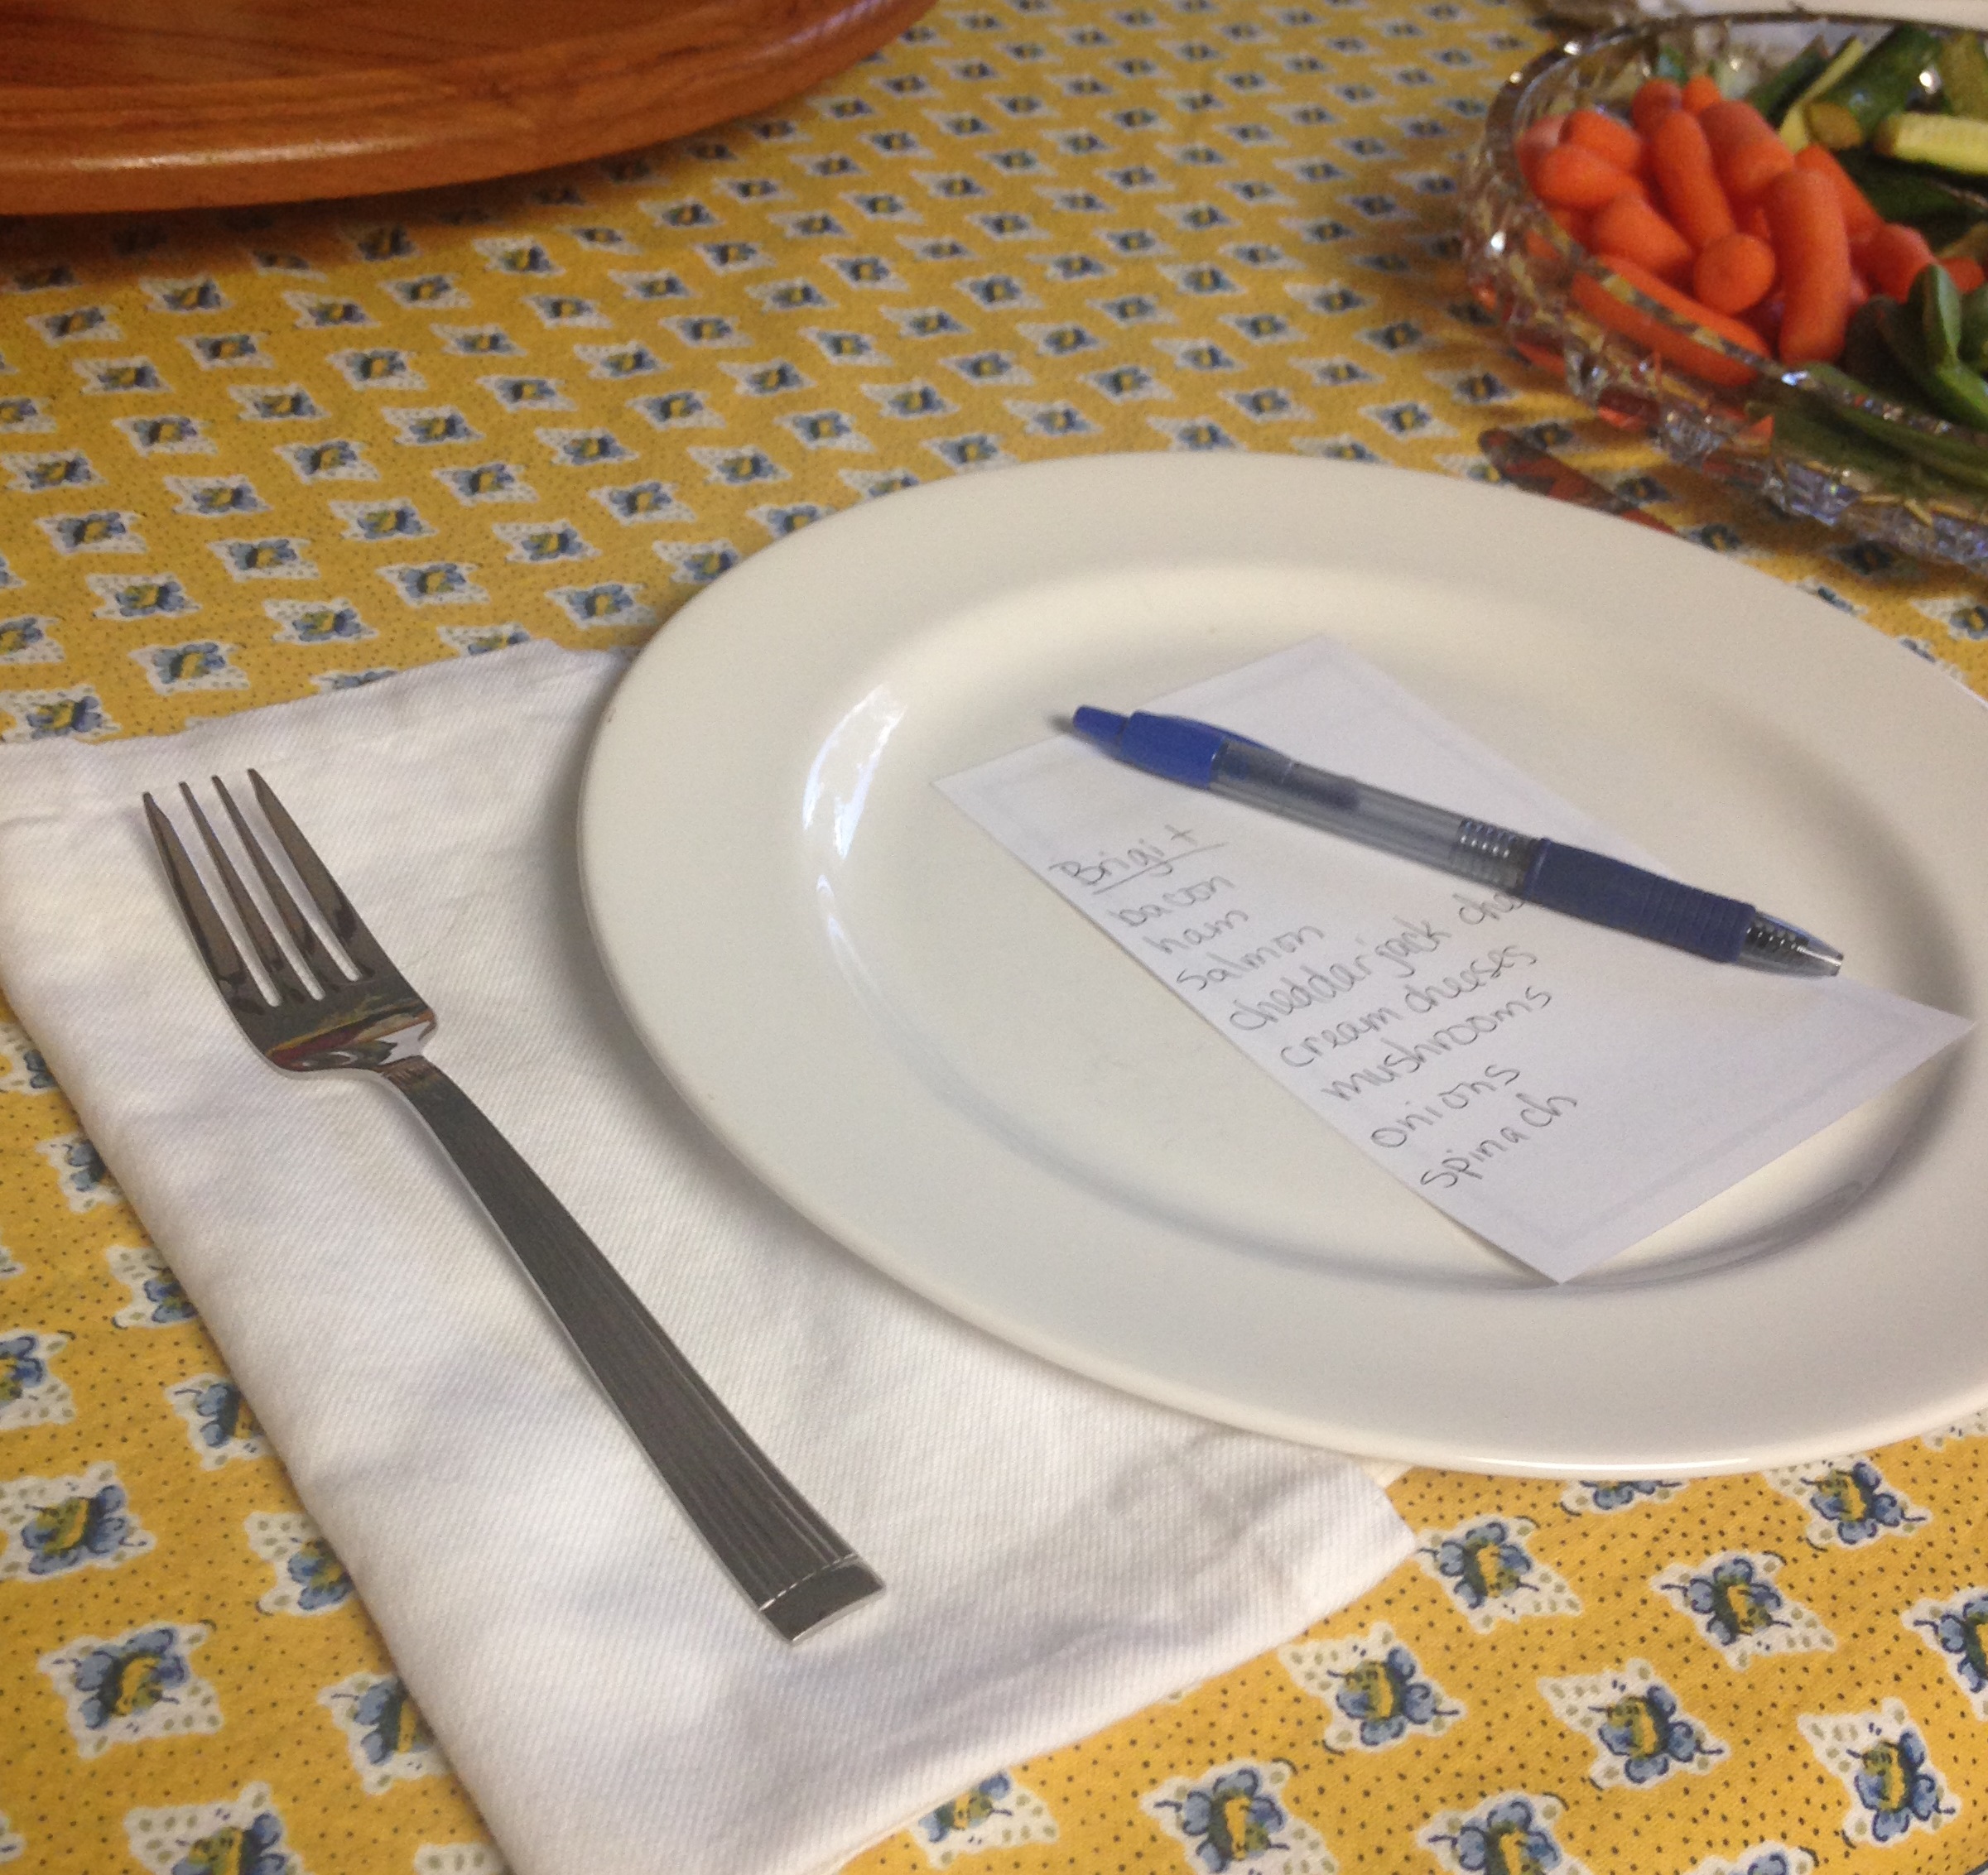
Hand out small pieces of paper with the guest name and available omelet ingredients listed. Have guest mark what they want in their omelet. When ready to make omelets preheat the omelet pans to medium. Melt a pat of butter. When butter begins to bubble pour in thin layer of egg to cover the bottom of the pan, about 1/3 cup. Add cheese to entire surface of egg (cream cheese would be dropped in with other ingredients, unless you want to try to spread it on with uncooked egg surface – good luck!). Add a spoonful of each vegetable/meat ingredient to one half the egg surface. When egg edges and bottom begin to firm up (can’t see the color of the pan bottom through the egg), fold over the cheese only egg layer on top of the vegetables and meat half. Cover pan for one minute to allow cheeses to melt, ingredients to heat and egg to finish cooking. Slide on to serving plate. Repeat until all omelets are made.

Other Dishes

Vegetable Tray. Provide about 1 cup per person of prepared seasonal raw vegetables that dip easily: grape/cherry tomatoes, celery sticks, carrot sticks, red or green bell pepper strips, snap peas, cucumber coins or sticks, radishes, zucchini sticks.

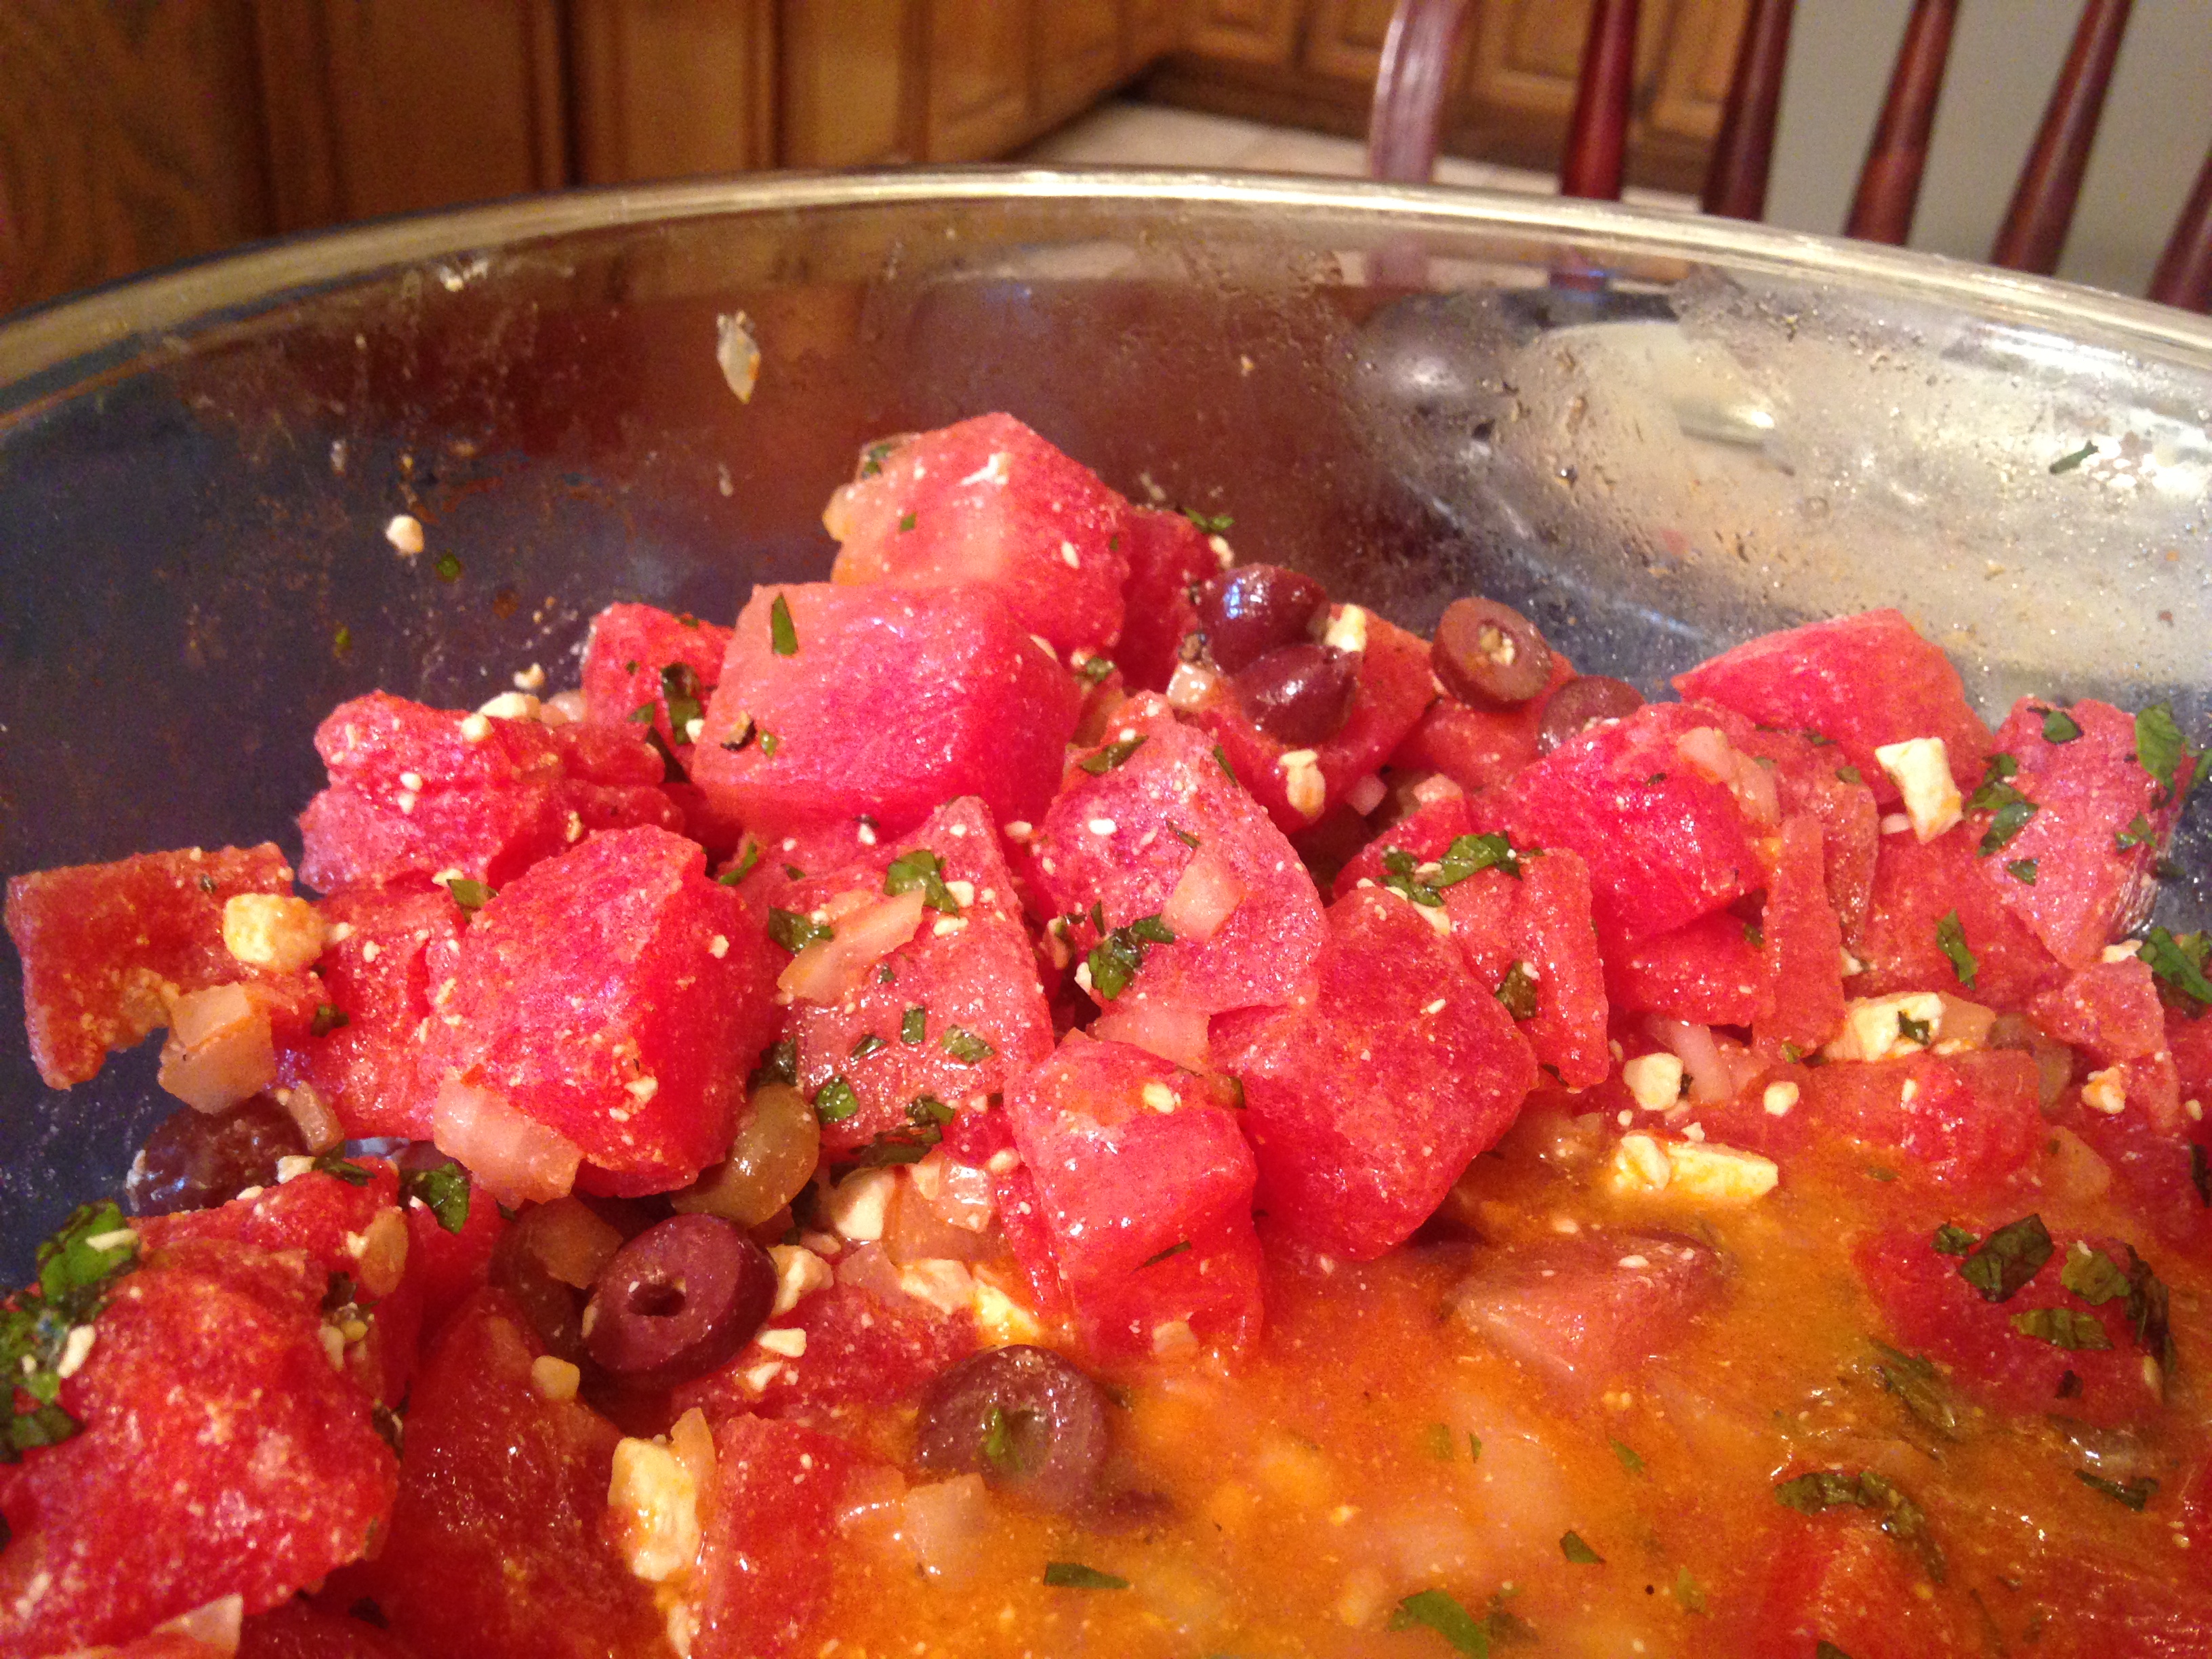
Fruit tray. Provide about 1/2 cup per person of prepared fruit: berries (slice strawberries if they are big!), apples, oranges, grapes and pineapple.

Dips. Provide at least one sweet and one savory dip: with fruit include Peanut Butter Yogurt Dip or whip together some cream cheese and pureed fruit like this frosting, and for the vegetables include French Onion Dip, hummus, or tzatziki.

Sweet Muffins. To balance the savory egg dish include some sweet muffins, like cranberry, blueberry, or oatmeal apple.

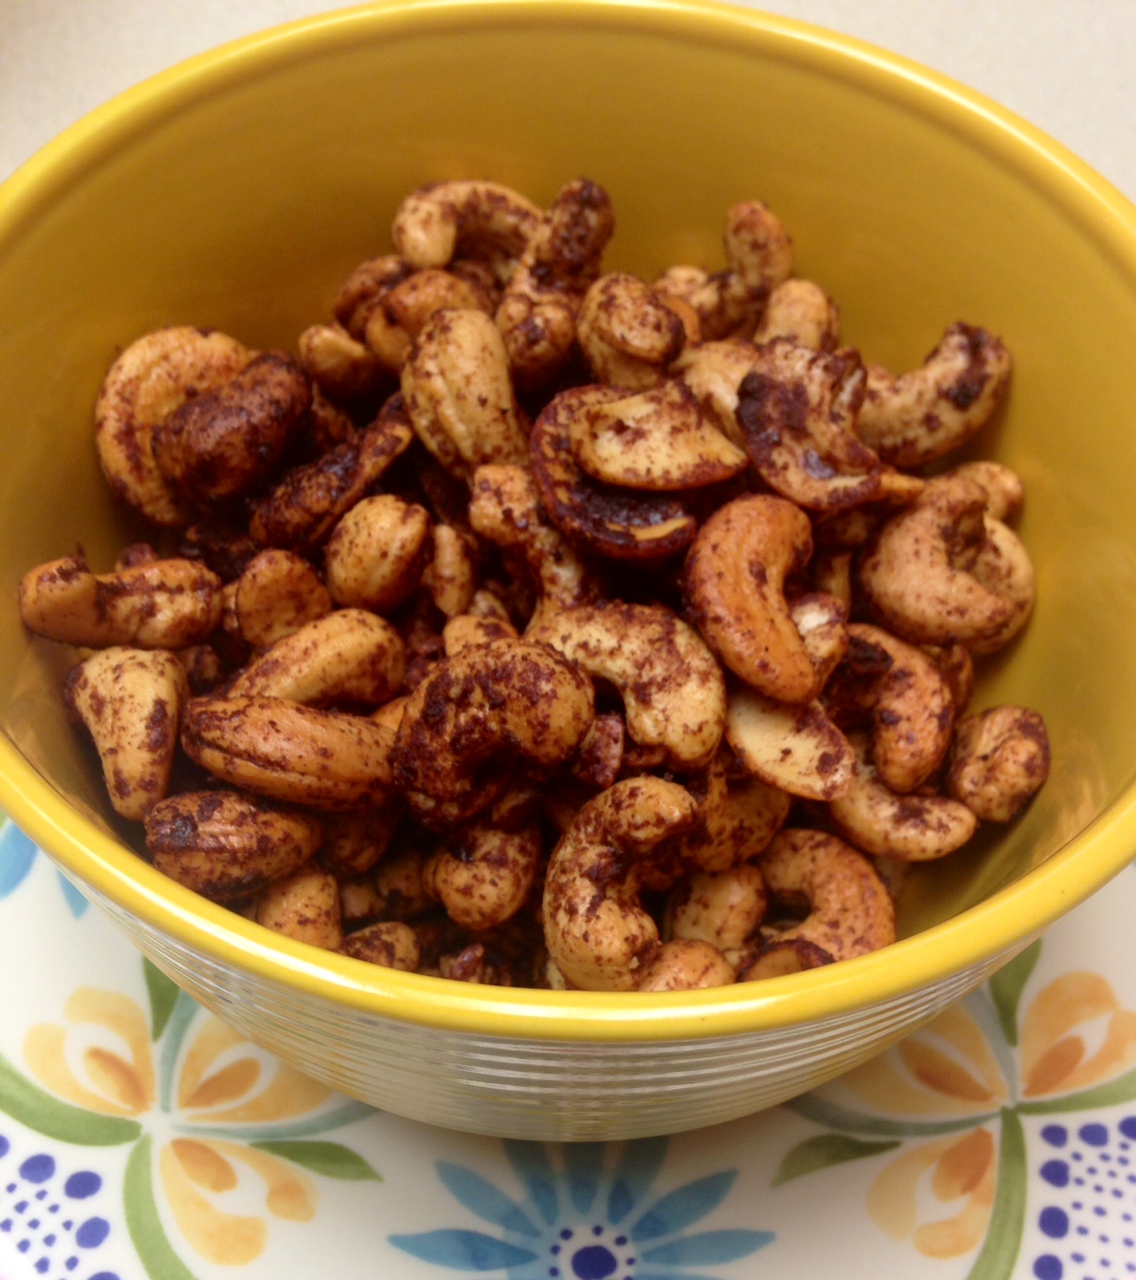
Savory Crisps. To go along with the dips serve some chips or crackers. A great item to serve is crispy veggie chips – beets, sweet potatoes, zucchini, carrots and green beans baked and salted. Very crunch addition to the meal!

Signature Drink. Although drink preferences of guests will vary, suggest having ingredients for a signature cocktail, like Mimosas, Caesars or Bloody Marys. Make available coffee, herbal iced tea and at least one type of juice as well.

French Onion Dip

french onion dip

My favorite dip EVER is French onion dip. Onion soup has been around since recorded ancient times, but French onion soup was the inspiration for the dip which became popular in the United States about 60 years ago. I have not asked any of them lately, but I bet the French would happily disown the dip version of their lovely soup. Growing up we always had packets of French onion soup mix in the pantry. I was in my 30s before I actually used the mix to make soup. Until then I had only used the packets for making dip or seasoning meats. Not bad tasting as a soup, but fresh, from scratch versions tastes better in pretty much every case.

Of late, I have been looking closely at ingredients of everything I buy, especially anything processed or convenient. This led to me being unimpressed with some of the packet ingredients – sugar, corn syrup, monosodium glutamate….I am pretty sure the Romans did not use much of those in their onion soup, and I am not keen on consuming them. It is easy to make packet-free French onion dip, and it is fun too! It takes a bit longer, but if you are in the kitchen doing other things anyway, you probably won’t notice.

Have you ever caramelized onions? It is a kitchen task I always enjoy if I have the time. Onion, water and a little salt makes for an impressive result. The biggest challenge is carefully watching while they cook (but not burn) and avoiding the temptation to stir. A while back I made some onion paste, which can also be used to make French onion dip, but I am going to elaborate a bit here on making chunky, caramelized onions that lead to the dip’s main ingredient.

French Onion Dip

1 large onion (Vidalia works great, but any yellow or white type will do)
2 cups water
1 cup sour cream or plain Greek yogurt
1 cup mayonnaise
2 cloves garlic, minced
2 Tbsp dijon mustard
Salt and pepper to taste

Roughly chop the onion, making sure all the pieces are broken up. Heat a medium saute pan to medium high. When the pan is hot add the onion to the dry pan. Let cook for about five minutes without stirring, allowing the onion to release moisture and begin to brown. Toss onion and let cook undisturbed for another three minutes. Add 1/2 cup water and stir, making sure to scrape the brown bits from the bottom of the pan. Let cook undisturbed for 3 – 5 minutes, allowing the liquid to reduce. When liquid is almost gone and onions begin to brown and caramelize again, stir and add another 1/2 cup of water. Repeat the liquid reduction and stirring two more times, until all the water is incorporated. Sprinkle onions with 1/4 tsp salt. Stir and set aside to cool. In a medium bowl combine the sour cream, mayonnaise, garlic, mustard, pepper and more salt to taste. Add the cooled onions and stir until combined. Refrigerate at least two hours or overnight before serving. Serve with vegetables, chips and crackers.

Dessert Cashews

dessert cashews

In preparation for our recent visit my mom bought some cashews, for Little B loves them. Specifically, she likes roasted, salted cashews. The generous container of purchased cashews was very much not salted. I had to come to the rescue for all our sakes!

The need to ‘fix’ the cashews reminded me of festival nuts. They are often our diet downfall. As we walk through a festival all day it is easy to walk by the funnel cakes, cobbler, ice cream, pastries, battered pig on a stick…you know, sugary and wheaty stuff. There are two or three danger zones, and they are all roasted nut stands. They typically roast the nuts and coat them with cinnamon and sugar. You can smell them about 100 yards away, so when you finally come up to the booth the brain has gone through the battle of yes, no, yes, no, oh well hell why not. We usually rationalize the purchase by assuring ourselves that splitting a bag among six people is not the worst thing in the world, and it is not. What usually happens is everyone has a few, then one or two people absentmindedly nibble on the entire bottom half of the bag and they are suddenly gone. Oops! I blame the ambiance and my nose – if I could not smell I bet I would care less about those darned nuts.

I noticed the festival nut seasoning combination worked well on pecans and almonds, but not so well on the cashews. They seemed to not capture the flavors as well and were just sad. It was not the fault of the nuts – they are more gentle and softer flavor-wise than their almond and pecan kin. The cashews needed something more than cinnamon and sugar. My first inclination was to add some bite, maybe cayenne, but Little B is not a fan. Pondering mom’s pantry and keeping Little B in mind, my eyes fell upon a can of cocoa powder. Of course! I relied on the general process I figured out for savory nuts and came up with these lovely chocolate cashews. They are sweet and rich and satisfying – a handful makes for a great dessert or snack when the chocolate craving bug comes around. I love nipping a few now and then. My mom had some mixed with popcorn for dinner the other day. Oh yeah, Little B liked them too!

Dessert Cashews

1/2 cup butter
2 Tbsp vanilla extract
1 Tbsp ground cinnamon
2 tsp cocoa powder
2 tsp Stevita granular sweetener
1 tsp sea salt (discard if using salted nuts)
8 cups roasted, unsalted cashews

Preheat oven to 350 degrees. Line two medium sized shallow baking sheets with foil. In a large bowl melt the butter in a microwave. Add vanilla extract, cinnamon, cocoa, stevita and salt. Stir until combined. Add the nuts and toss until well coated. With a large slotted spoon drop nuts onto baking sheets and spread evenly into a single layer – additional liquid on the pan may result in a burning smell before the nuts are done baking, so reduce the ‘drizzle’ as much as possible. Place sheets into oven on different shelves. Bake for 5 minutes. Remove nuts from oven. Toss nuts and again spread evenly into single layer. Return to oven, making sure the sheets are switched from the first baking period. Bake for 5 – 8 more minutes, until nuts are sizzling a bit and barely beginning to brown. Note that the point of being brown and being burned are very close together, so stay nearby during the second baking period. Remove from oven and let cool completely. Store at room temperature in air tight container.


Cauli n Cheese

cauli n chz

I have made this before but did not have the just right combination for creamy and cheesy, so did not share it. Other cheesy things with cauliflower, like the Cauliflower Mac Bake is cheesy but not so creamy, and the Cheesy White and Green Bake is good, but the fibrous broccoli does not quite bring to mind a replacement for mac n cheese. I think the combination of cheeses and cream really worked this time. The cheese merged with the cauliflower and cream instead of becoming stretchy. This time was different. This time it worked just right. There was a chewiness, cheesiness and creaminess that worked like a comfort food for me. THIS time I was reminded of the nights as a child when mom and dad did not have time to make dinner and grabbed a box of pasta and cheese pouch, threw it in a pot and cooked it up. Sometimes ham or hot dogs were chopped up with it and made it even more salty. The taste of this meal also reminded me of meatless Fridays that were part of the religious aspects of my upbringing. I never actually missed the meat as I dug into the creamy cheesiness. After a few mouthfuls Little B asked if I would make this every night because it was ‘soooooo good!’. I don’t know if I can accomplish that, but it certainly is not hard to do if there is a kitchen nearby and barely took more time than fixing mac n cheese from a box! It would be so cool if she craved cauliflower instead of pasta in 20 years…

Cauli n Cheese

1 head cauliflower
2 eggs
1 cup heavy whipping cream
1 Tbsp sea salt, plus more for top
1 tsp ground black pepper, plus more for top
1 tsp onion powder, plus more for top
1 tsp garlic powder, plus more for top
2 cups grated sharp cheddar cheese
1 1/2 cups grated parmigiano reggiano cheese

Preheat oven to 350 degrees. Remove leaves and stem from cauliflower. Cut cauliflower head into bite-sized pieces, keeping as much of the florets attached to the base as possible – avoid the crumbling of the florets. In a medium bowl whisk the eggs and cream, then add the salt, pepper, onion powder and garlic powder. Whisk in the seasoning. Add the cheese and stir in with the cream mixture. Arrange the cauliflower evenly in a 9″x13″ baking dish. Sprinkle some salt on cauliflower. Pour creamy cheese mixture over cauliflower, spreading cheese to cover the top entirely. Sprinkle a bit more salt, pepper, onion powder and garlic powder on top. Place uncovered in preheated oven for 40-45 minutes, until top is browned and bubbly. Remove from oven and let sit for ten minutes before serving.

Pecan Crusted Chicken

pecan crusted tenders

A few years ago we stopped eating wheat for a number of reasons. We have not been perfect about it, but try really hard. It is amazingly difficult to avoid wheat in convenience foods at stores and restaurants in America. Take a quick look at kid menus in quick serve and sit-down service restaurants – you are most likely to see choices like burgers,  grilled cheese sandwiches, corn dogs, macaroni and cheese, and some sort of breaded chicken. Most often included are the lovely and mysterious chicken nuggets and tenders – lovely because they are often crispy and mysterious because it not always clear what parts of the chicken are tendered or nuggetted. Little B and I like having such things on occasion, and am glad I have found a few versions that are not only wheat free but completely grain free. I like using the baked crispy chicken recipe for tenders and nuggets too, but wanted something with a little more crunch and bulk. The pecans sure fit the bill in this new recipe! The nuts chop up into various sizes, adding a nice texture which mixes well with the chicken. Little B eats them plain, but I like dipping in spicy dressing or mustard. They are filling too – instead of feeling hungry soon after eating like with wheat, the nut coating fills me up fast and keeps me full for a while. My in laws generously let me take over their kitchen during a recent visit and really liked them. Little B inhaled this stuff too – another score!

Pecan Crusted Chicken

3 pounds boneless skinless chicken pieces (tenders and thighs recommended)
2 pounds raw pecans
1 tsp sea salt
1 tsp garlic powder
3 egg whites
2 Tbsp dijon mustard
Sea salt and ground black pepper to taste

Preheat oven to 400 degrees. In a food processor pulse pecans, salt and garlic powder until nuts are finely chopped. In a medium bowl whisk together egg whites and mustard until well combined, but stop short of the whites becoming stiff. Line one to two shallow baking sheets with aluminum foil. Spread the nuts on a third sheet or large plate. Generously season chicken with salt and pepper. Dip the chicken in the egg wash, letting the excess run off. Roll chicken in the nuts, gently pressing them into the meat. Place chicken on the foil lined baking sheets with about an inch between pieces. Bake for 35-45 minutes, until juices run clear (whole chicken breasts or bone-in chicken may take longer). Serve immediately, plain or with desired dipping sauces.

Savory Watermelon Salad

IMG_9048As kids my brother and I spent summer afternoons outside a lot. We were able to cavort around our neighborhood bicycling, rollerskating, swimming, playing soccer and other things kids did in the 80’s ‘on the streets’. One of the snacks we ate was messy, juicy, sweet watermelon. Mom would cut it up and bring a bowl out to the back yard. We would take a break from gardening or playing in the sprinkler to feast on it, sprinkling each wedge with a bit of salt and letting the juices run down our chins. After we were done we often had seed spitting contents. The watermelons we  had were always riddled with slippery black seeds. We would save them up as we ate, then would have the contest. There were occasional arguments about whether seed bounces counted in spitting distance, or whether one of us stepped over the spitting line when getting a running start on a spit. To this day I am surprised there weren’t more watermelon plants growing rogue in the yard. This may be the oddest sounding salad I have ever made, but it was curiously satisfying. On a warm summer day in Texas I was looking for something other than a green side salad at dinner. We don’t eat much watermelon, considering the higher carbohydrate count for the fruit, but I am glad I plunged in with this salad. Very refreshing, and quite a different slant compared to the spiked Whiskey Watermelon I made a few years ago…different type of satisfying…

Savory Watermelon Salad

1 small seedless watermelon
1 cup crumbled feta
1 cup kalamata olives, pitted and sliced
1/2 cup finely diced sweet yellow onion
1/3 cup extra virgin olive oil
1 lemon, juiced with meat retained
1 tsp sea salt (plus more to taste)
1 tsp ground black pepper
1/4 tsp red chili flakes
1/2 cup chopped fresh mint leaves

Prepare about 8 cups of watermelon in bite-sized pieces by cutting it into 1-inch cubes or using a melon baller. In a medium bowl combine the olive oil, lemon juice, salt, pepper and chili flakes. Whisk until combined. Add the feta, olives and onion. Stir to coat with the dressing. Add mixture to watermelon and gently toss, trying not to crush the watermelon pieces.  Sprinkle mint and more salt to taste on top. Serve immediately or chill until served.

Note: as you can see from the picture the watermelon juices will mix with the dressing build up as the salad sits. It is recommended that a slotted spoon is used to serve, to reduce the soupiness of the salad when plated.

Post Navigation